
Insulated Lunch Bag


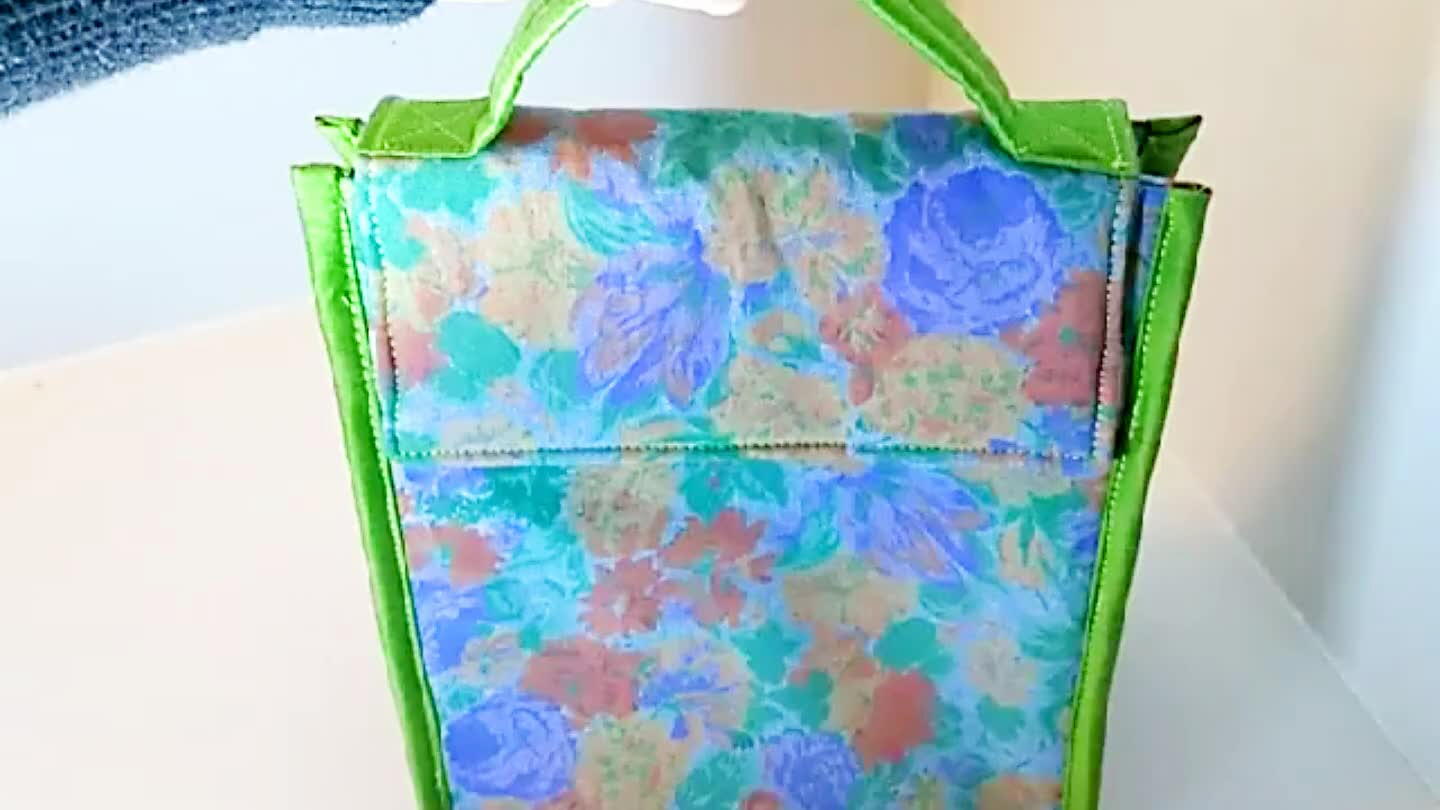
I wanted to make a lunch bag with a cute fabric and this is the best pattern that I could find. Easy to make and closes perfectly with velcro
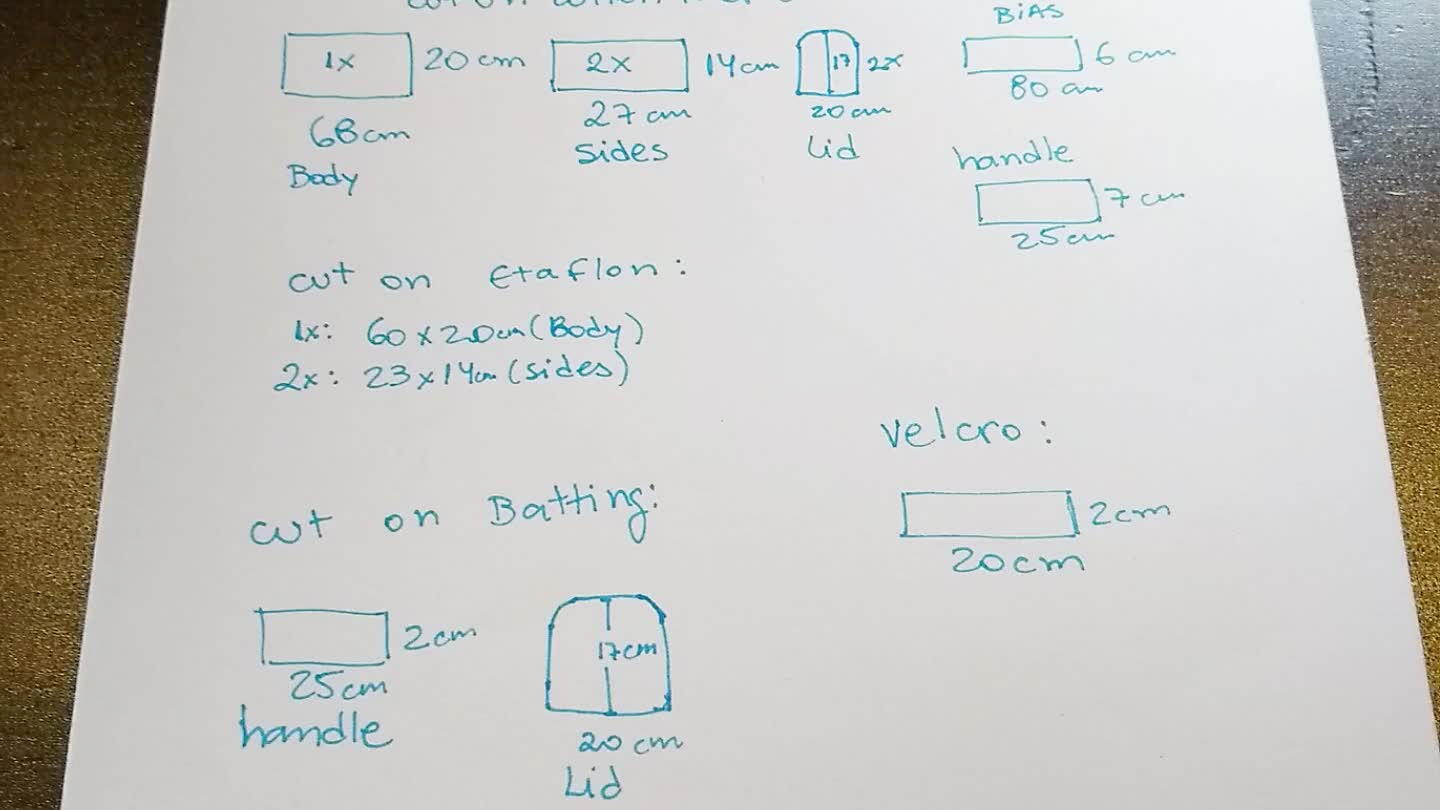
What you will need
cotton fabric
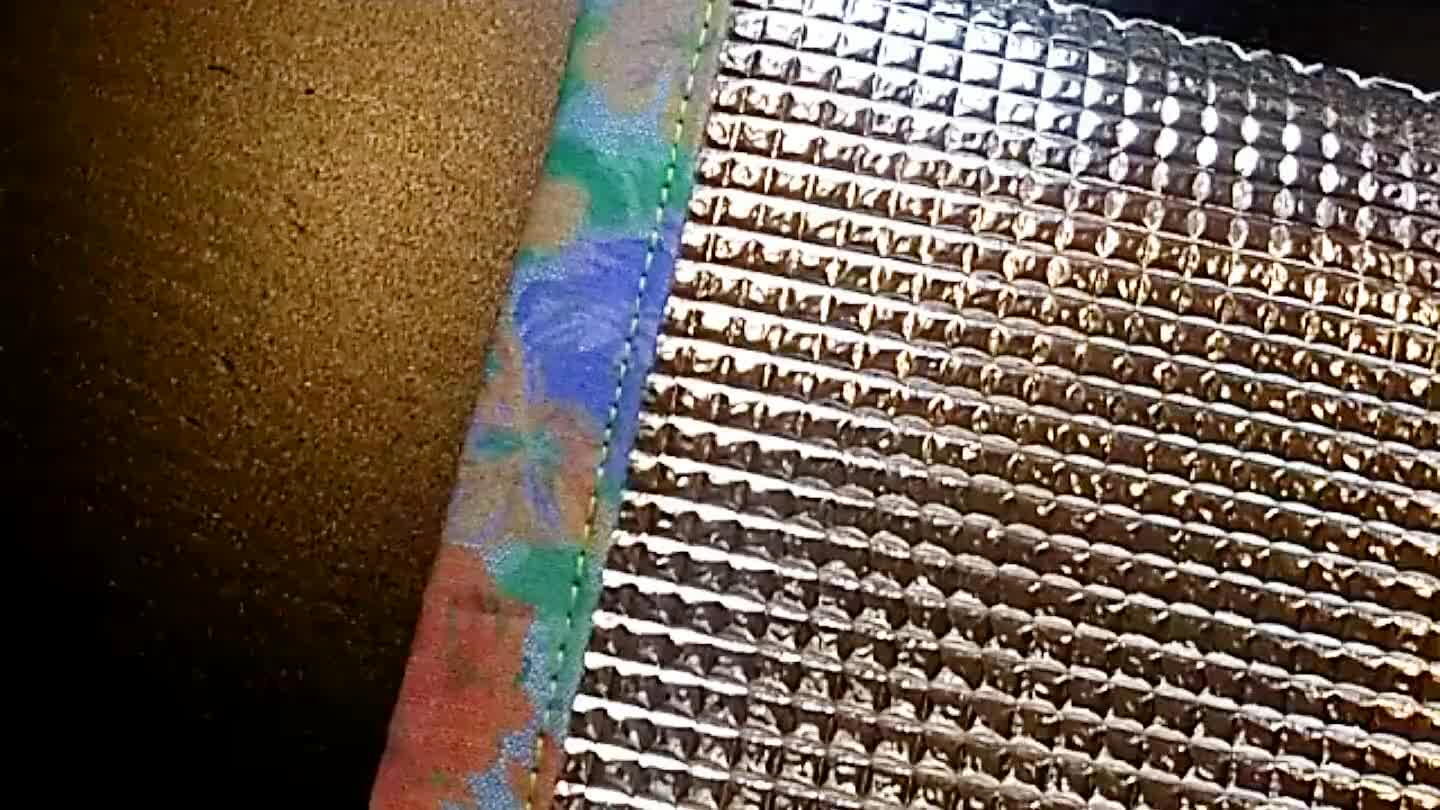
etaflon or insulshine
batting
velcro
thread, pint, scissors
How to do this project
1
*maybe the next time I would to the lid a bit bigger, maybe with 19cmx 21cm
2

Mark 2,5cm and place the Velcro (the fluffy part)
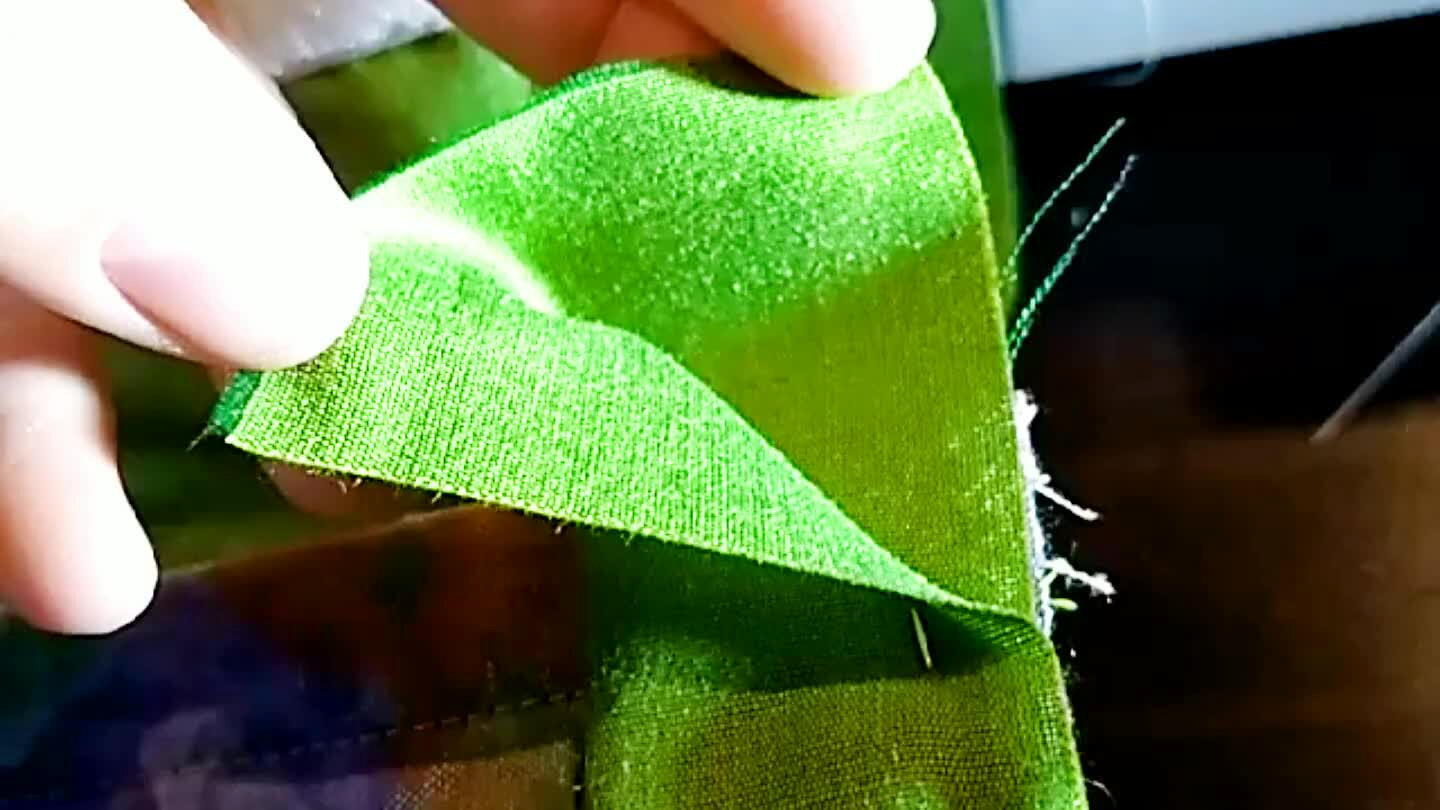
3
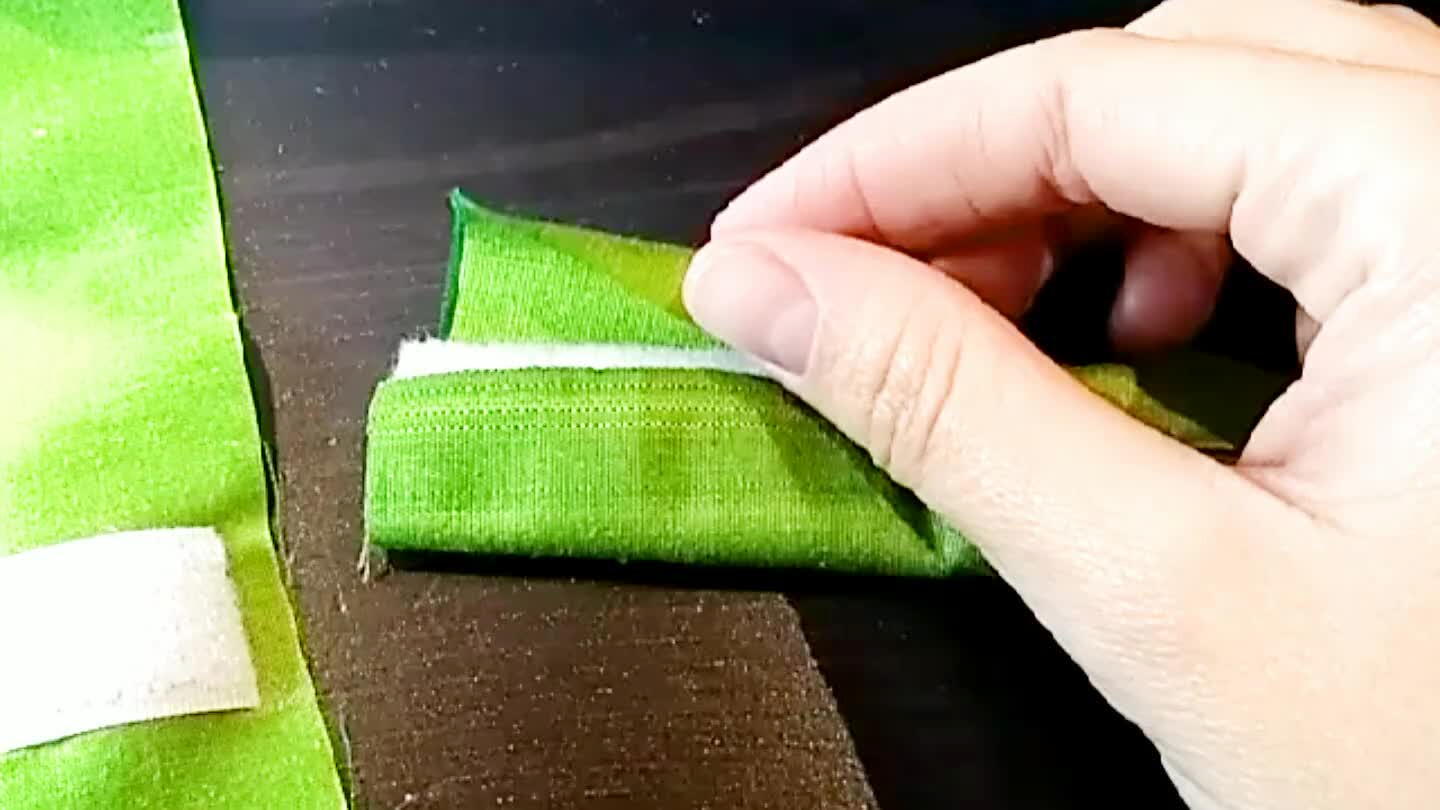
Fold the handle with the the batting inside and make a straight stitch. Mark 6cm down and place the handle on the outside of the fabric (already with the batting). Sew a cross inside a rectangle on the sides of the handle.
4
Place the outside fabric with the inside fabric, the right side facing each other and sew around, remember to leave 5cm open to turn to the other side. Make a straight stich all around to hold everything in place.
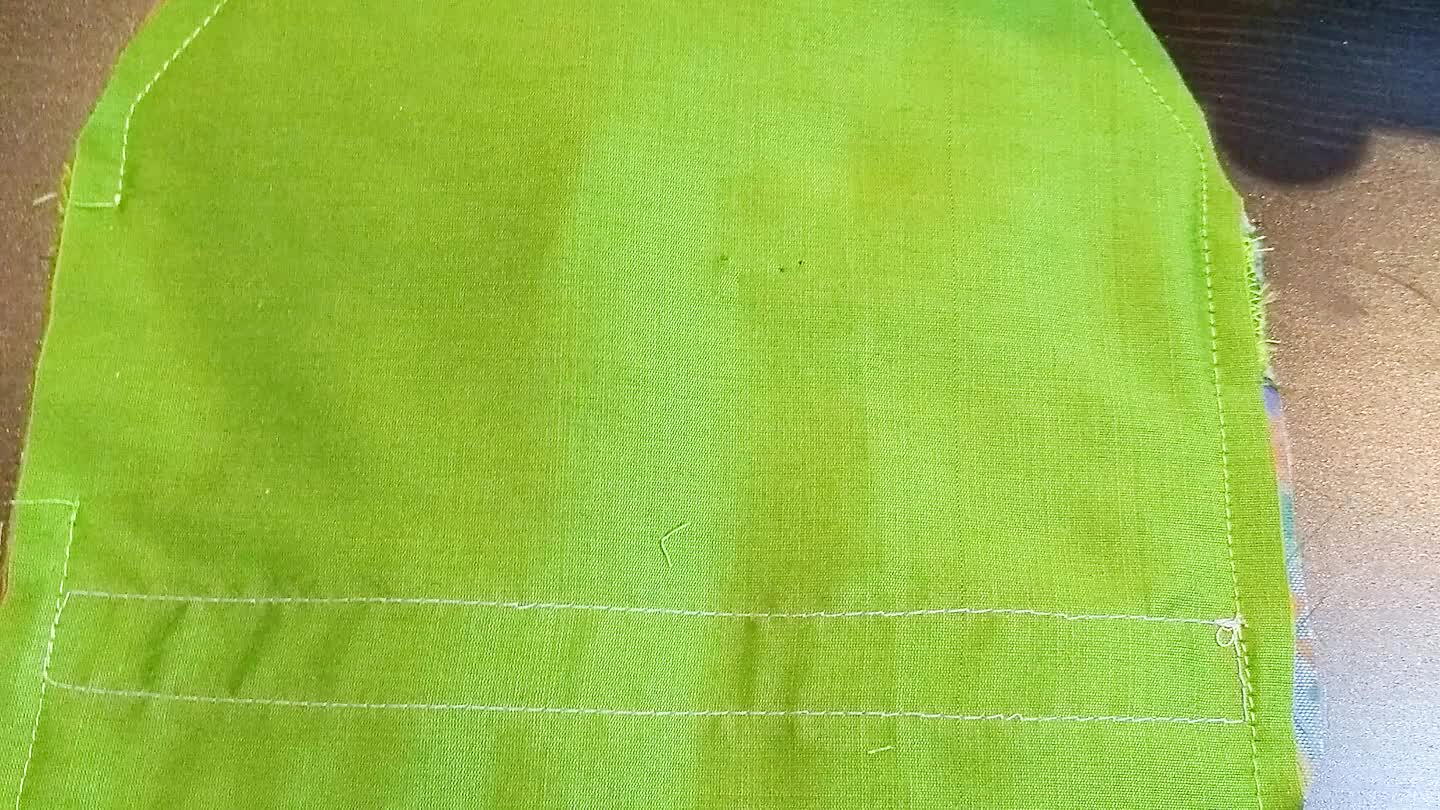
5
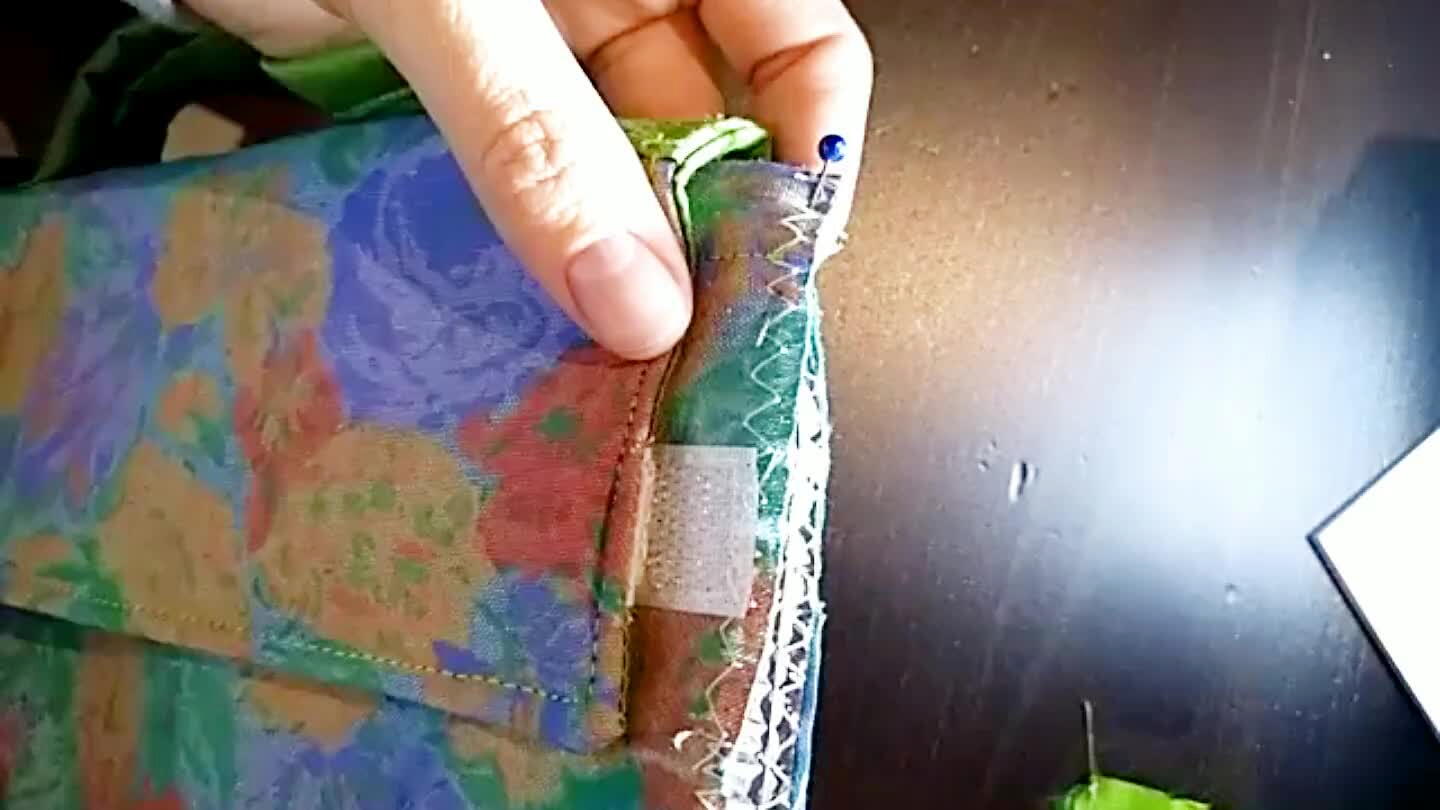
Mark 8cm from the edge and sew the other part of the Velcro. Mark 4cm down on the back of the outside fabric and place the etaflon. Make a hem folding the fabric twice.
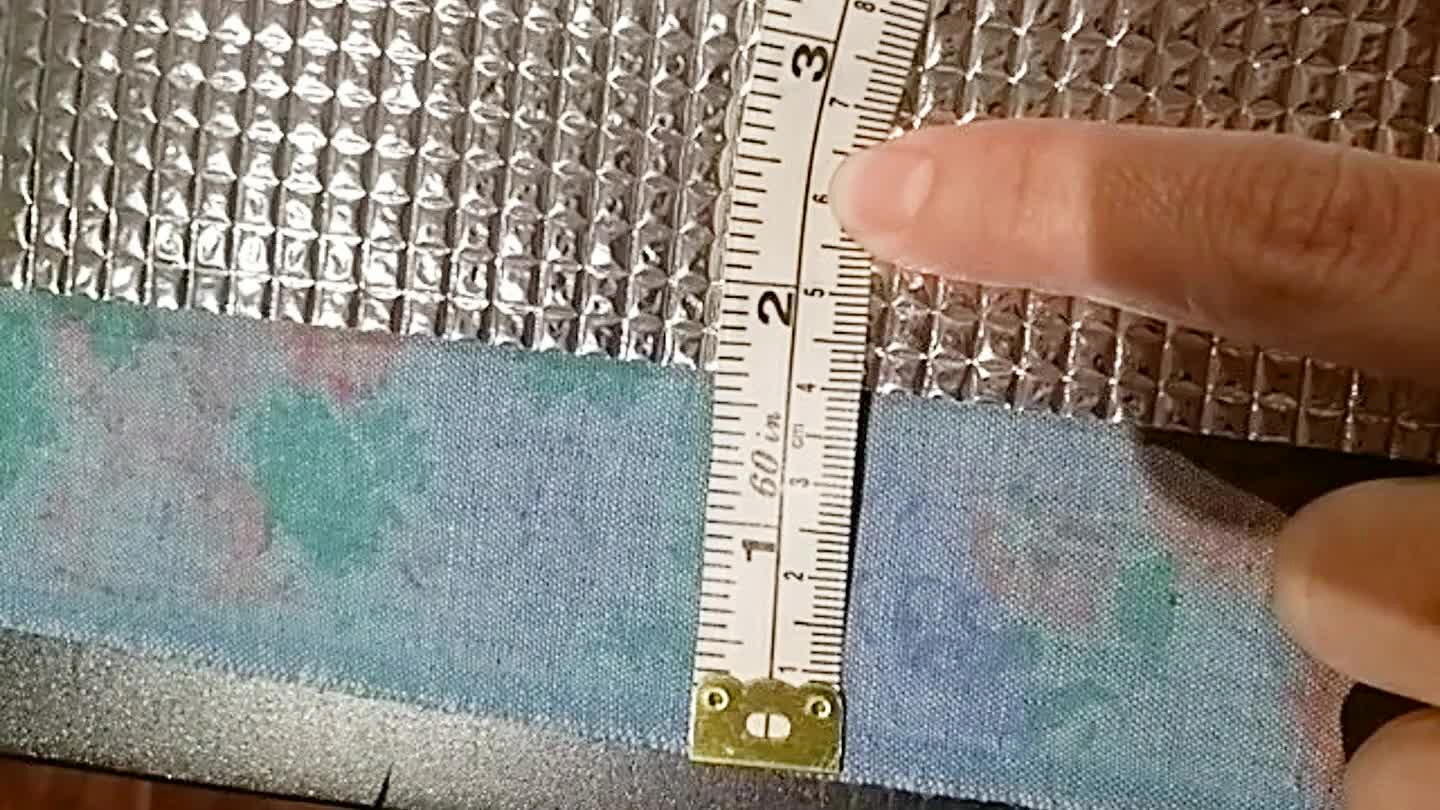
6

Sew the Hem on the both sides. Use zigzag stitch on the sides to stabilize the etaflon with the fabric. Mark the middle of the lid and the middle of the body to place them together. 3.5cm down (of the part that don't have the Velcro). You place the the outside facrics together (the smaller part of the lid closer to the end of the body)
7
Repeat the process that you have done with the body (Do the Hem on the sides and stabilize with zigzag). Before sewing the edges to the body, check if the Velcro is in the right position (at this moment it should be 6cm from the top, mine wasn't 😭, so I did it again)
8
Mark the middle of the body and the middle of the sides to place them together. Remember to sew the bottom first, leave half centimeter on each side.
9
Fold the bias, the folded side facing the body and the open part facing the side of the lunch bag) pin all around from the out side (leave 3cm on the top). Use straight stich all over ( it may be easier to sew the sides and the bottom, leaving the corner to do handstitch). Turn the 3cm, that you have left, down and pin all around. Now you can make blind stitch or use the sewing machine. Again, it may be easier to handstitch the corners.
10
Comments