
Raised "bed" and Bench


A raised sleeper bench
What you will need
Railway Sleepers
Galvanised Heavy Duty Brackets
Screws
How to do this project
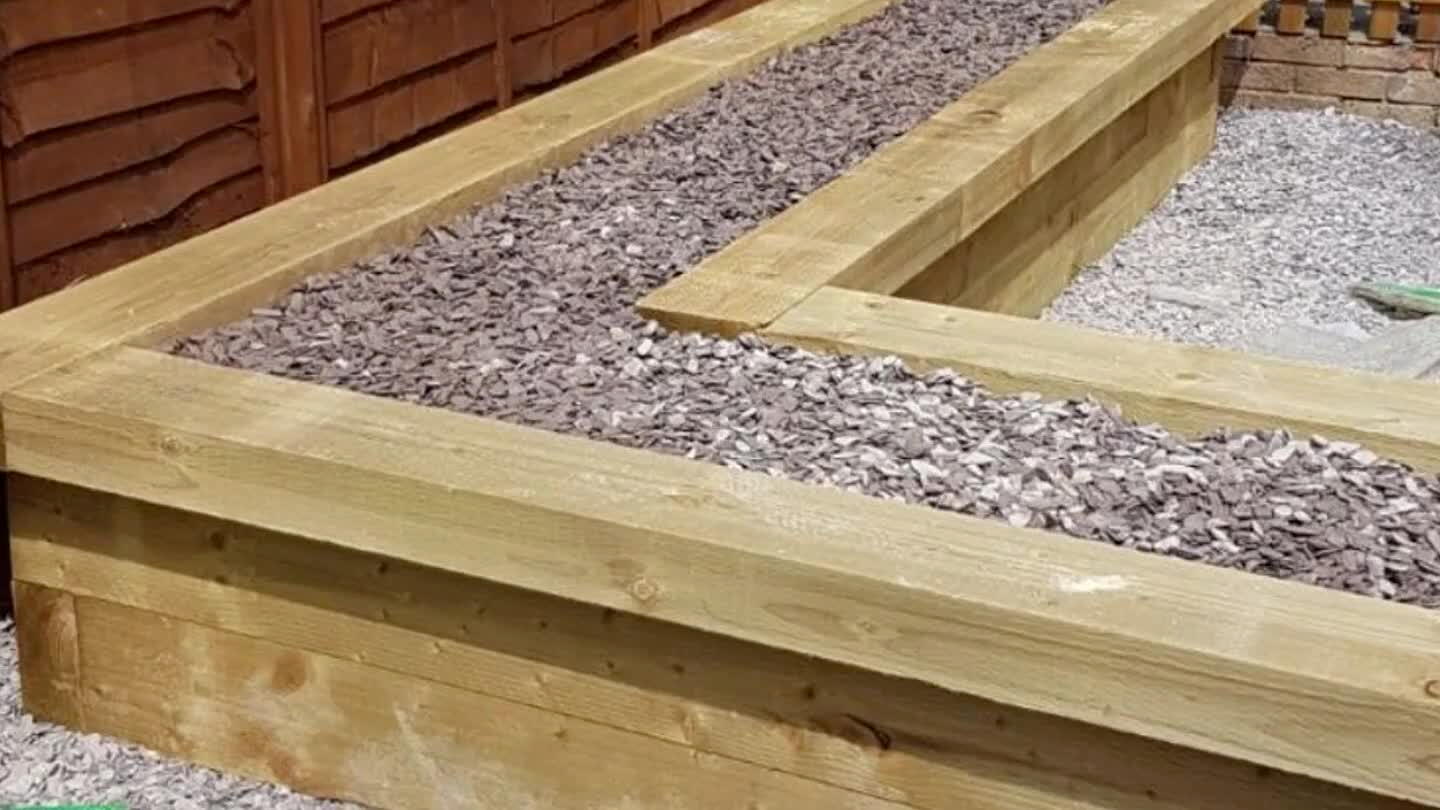
1
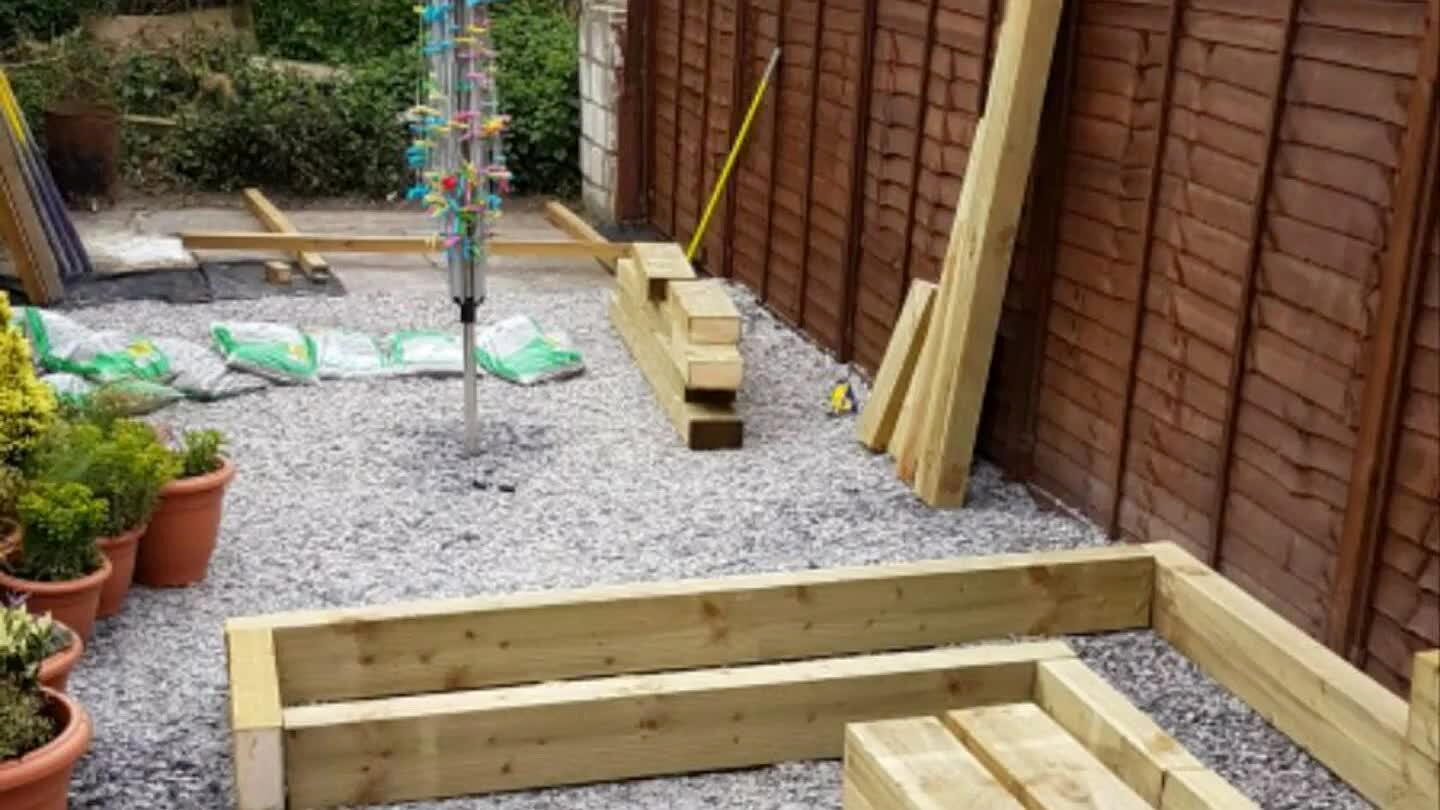
Cut sleepers to length
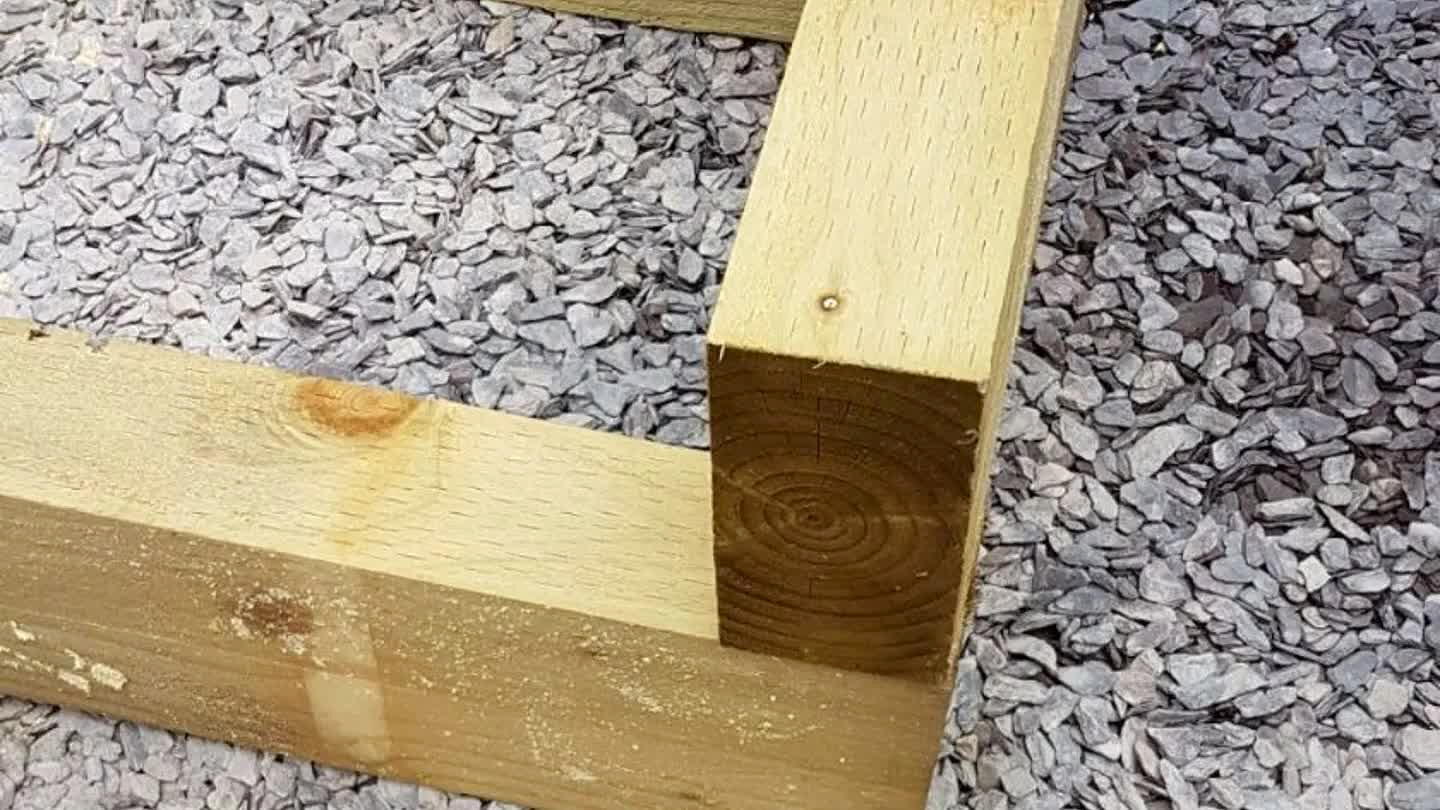
2
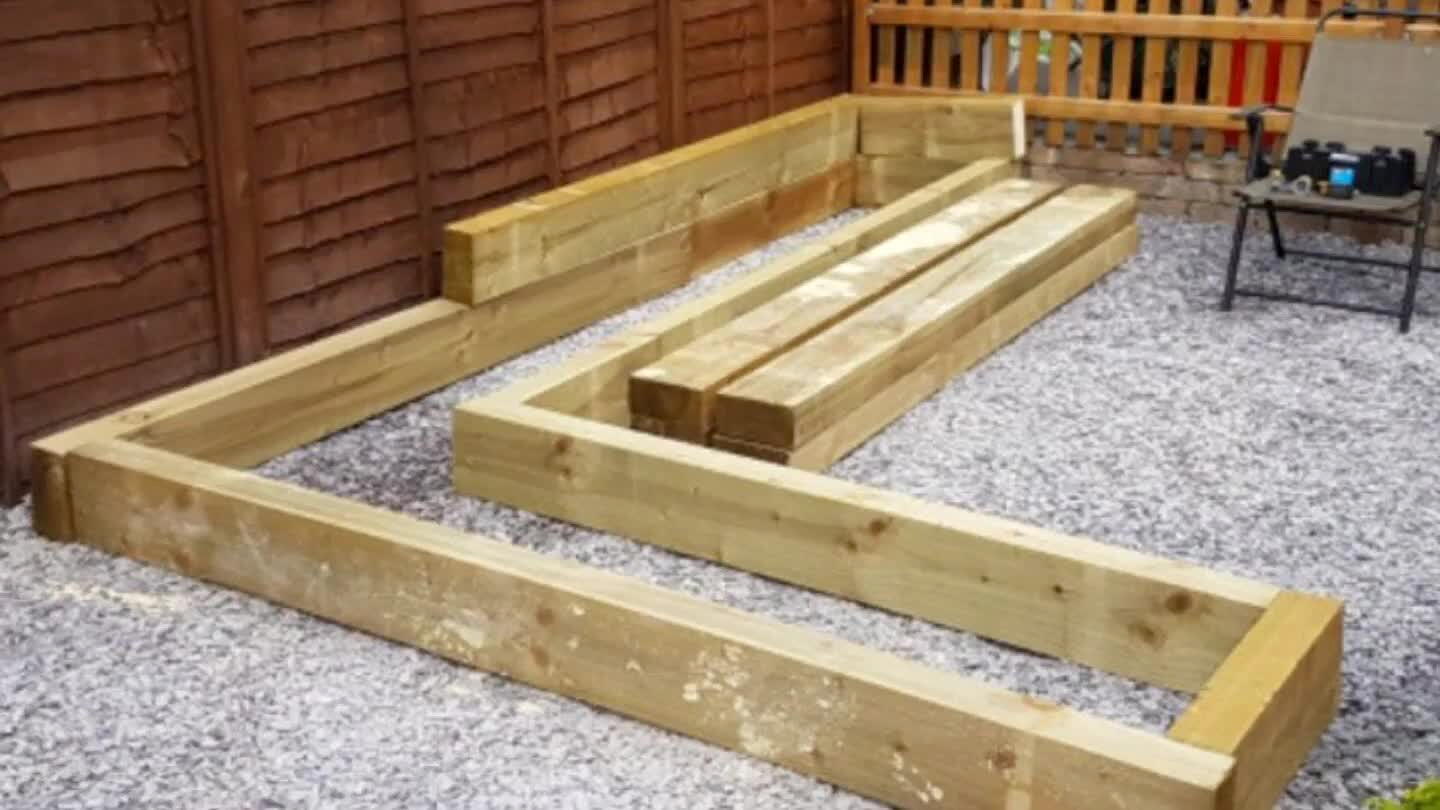
Screw bottom level together using brackets
3
Add second layer, offsetting joints, and screw together using brackets. Attach to bottom level.
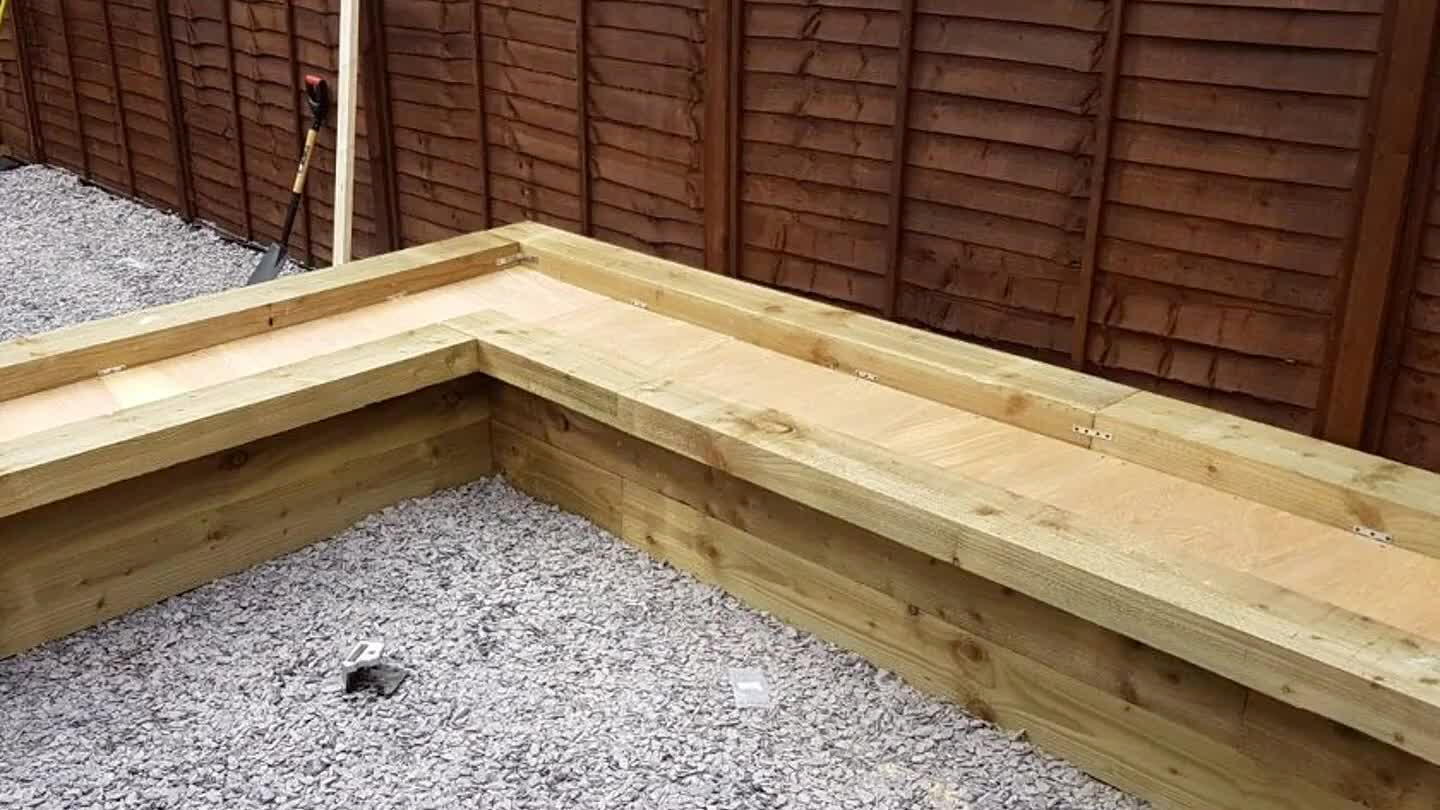
4

Add top layer, again offsetting joints and using brackets to secure in place.
5
Either infill with gravel or soil, or as I did, install a false bottom using exterior grade ply. I framed the inside out with 35 x 60 battening then screwed the ply down.
6
Plant as required or as I have done, place plant pots on top.
7
The top sleeper is wide enough and is securely attached, enabling it to be sat on with complete confidence.
Comments