
Balance Bike - Father/son Project
CAD rendering of my son's design


The goal was to make it look like an Italian Vespa
What you will need
Sheet of 1/2 inch Russian poplar plywood
Red oak remnants for parts needing more strength
Wheels from a $10 kid's bike found on Craigslist
Various hardware pieces for assembly
Bushings for steering mechanism7
Handle grips
3/4 inch dowel for handlebars
1 inch wide aluminum bar stock. 1/8 thick
How to do this project
1
My son decided he wanted to design and build a balance bike for his buddy's daughter. This is our adventure in making something outside our comfort zone...
2

We started off with detailed plans and templates drawn by my son. Mechanical engineers provide measurements to 3 decimals! Lol
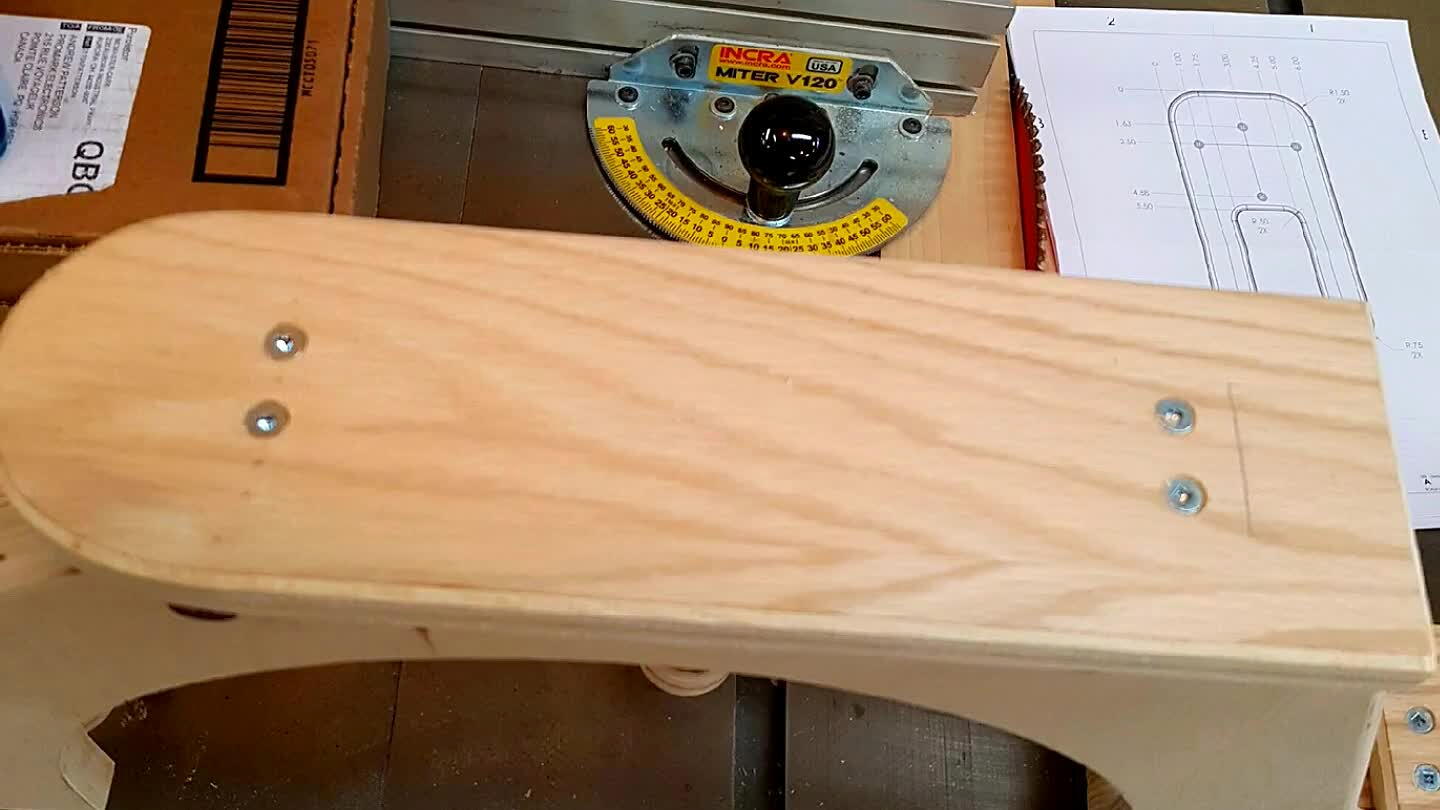
3
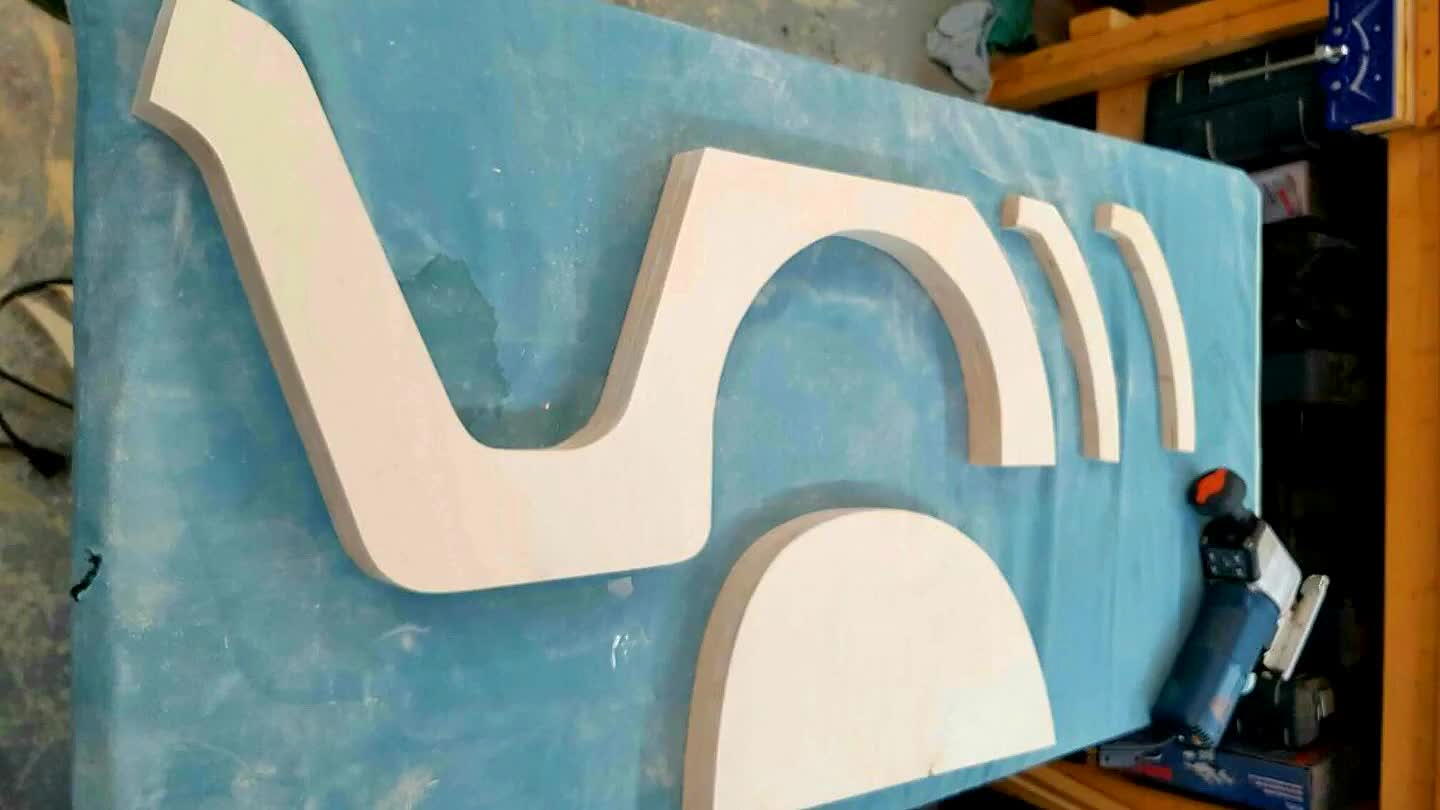
Trace the paper templates onto the plywood and cut and shape the frame and fender pieces. Use the first frame and fender pieces as templates to make a second copy.
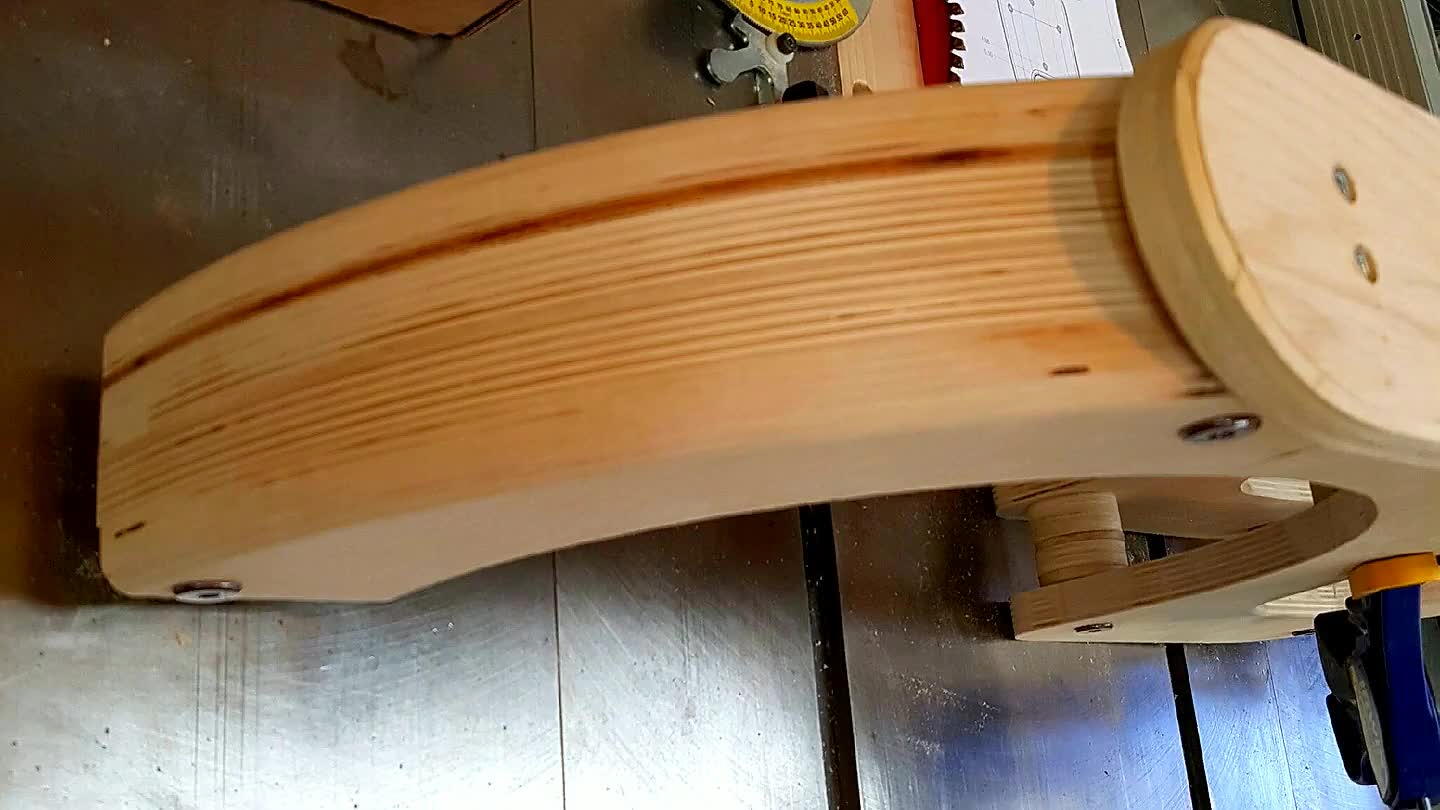
4
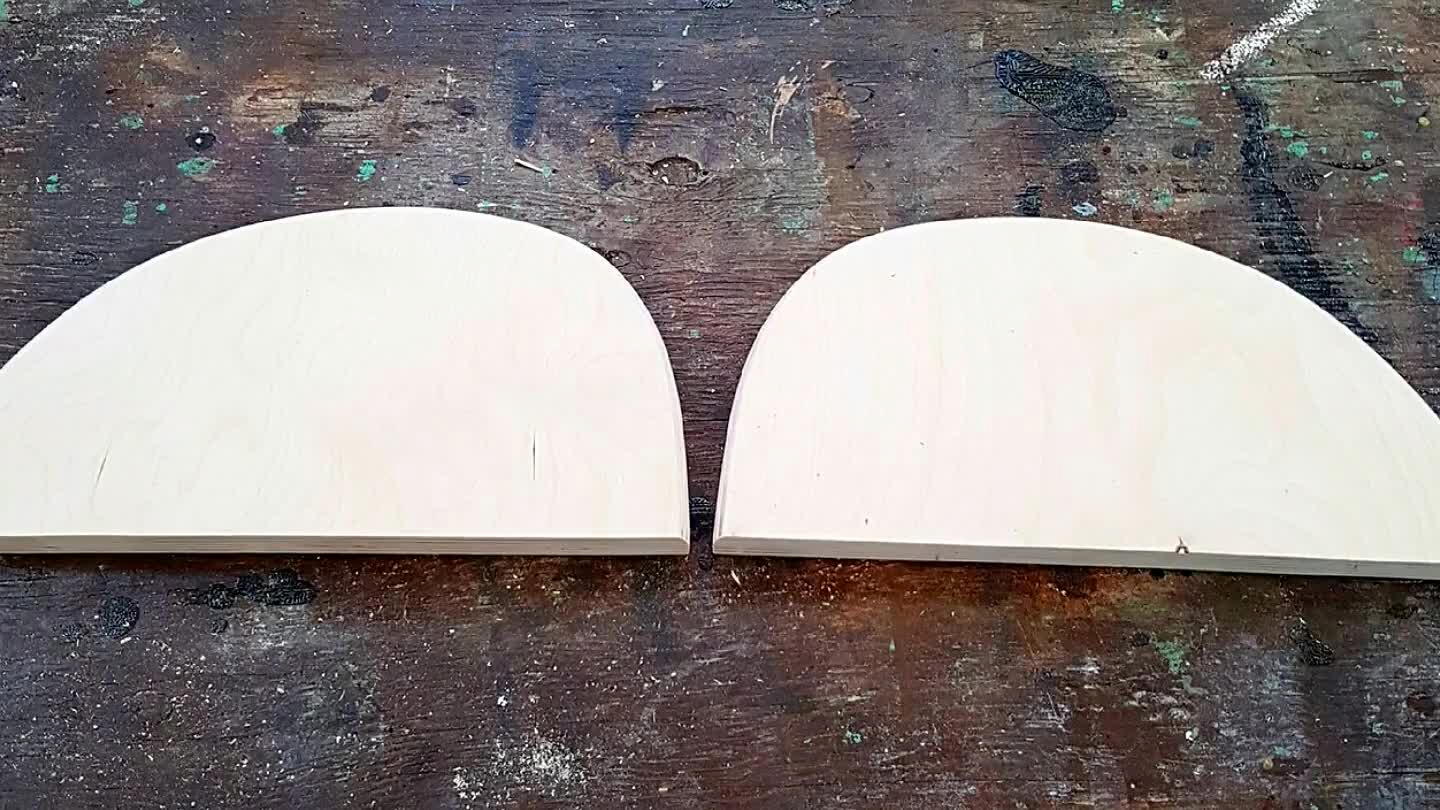
Once the fenders are fabricated, hollow out the back of the fenders to lighten them. Keep enough material where the wheels will mount.
5
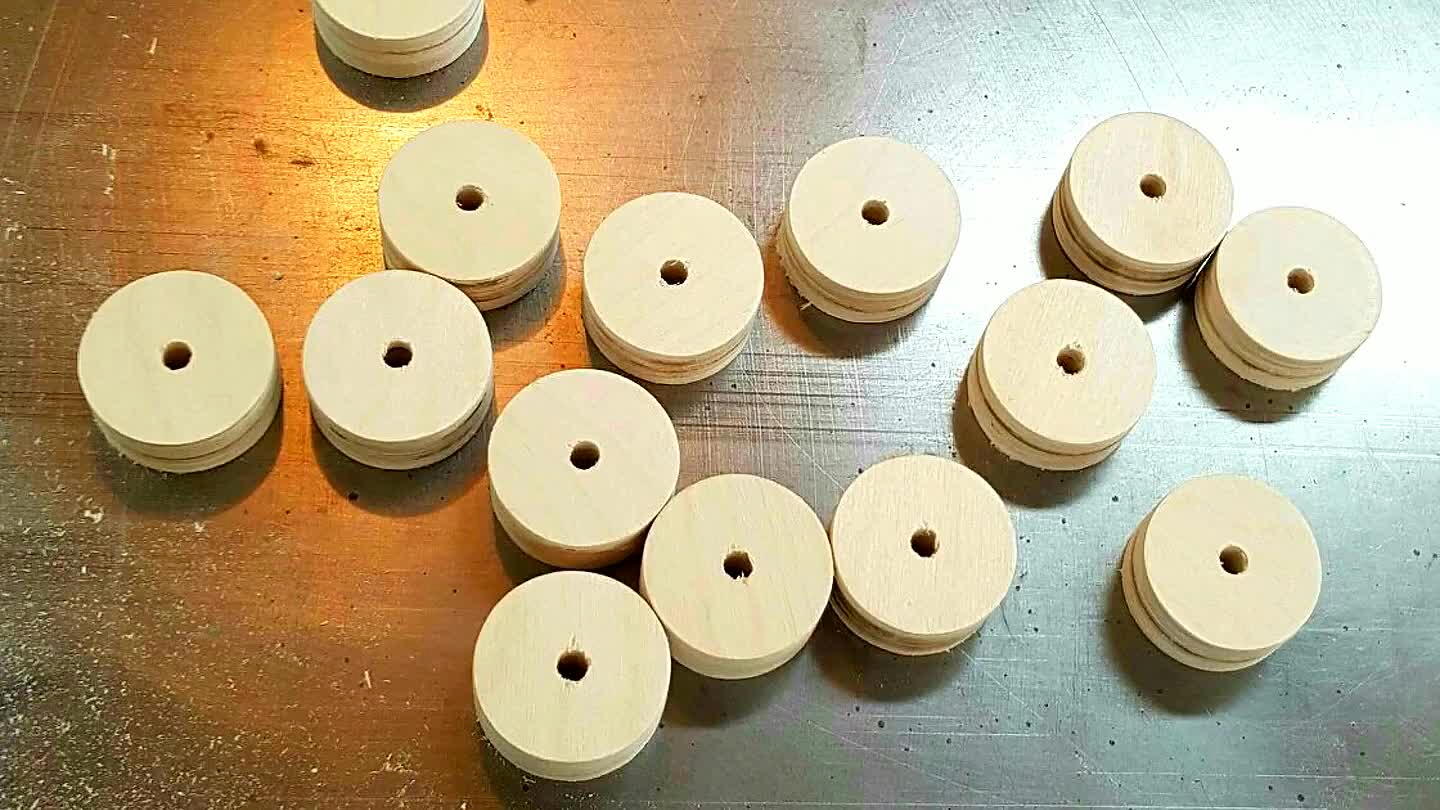
Easiest part of the project... Cut frame spacers from plywood cut-offs using a 1-1/2 inch hole saw.
6
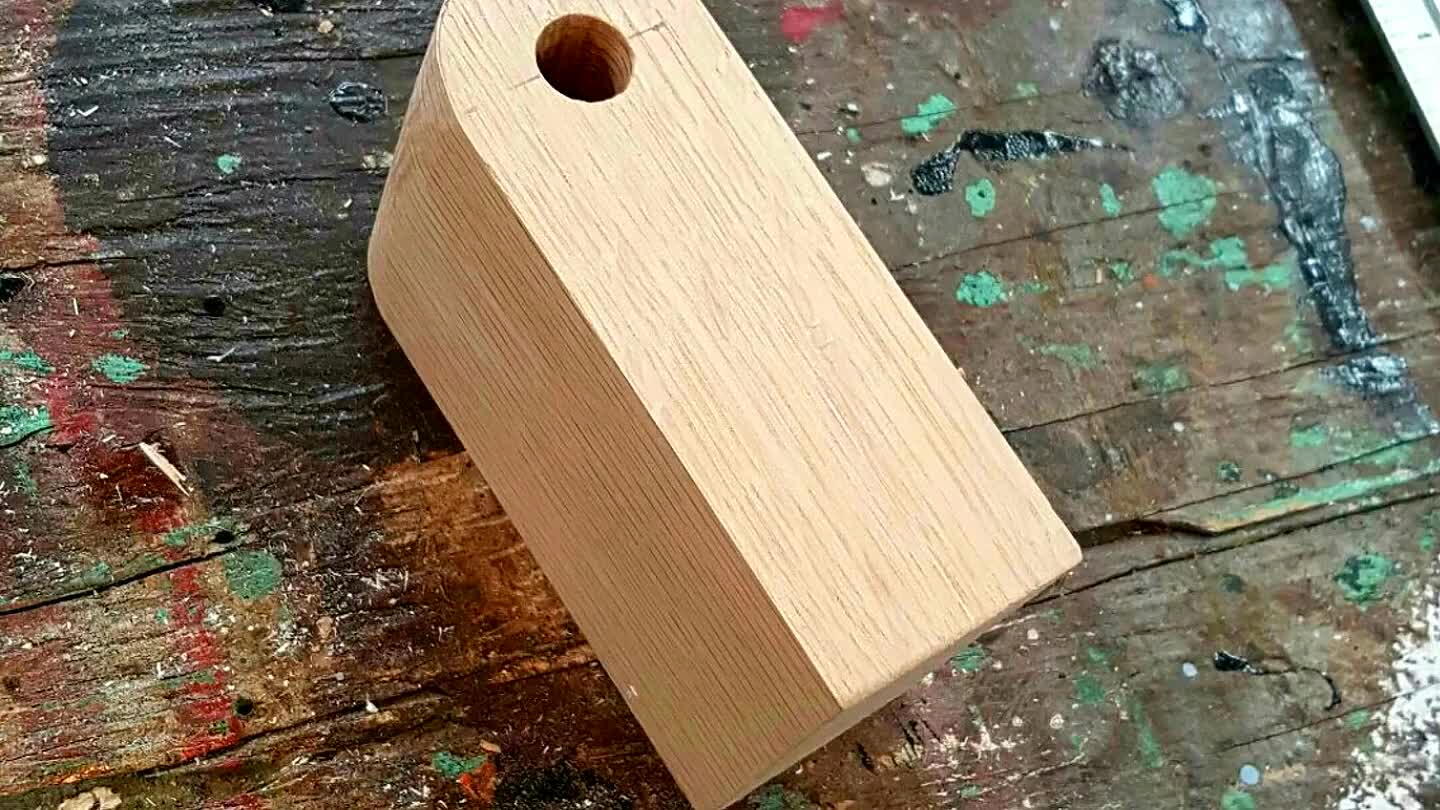
Make the headset from solid oak for strength
7
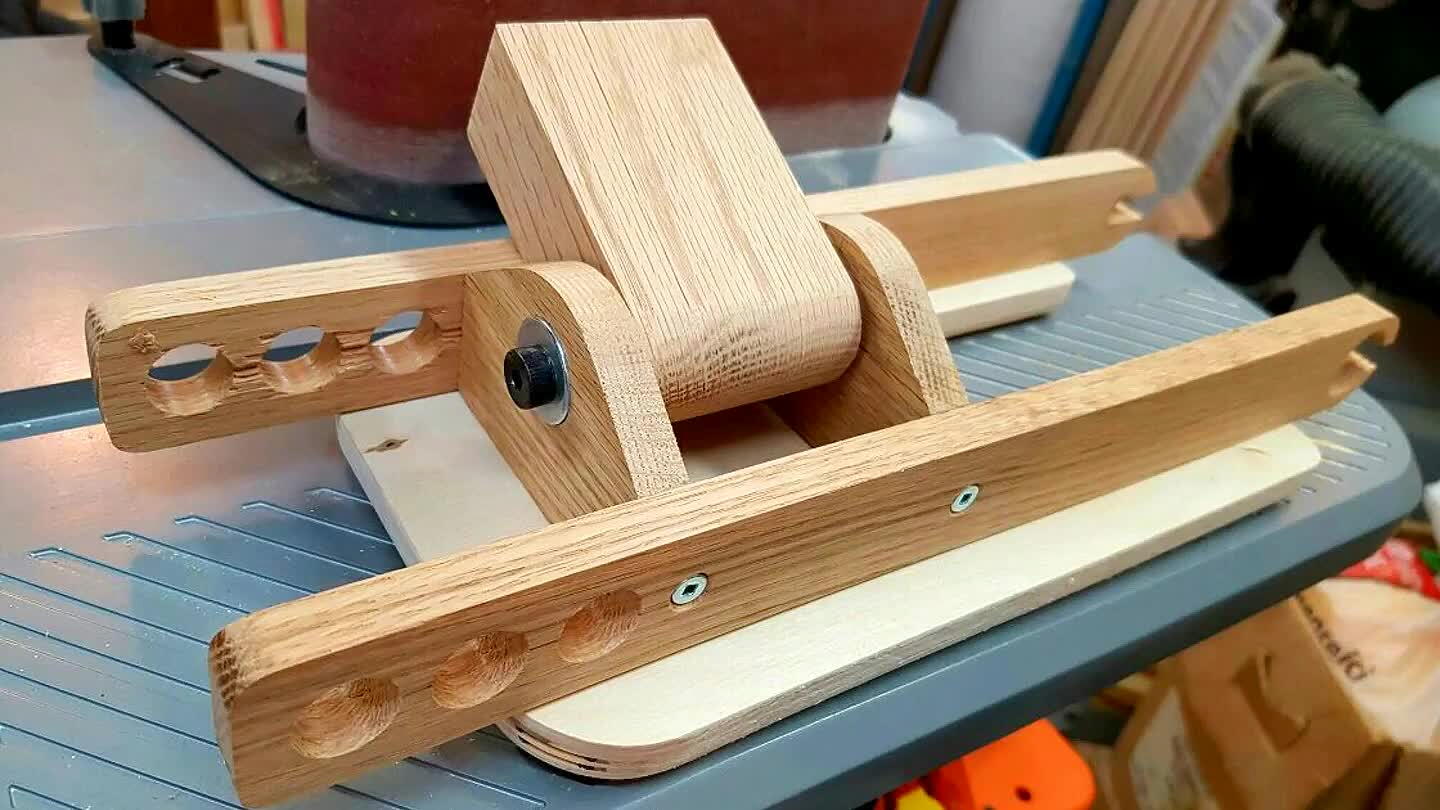
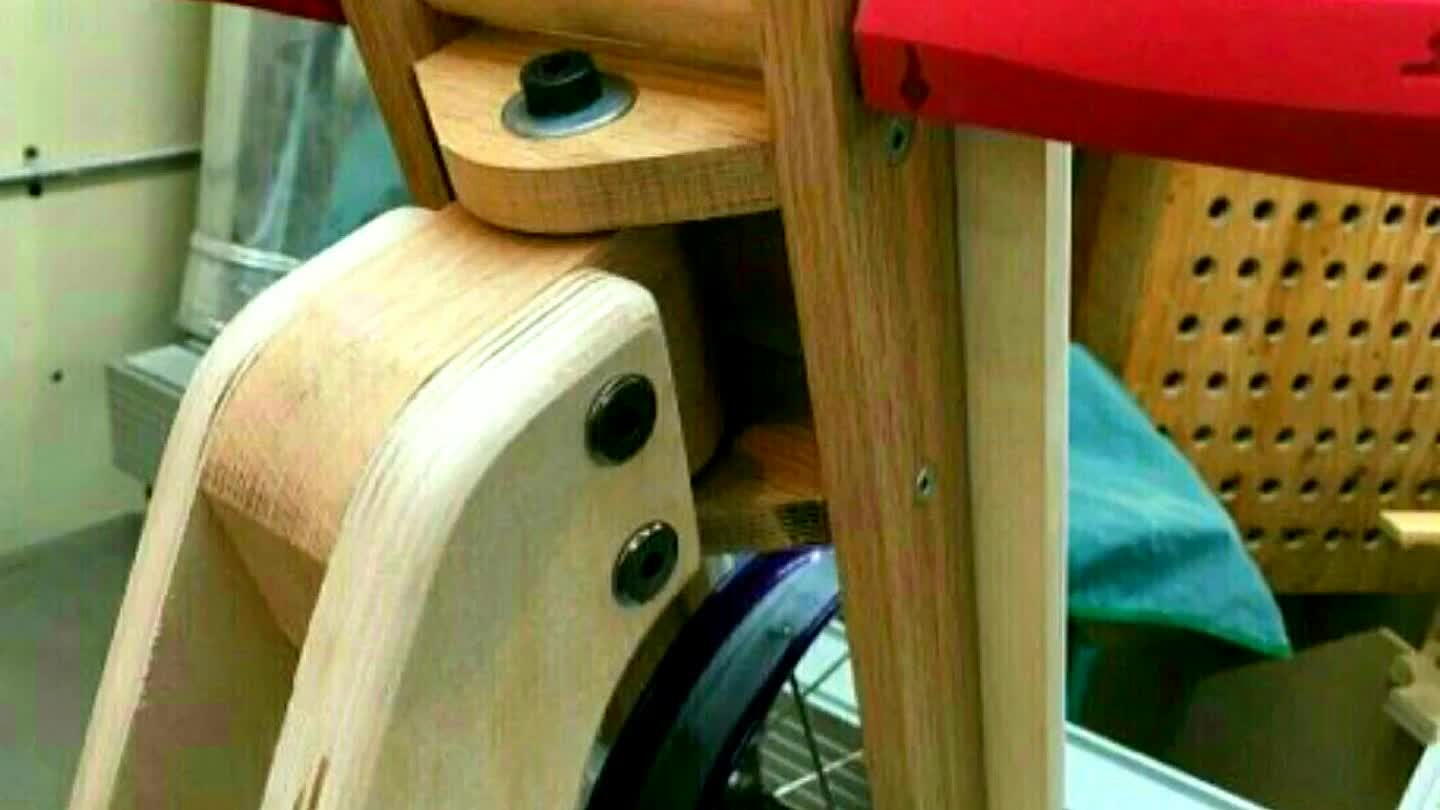
Steering assembly. Build the fork and headset brackets from solid oak, and faceplate from plywood. Assemble.
8
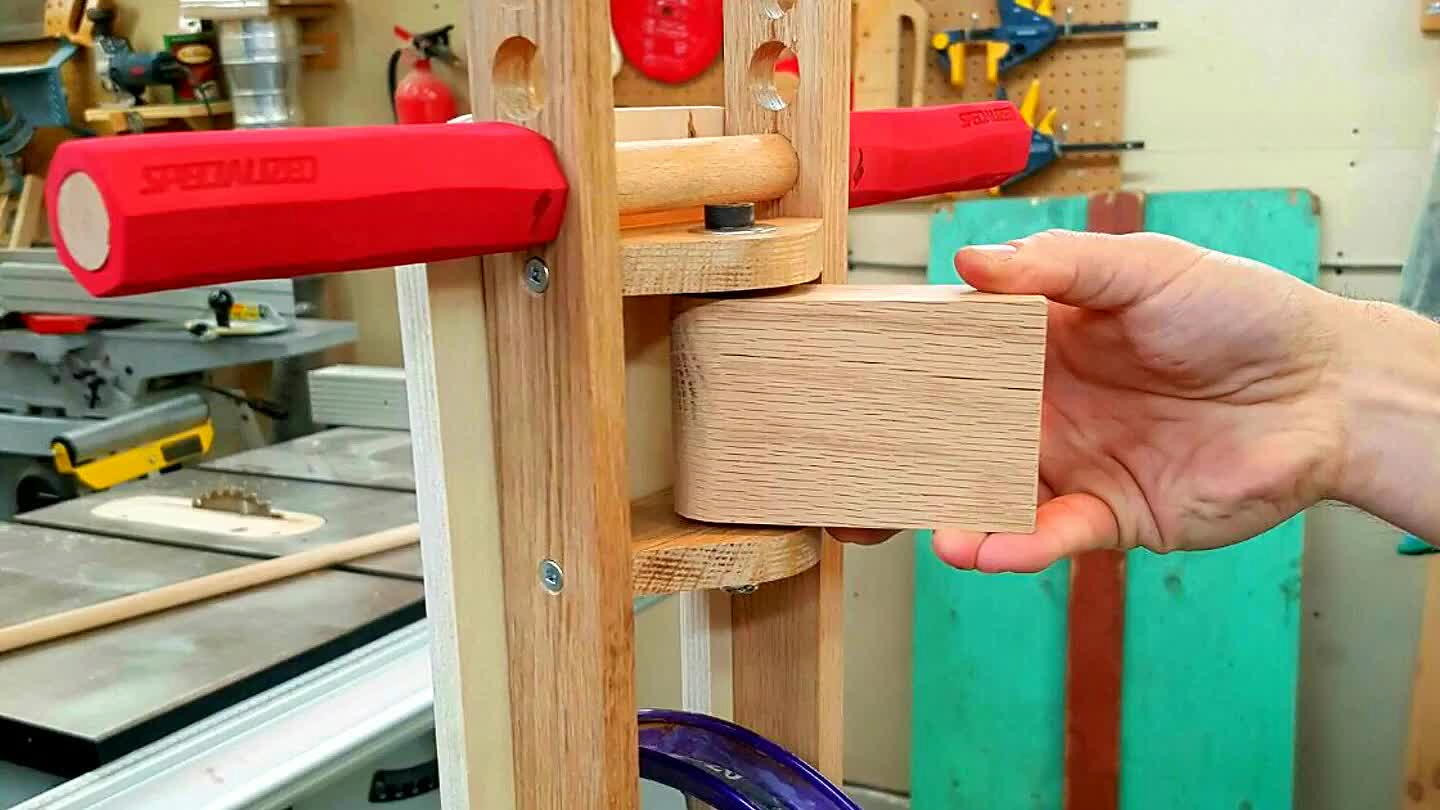
View of the steering mechanism with handle bars installed. Donor handle grips from spare bike parts from a friend.
9
Make the seat and adjustable seat extension. Need to drill out the seat height adjustment holes in the frame.
10
Make the rear fender filler and match fender contour
11

Assemble the frame using the spacers and insert the oak headset
12
Attach steering mechanism to the headset
13
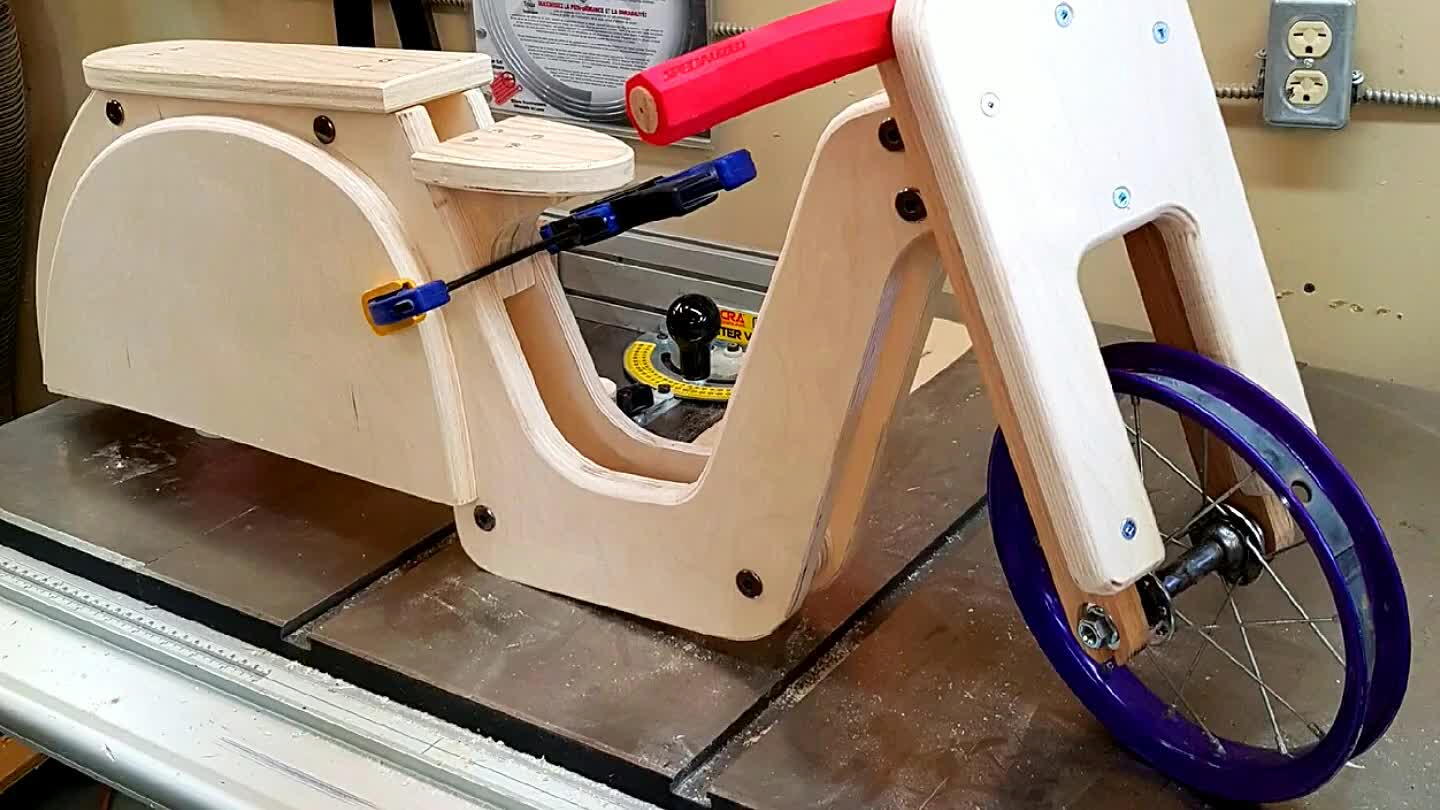
...dry fit all the parts. Drill out the holes for the seat extension height adjustments..
14
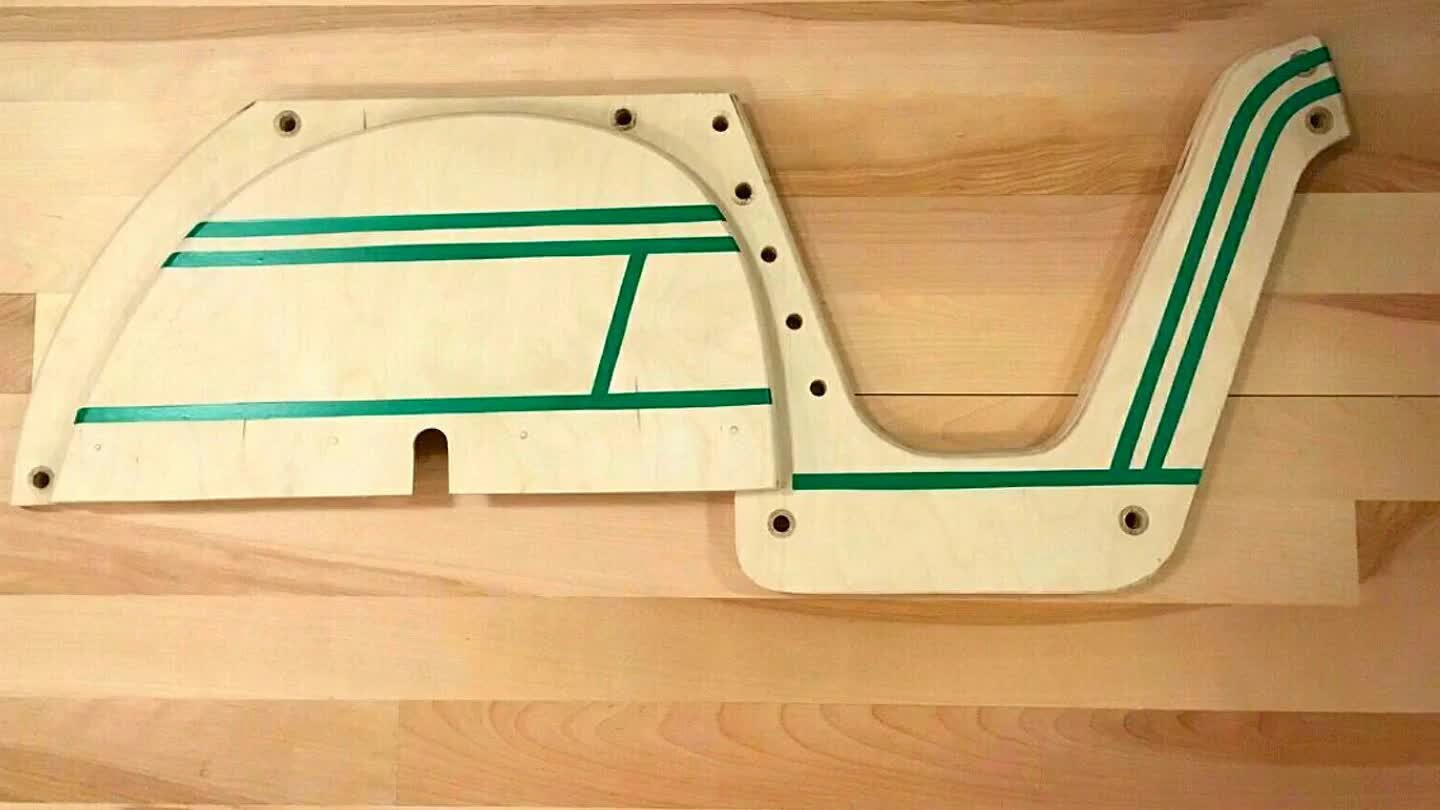
Time to take the bike apart to mask the paint design.
15
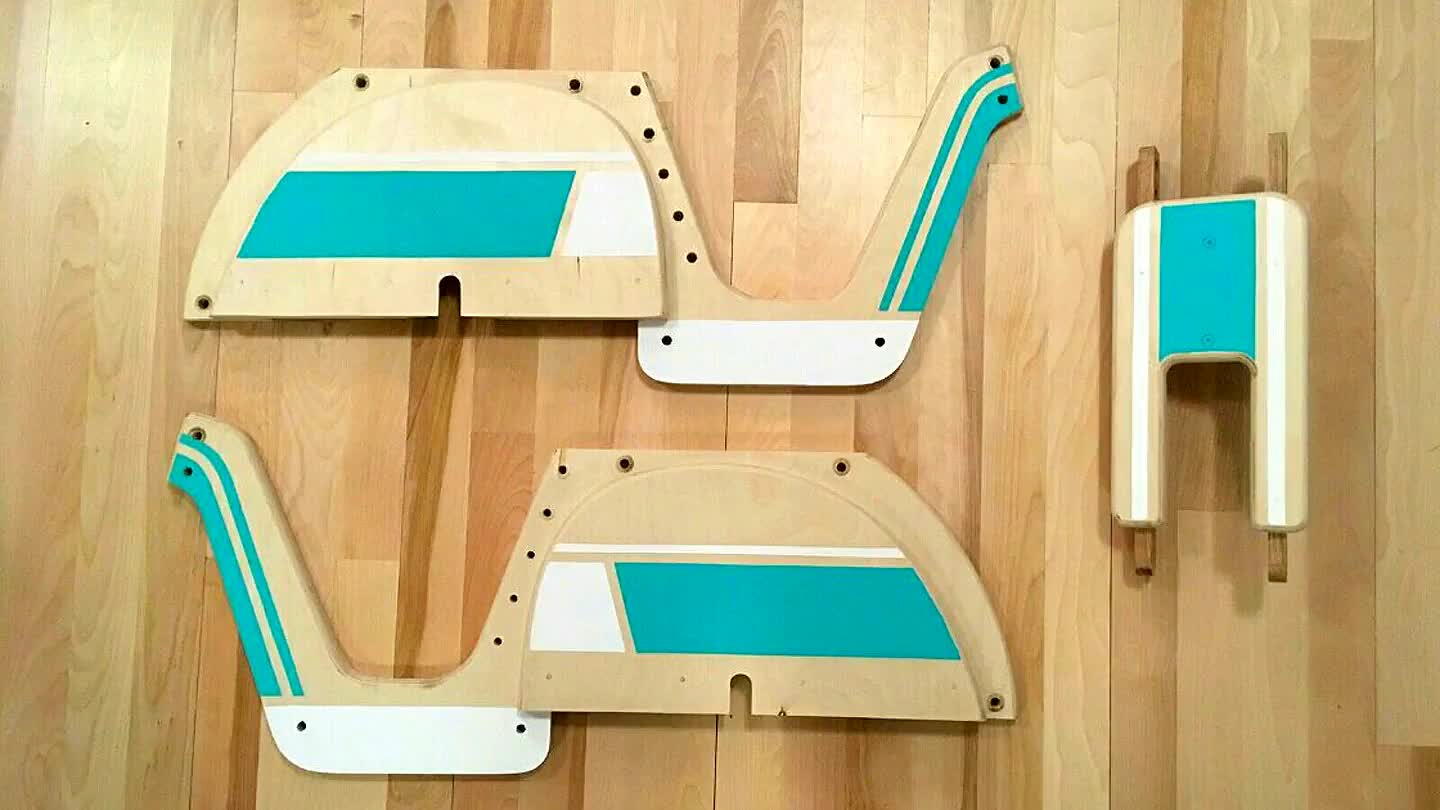
Paint Job. Aqua and white. All other raw lumber gets a few coats of exterior grade varnish.
16
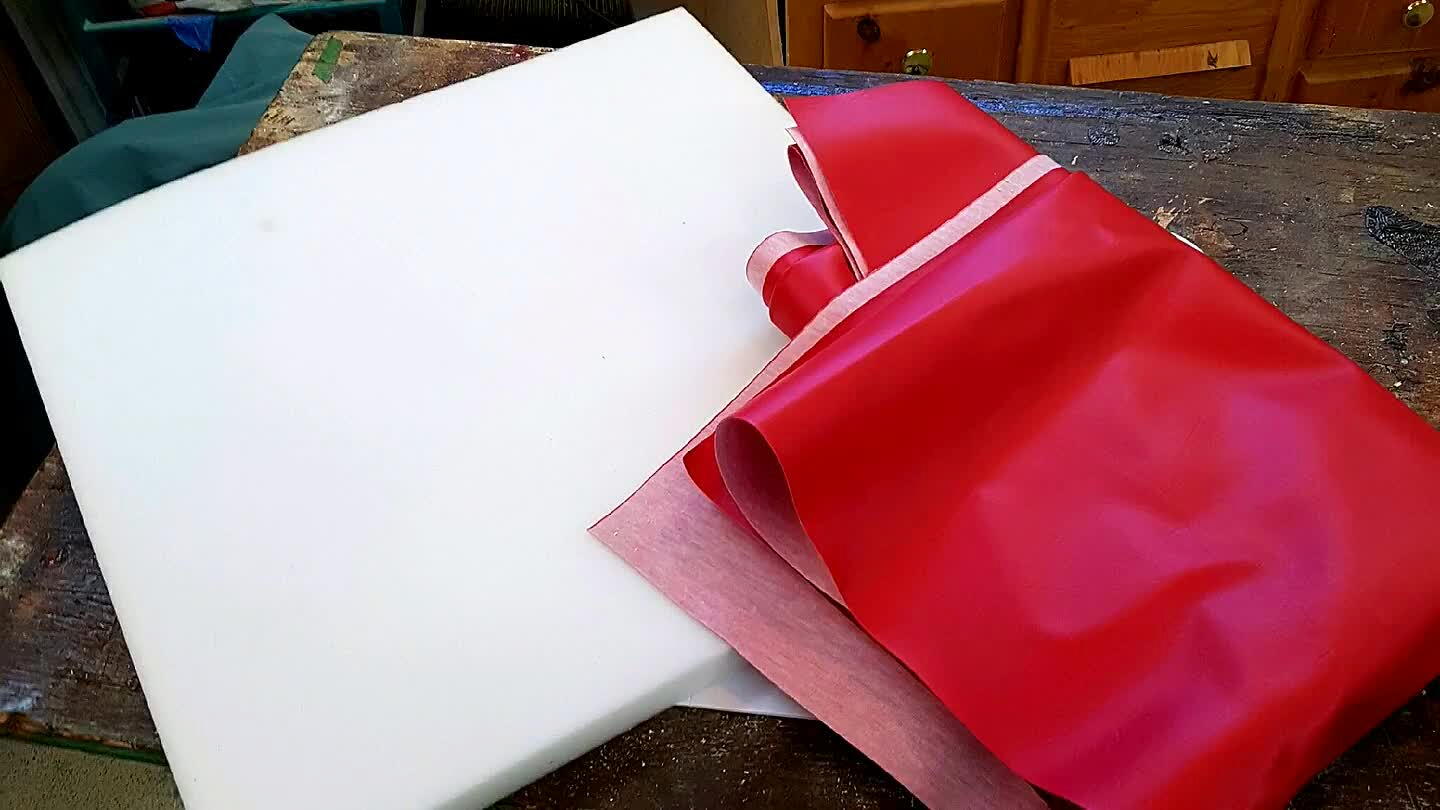
Materials to cover the seat. High density foam and red vinyl.
17
Just about done! Added aluminum bar stock on the back fenders to strengthen the rear wheel support.
18
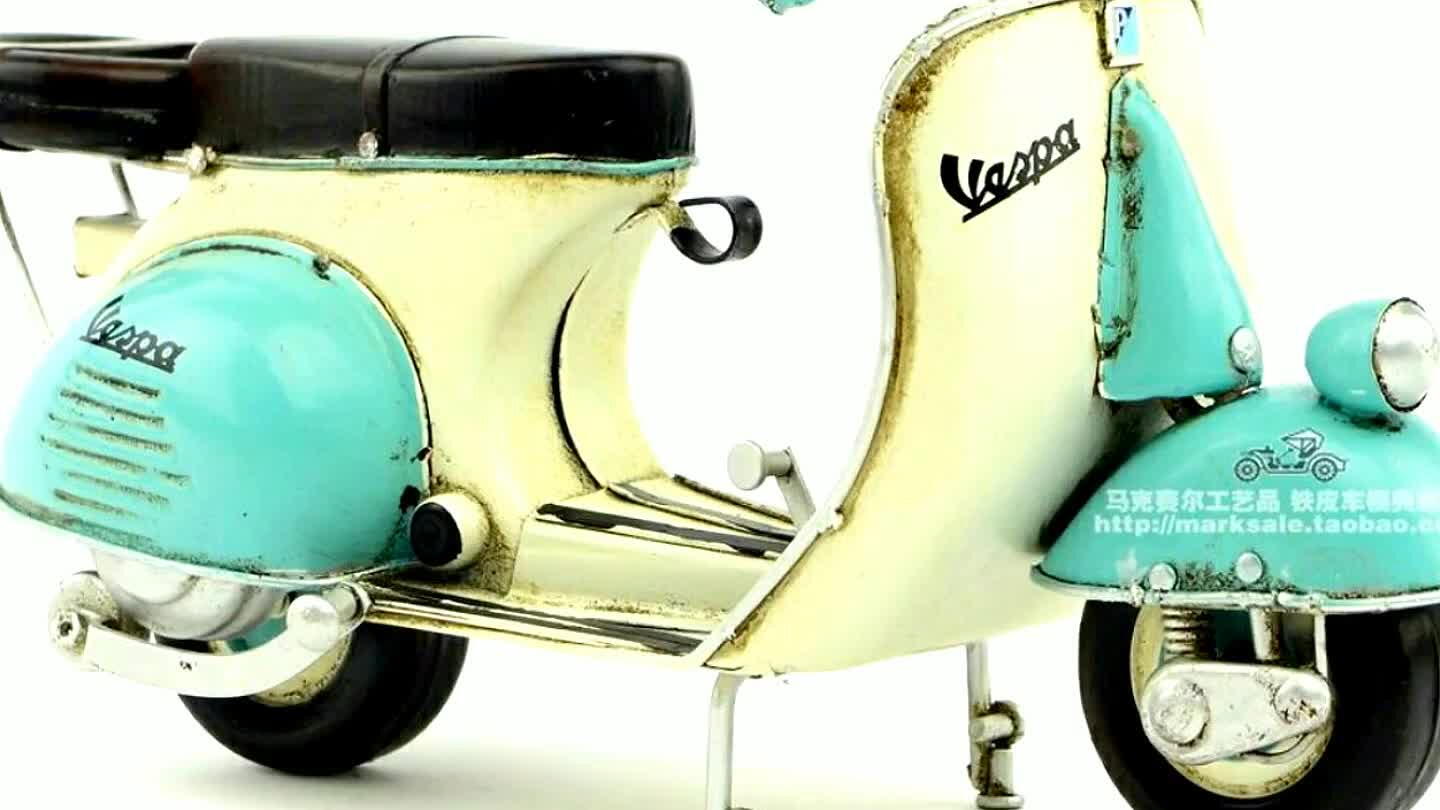
The inspiration
19

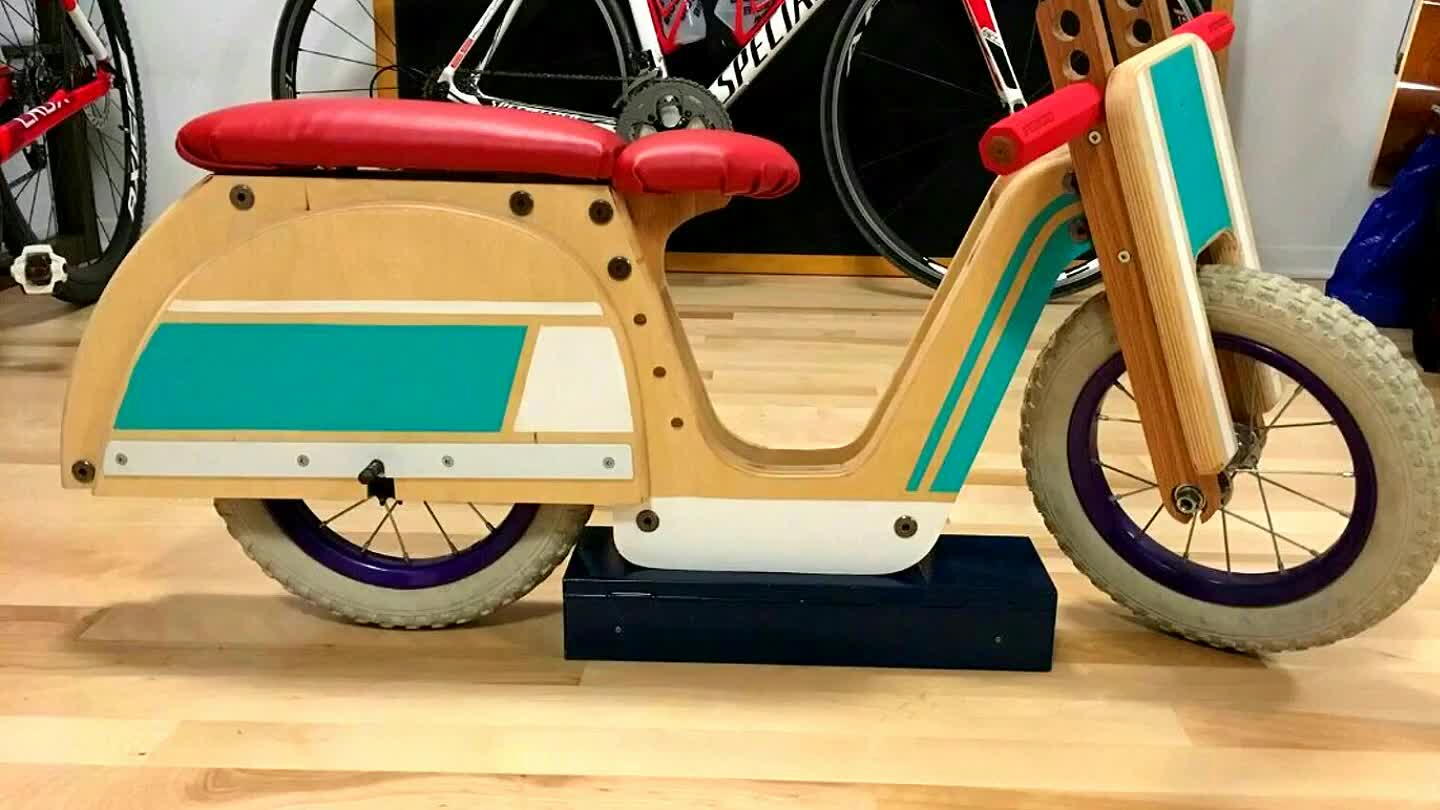
A few cosmetic things to do. Still have to paint the aluminum bar screws and cut the rear wheel axel. But yeah, looks like we have a finished product. Great father/son bonding experience. And we're still on talking terms. Lol
Comments