Coat Rack
Stand alone
What you will need
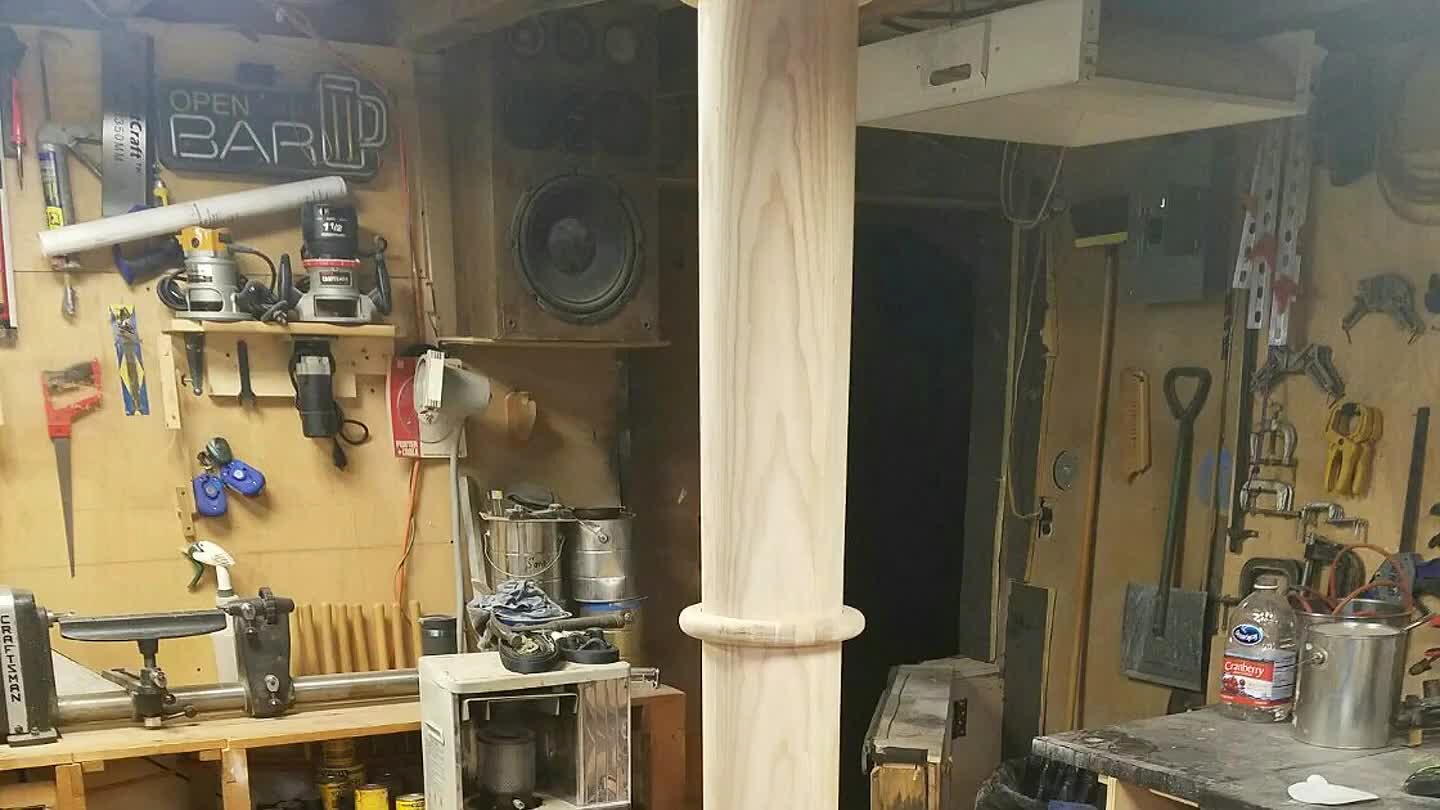
4 pcs 1" x 4 1/4" x 72" (radius crown molding)
5 pcs 1" x 8 1/2" x 8 1/2' (for rings)
1 pc 1" x 6 1/2 " x 6 1/2" (top cap)
4 pcs 1 1/2" x 4" x 8" (base blocks)
1 pc 1" x 21" x 21" (base plate)
6 pcs 1" x 1" x 8" (hangers)
How to do this project
1
![](https://craftlog.global.ssl.fastly.net/m/ve/b64-284350-1486908247022-b3B0aW1pemVGb3I9ZGVza3RvcGhoZCZsYW5ndWFnZVRhZz1lbi1VUyZyZW5kZXJDbGlwU3RhcnQ9MSZyZW5kZXJDbGlwU2l6ZT0z.jpg)
Finish with 3 coats satin finish
2
![](https://craftlog.global.ssl.fastly.net/m/ve/b64-284350-1486908247022-b3B0aW1pemVGb3I9ZGVza3RvcGhoZCZsYW5ndWFnZVRhZz1lbi1VUyZyZW5kZXJDbGlwU3RhcnQ9NCZyZW5kZXJDbGlwU2l6ZT0y.jpg)
Glue and clamp 4 pcs of molding together to create post
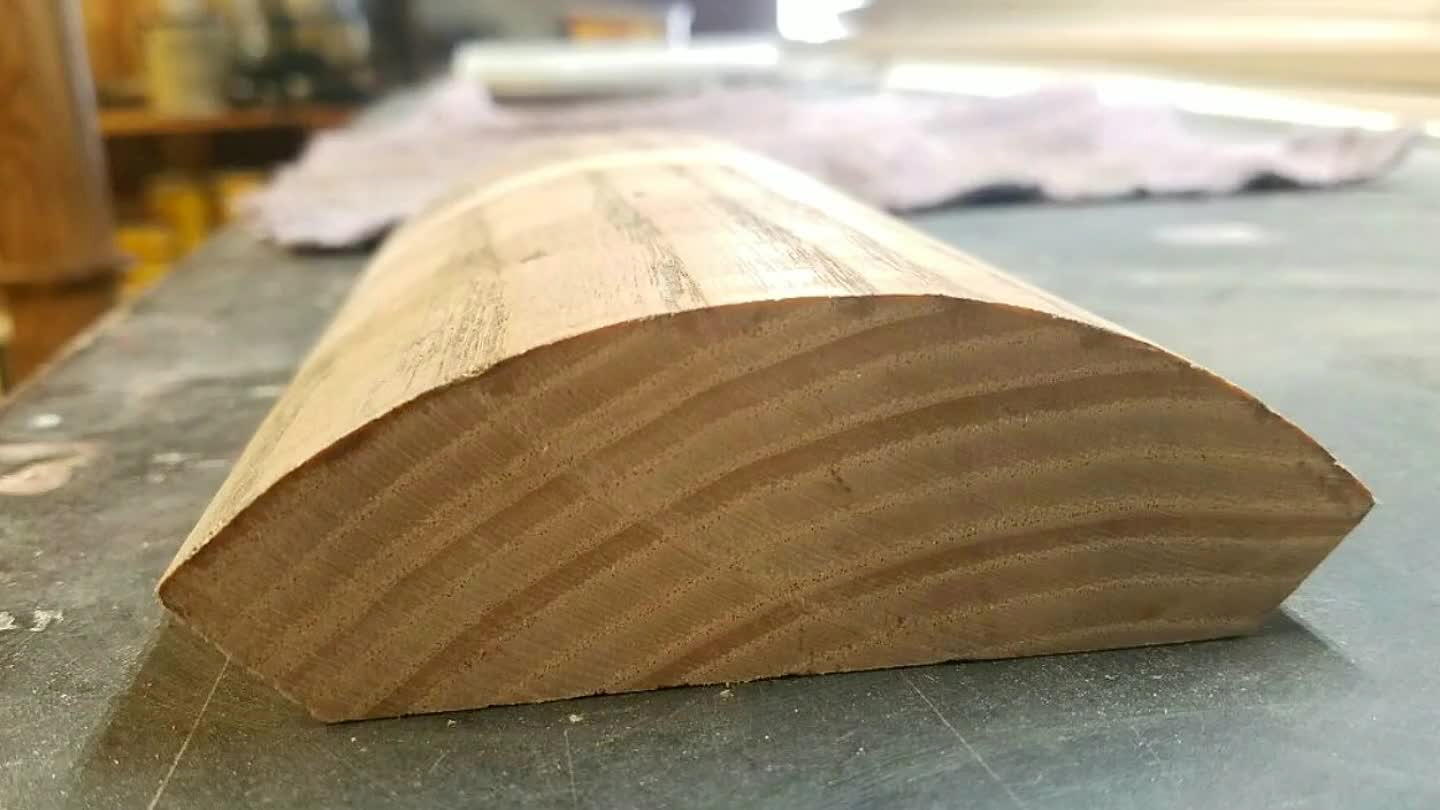
3
![](https://craftlog.global.ssl.fastly.net/m/ve/b64-284350-1486908247022-b3B0aW1pemVGb3I9ZGVza3RvcGhoZCZsYW5ndWFnZVRhZz1lbi1VUyZyZW5kZXJDbGlwU3RhcnQ9NiZyZW5kZXJDbGlwU2l6ZT0x.jpg)
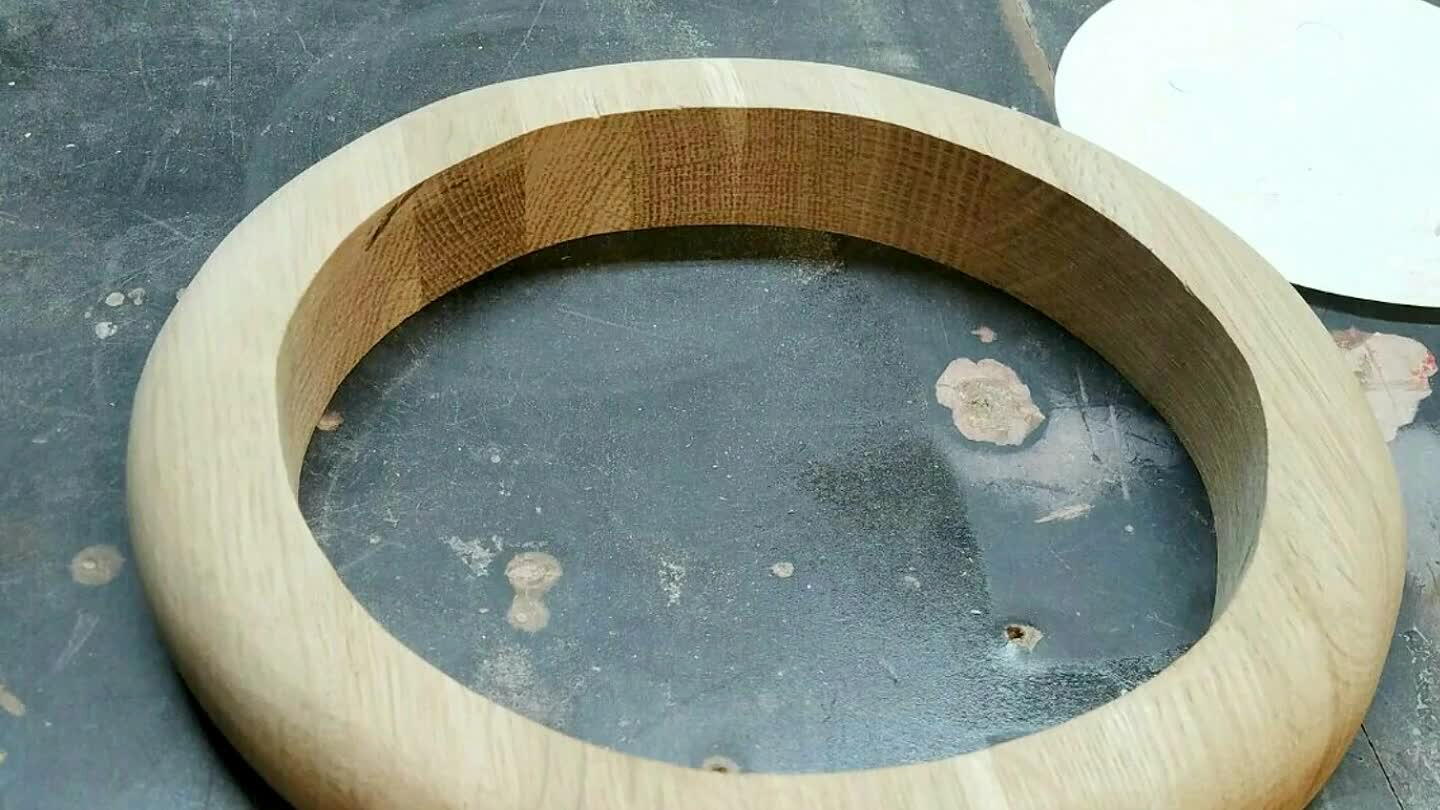
Cut 4 pcs 8" od with a 6" id rings out and put a 1/2" radius top and bottom
4
![1/2" radius on 1 side. You can now assemble the top cap](https://craftlog.global.ssl.fastly.net/m/ve/b64-284350-1486908247022-b3B0aW1pemVGb3I9ZGVza3RvcGhoZCZsYW5ndWFnZVRhZz1lbi1VUyZyZW5kZXJDbGlwU3RhcnQ9NyZyZW5kZXJDbGlwU2l6ZT0y.jpg)
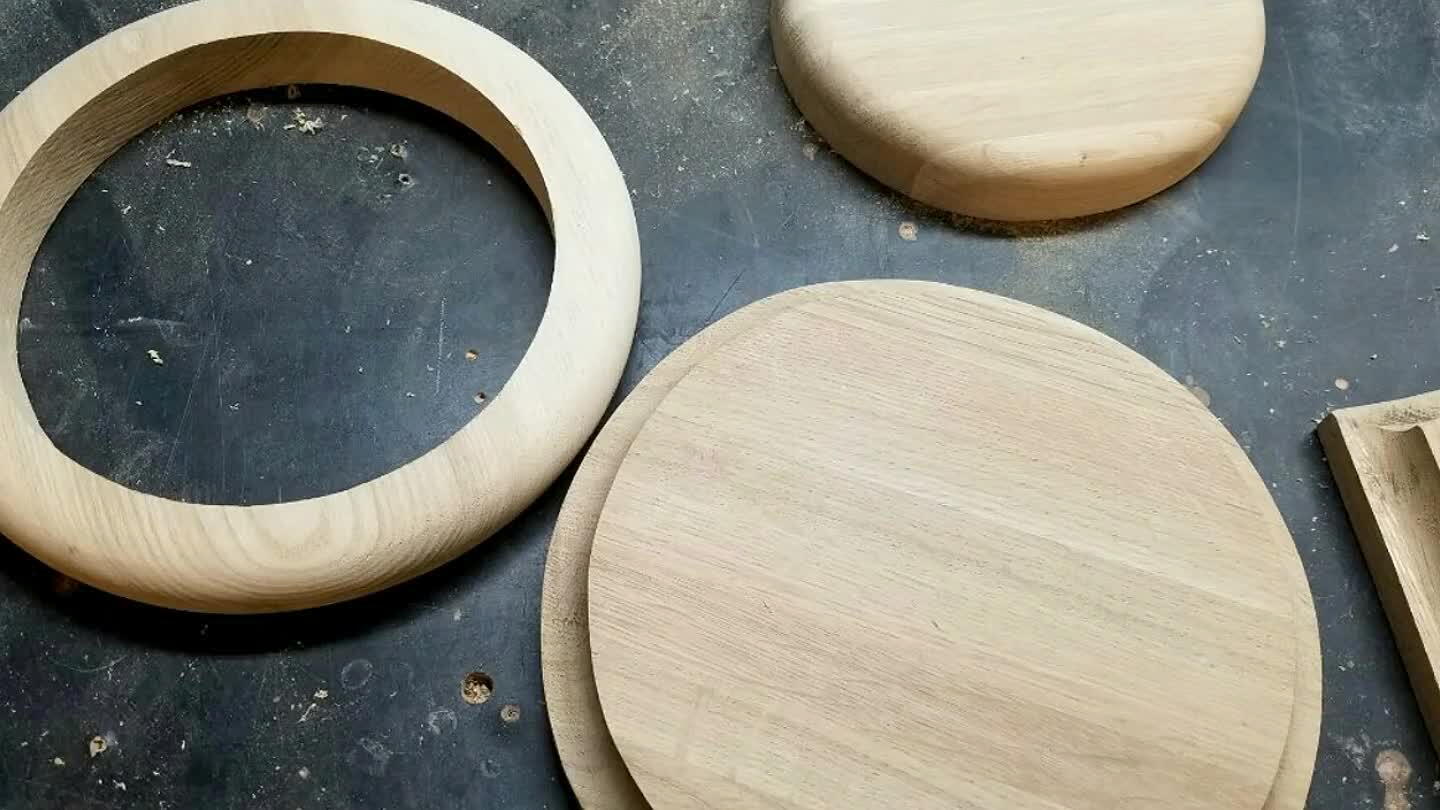
Cut 1 pc 8" od ring out and put a 1/2" cove on top. And 1 pc 6" od and put 1/2" radius on 1 side. You can now assemble the top cap
5
![radius with 1/2" bit.](https://craftlog.global.ssl.fastly.net/m/ve/b64-284350-1486908247022-b3B0aW1pemVGb3I9ZGVza3RvcGhoZCZsYW5ndWFnZVRhZz1lbi1VUyZyZW5kZXJDbGlwU3RhcnQ9OSZyZW5kZXJDbGlwU2l6ZT0y.jpg)
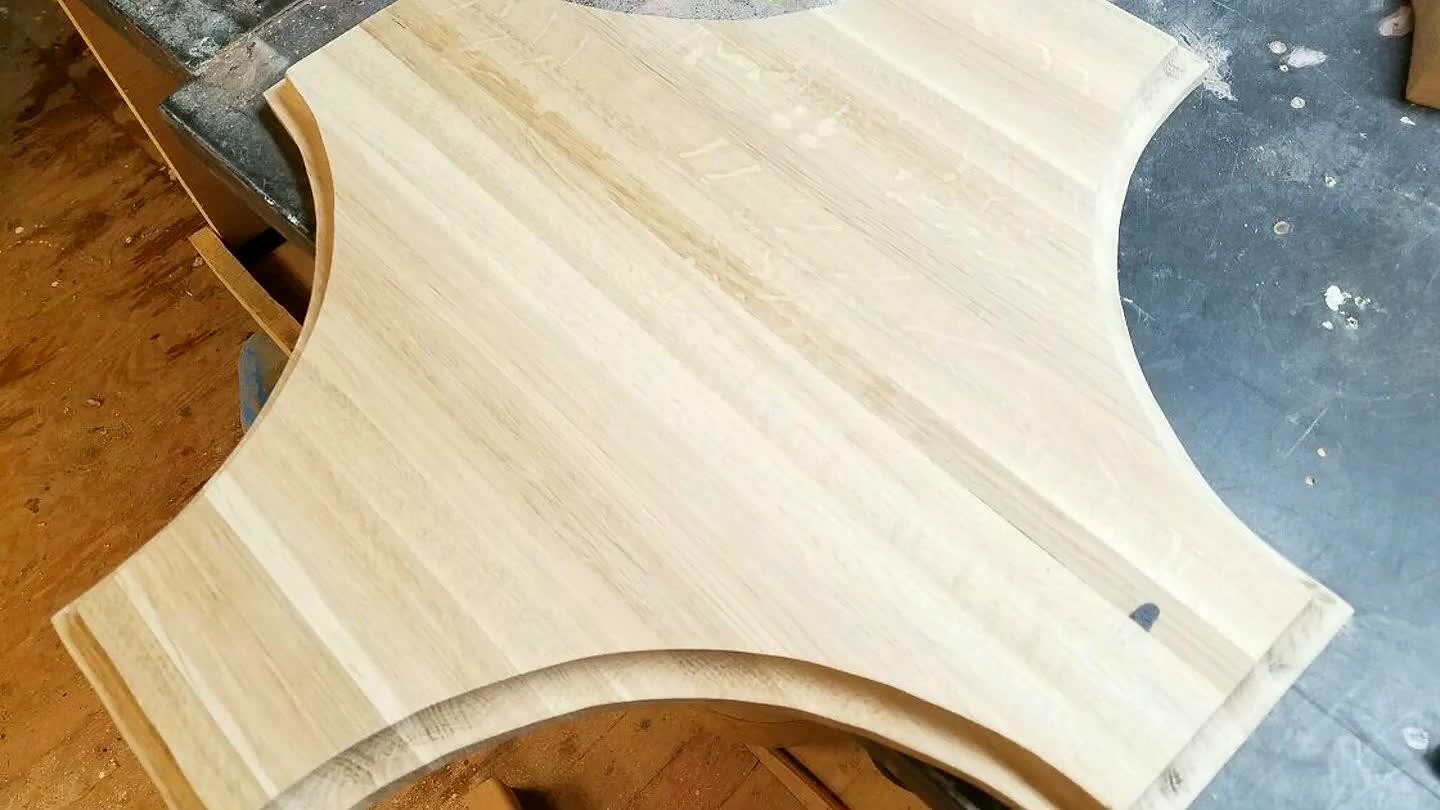
Cut base plate and cove outside with 1/2" cove bit then cut base blocks and radius with 1/2" bit.
6
![](https://craftlog.global.ssl.fastly.net/m/ve/b64-284350-1486908247022-b3B0aW1pemVGb3I9ZGVza3RvcGhoZCZsYW5ndWFnZVRhZz1lbi1VUyZyZW5kZXJDbGlwU3RhcnQ9MTEmcmVuZGVyQ2xpcFNpemU9MQ==.jpg)
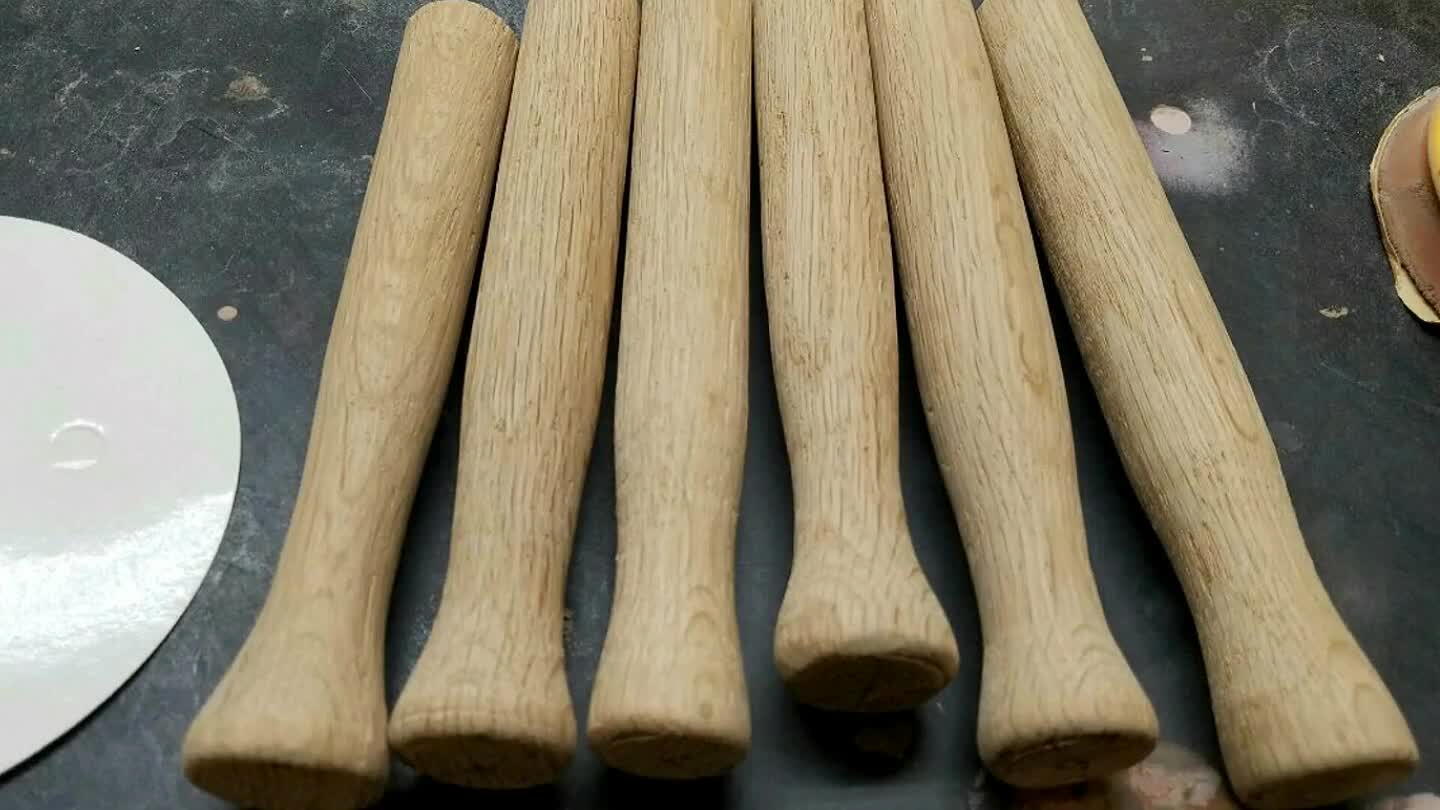
Turn 6 pcs for hangers
7
![](https://craftlog.global.ssl.fastly.net/m/ve/b64-284350-1486908247022-b3B0aW1pemVGb3I9ZGVza3RvcGhoZCZsYW5ndWFnZVRhZz1lbi1VUyZyZW5kZXJDbGlwU3RhcnQ9MTImcmVuZGVyQ2xpcFNpemU9NQ==.jpg)
Assemble and finish with color of choice.
Comments