
Conference Table
14 foot conference table for Hedgehog Electric


I have really loved building this table! It took the whole school year to build in our shop and took up a lot of space! I had never really built anything before besides a blanket chest. So this was a massive jump into woodworking. Luckily it turned out pretty great with a little help from my woodworking teacher.
What you will need
maple
walnut
walnut plywood sheeting
walnut preglued vaneer (heat activated)
power strips
pocket screws
wood glue (a lot!)
hand belt sander
stone coat epoxy (4 gallons)
1/8 inch notched trowle
small paint bruses
duct tape
plumbers torch
plastic sheets
mixing buckets
mixing drill bit
gloves
How to do this project
1
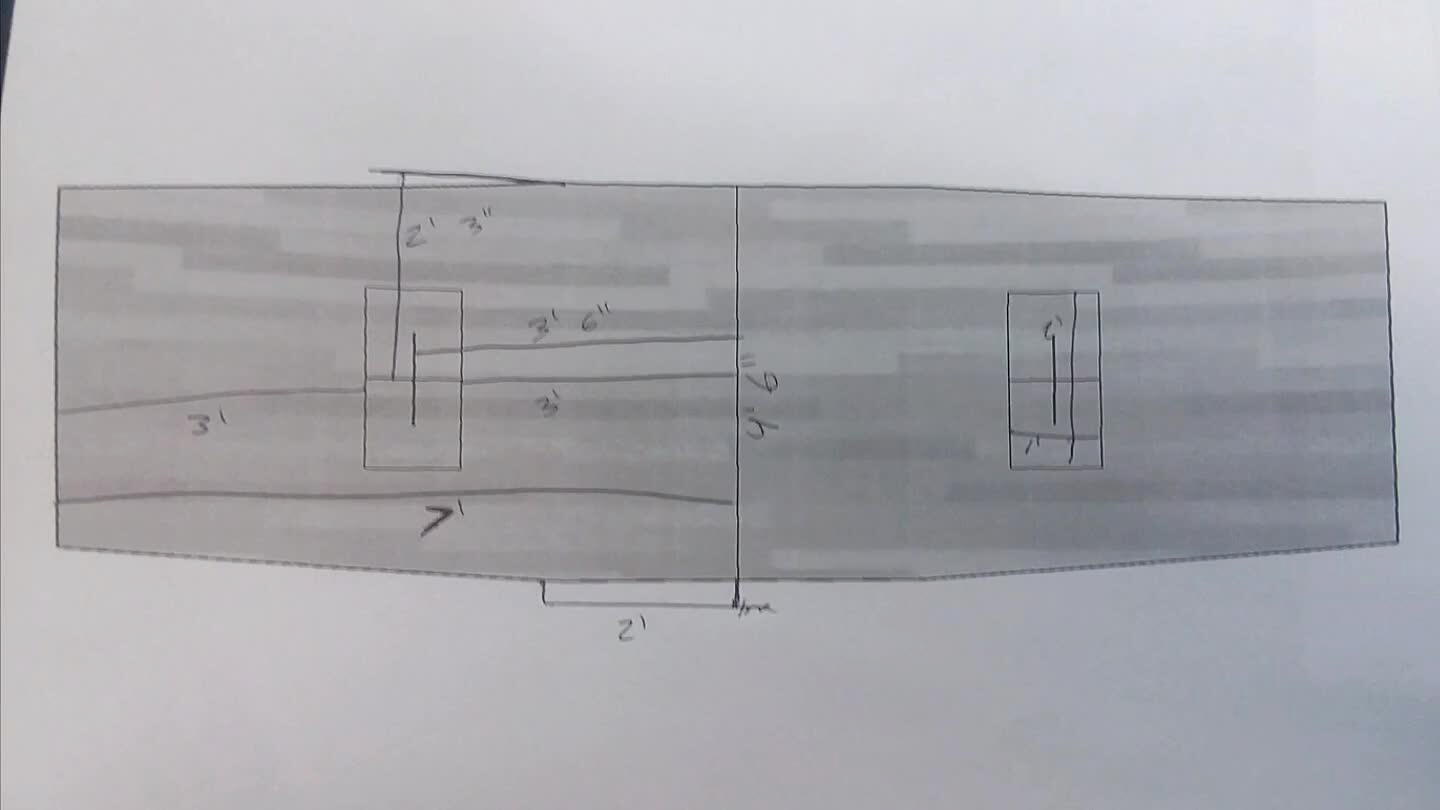
I designed the table on a program and put all the dimensions on here.
2
These are pictures of the maple I used for the top and how I cut them to random sizes so there isn't a pattern in the top and I also used a Domino machine to add a little strength so it doesn't curve to much when glued together.
3
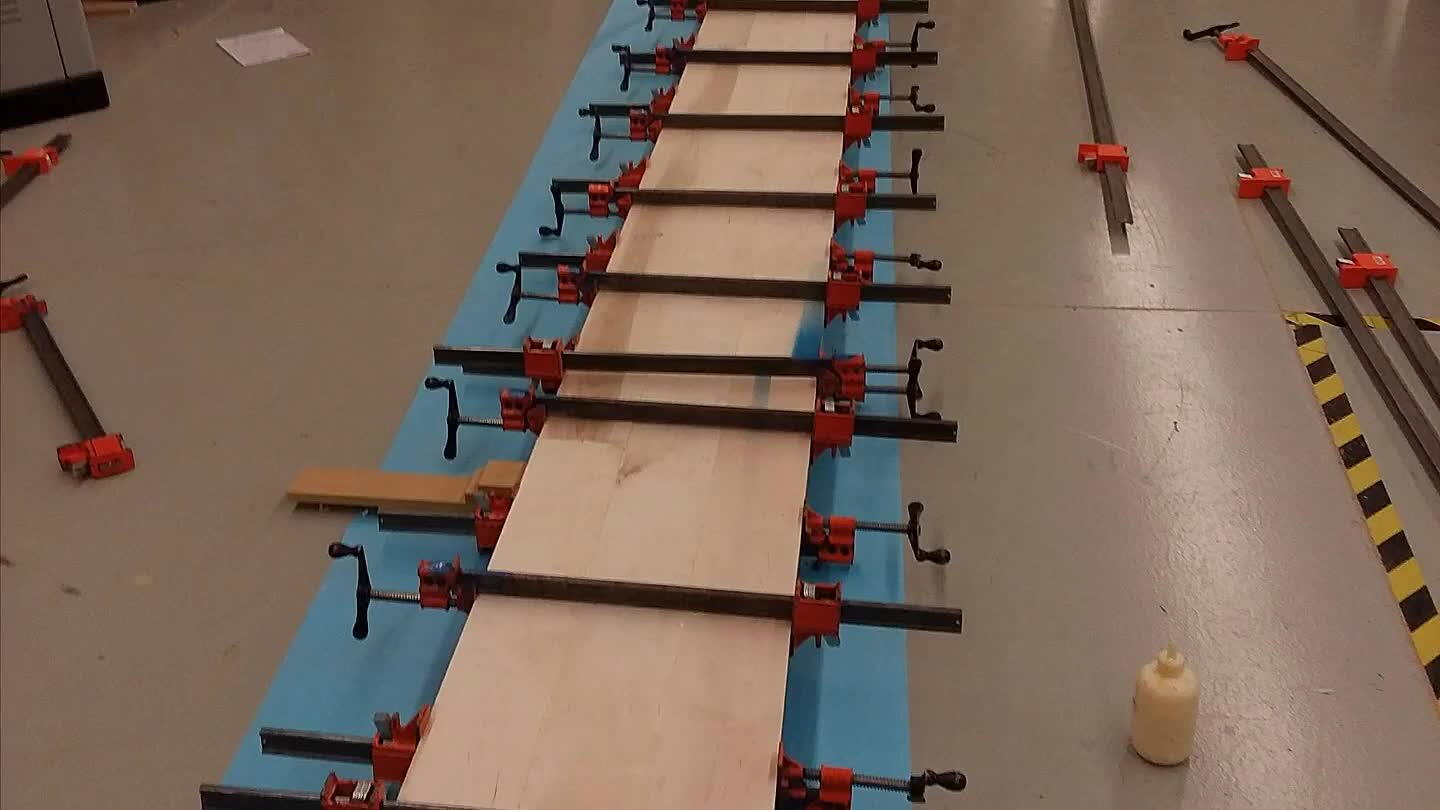
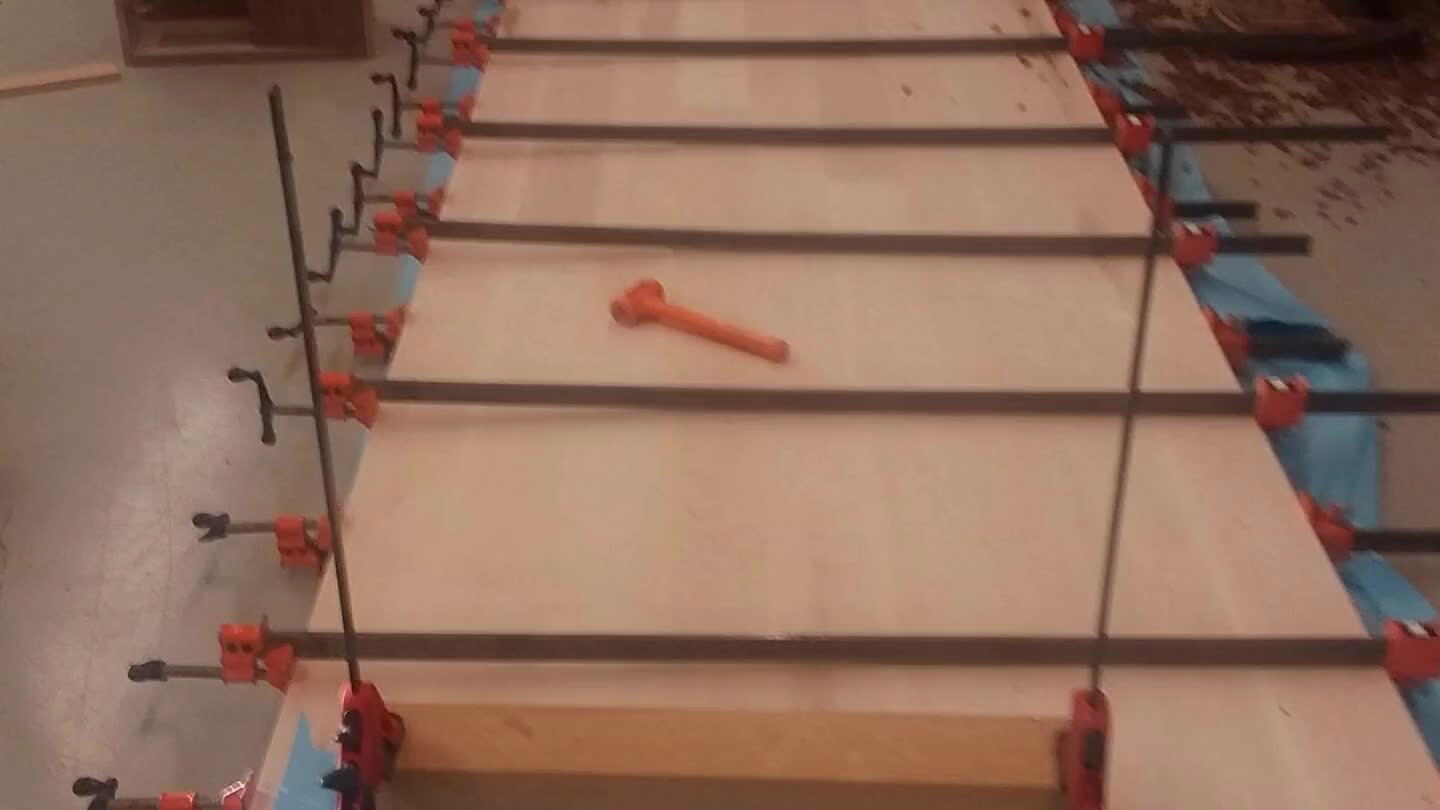
This is 1/3 of the top. Since I had to put it thru the planner and wide belt sanded still I had to do it in 3 peices so it would fit
4
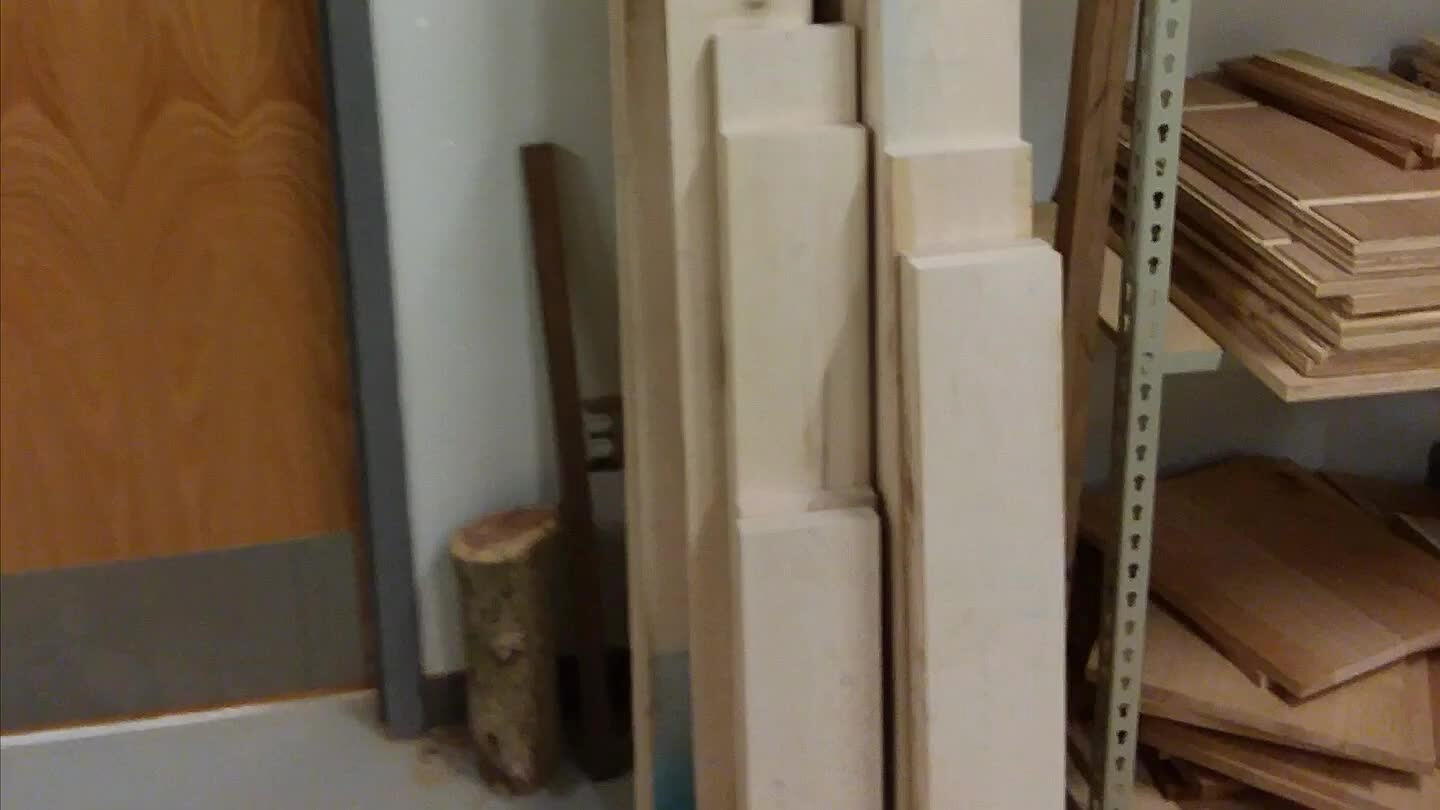
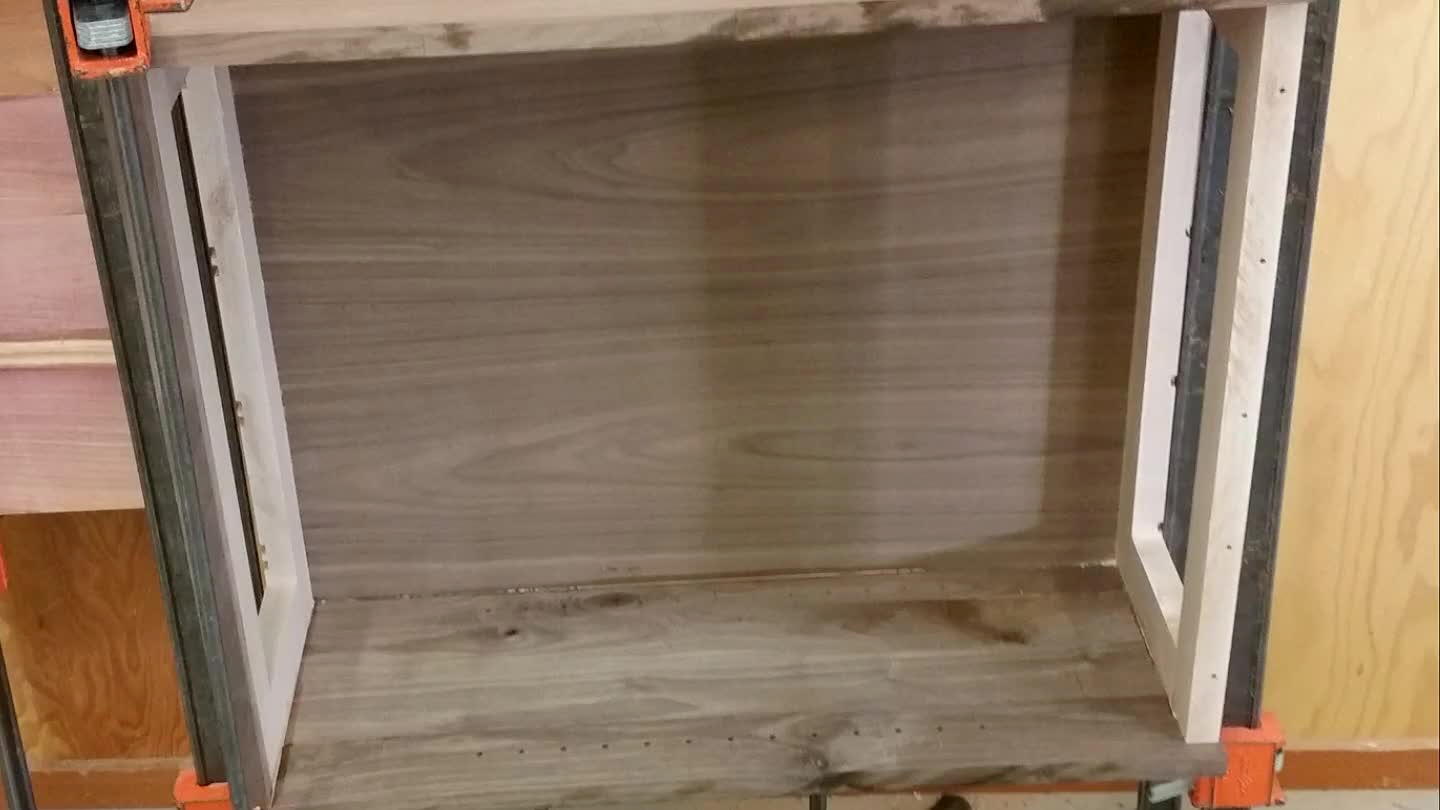
While waiting for the glue to dry I moved onto the Walnut legs. We decided to do some parts real Walnut and some parts plywood sheeting. I also built some web frames to keep it straight.
5
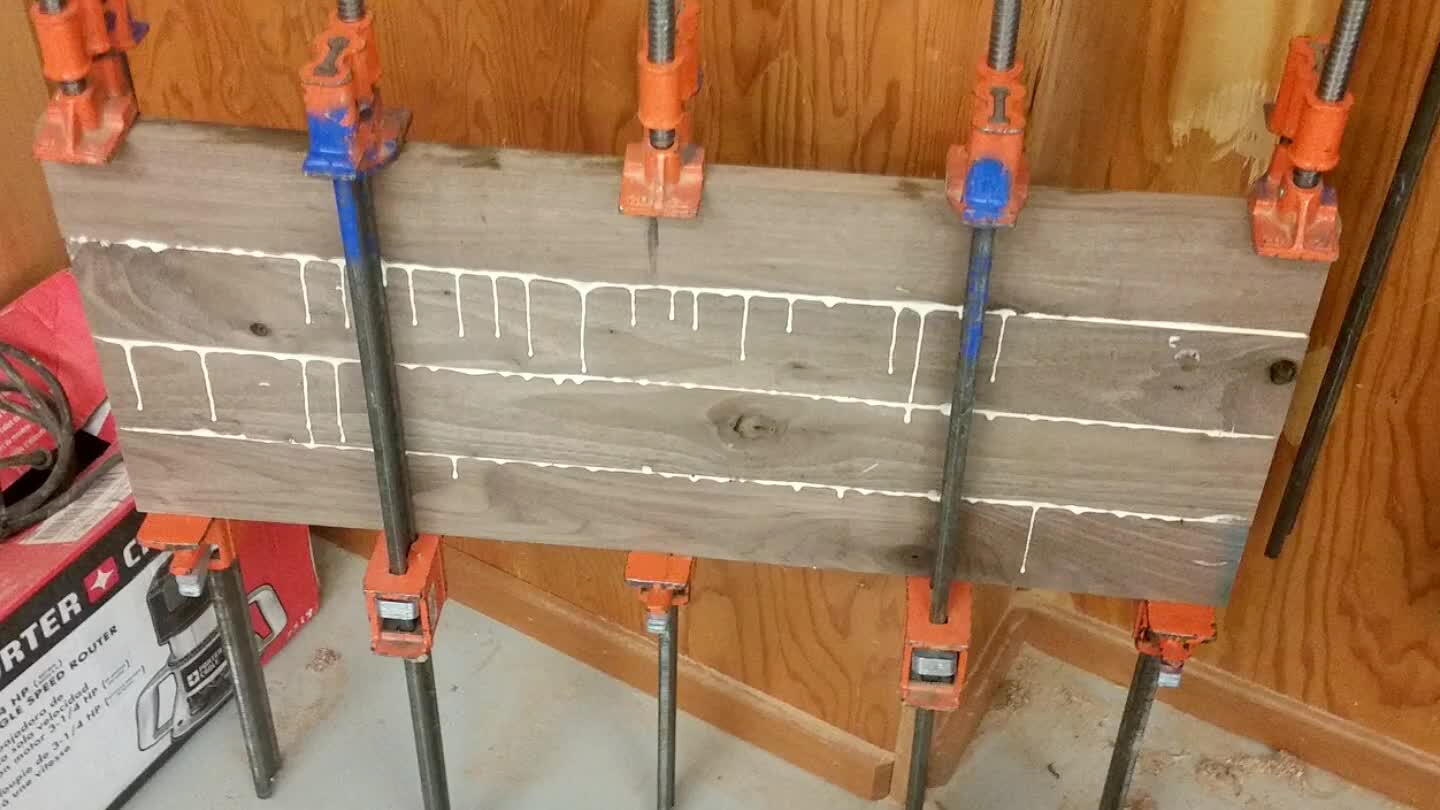
Once everything was cut to size I glued it up and used pocket screws to help keep it tight and strong.
6
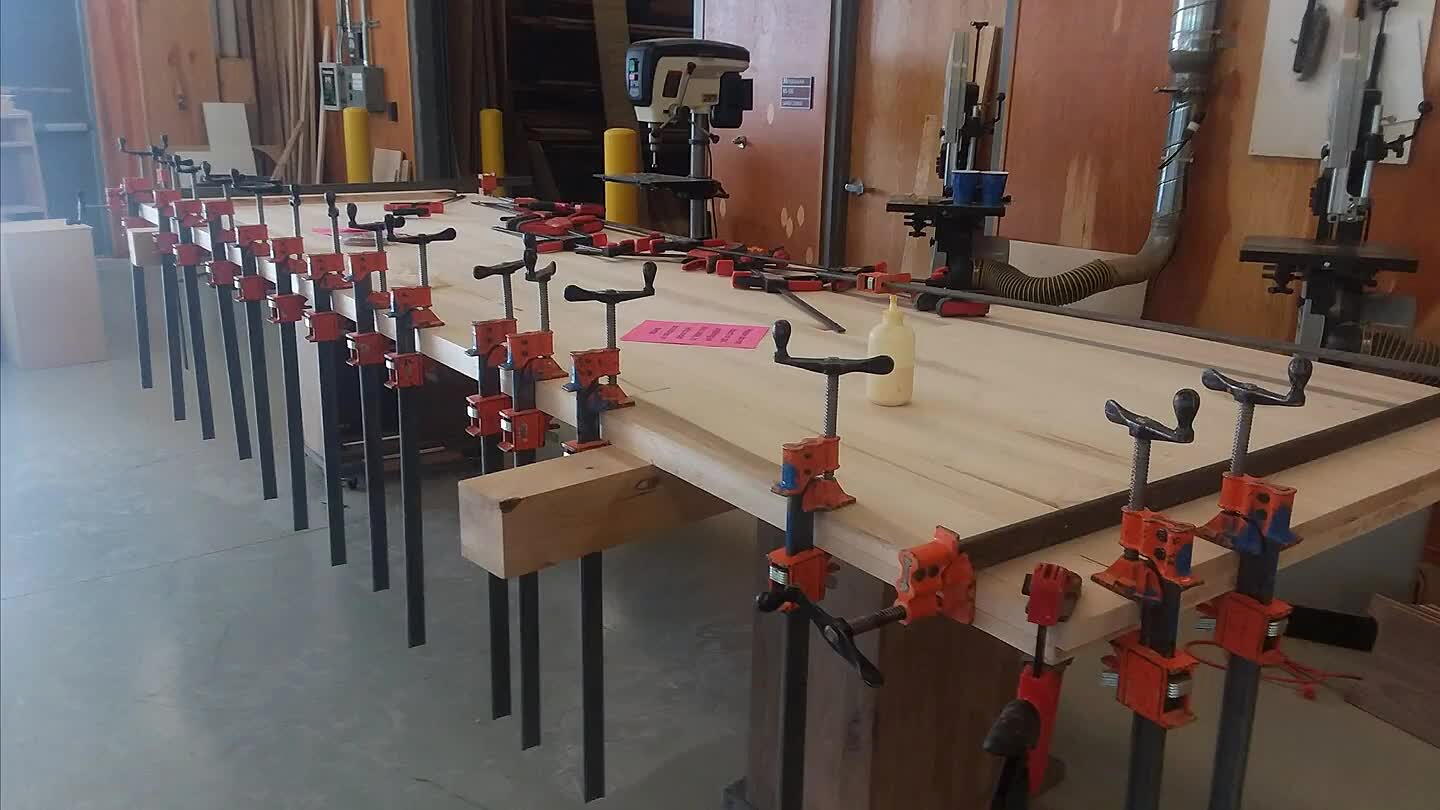
Now that the legs were finished I decided to glue the 3 peices together after planning and sanding I used a lot of Domino's on this step for strength and also a ton of clamps!
7
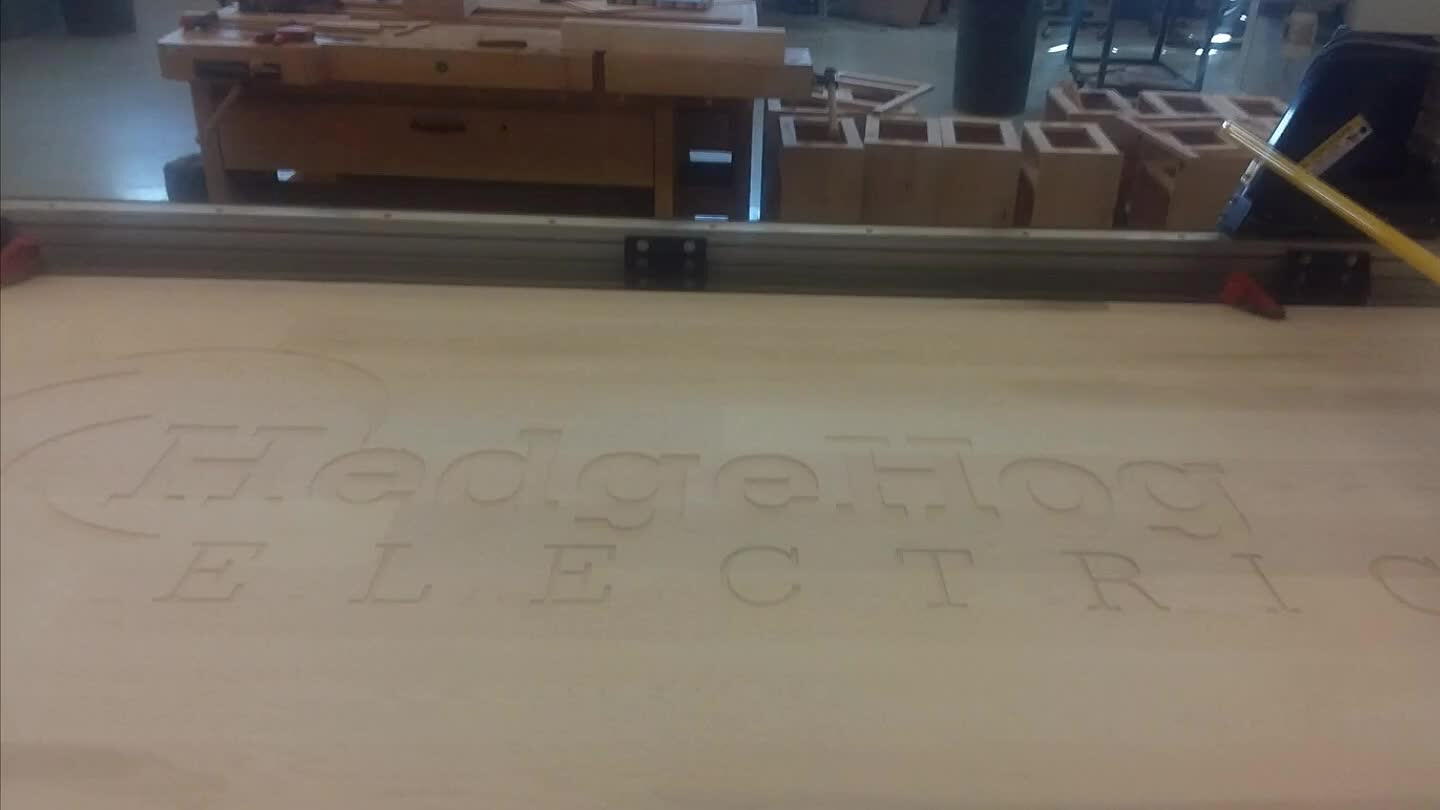
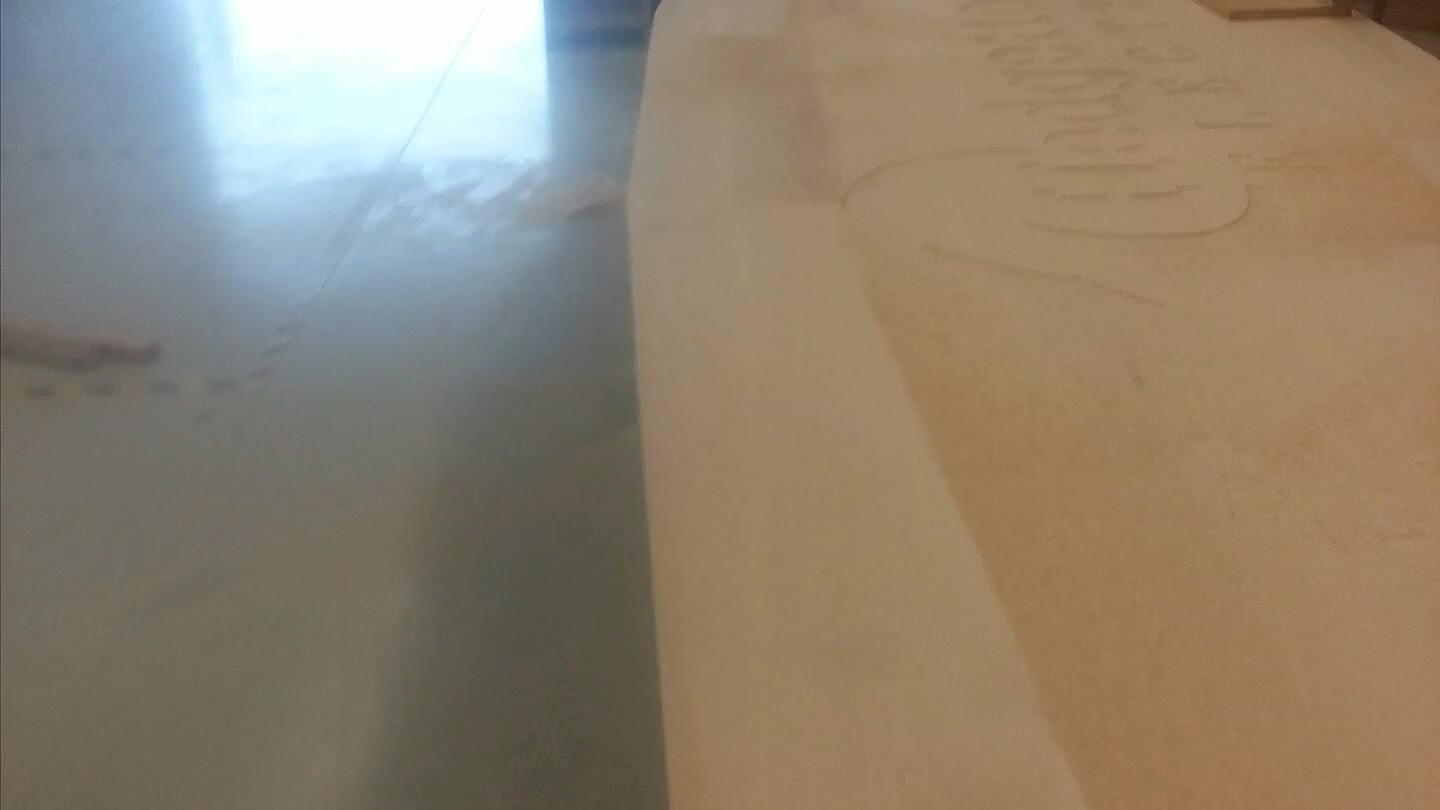
This part was my favorite! We haulled the table on the the CNC machine and engraved the logo for Hedgehog Electric into it! It was so awesome to see it!
8
Now that the top was almost done I made an extra strip to make the table look 2 inches thick not 1 and then I sanded to top a TON!
9
Next I cut some angles on the sides going 4.5 inches from the side and 5 feet from the end to help give it a little more character
10

Next I made the cable tray to go from one leg to the next and I attached it to the bottom of the table with some extra supports to help keep the table straight.(legs aren't attached yet)
11
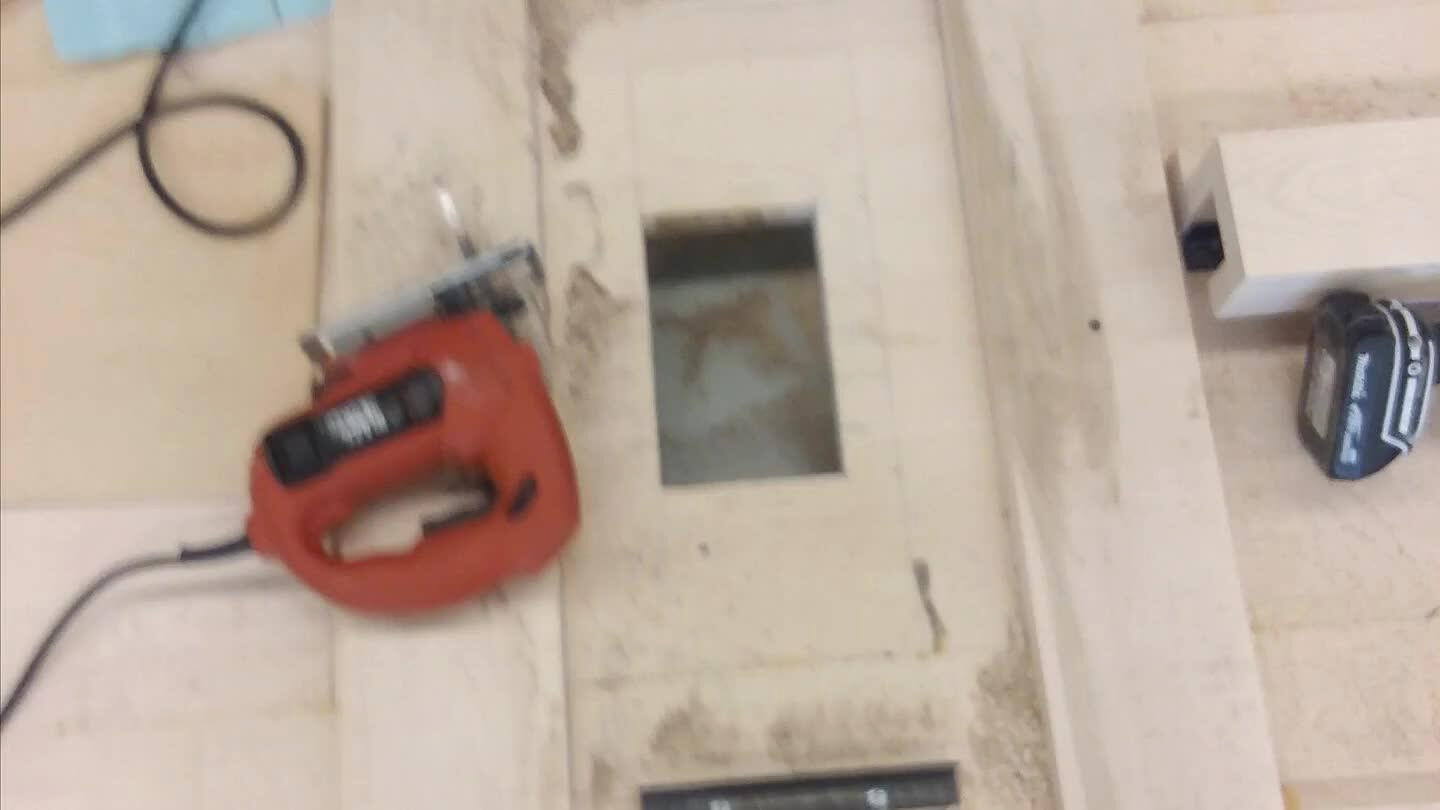
Now I cut holes for the cable plugs to connect to so they have power and you don't have to see a ton of cords on top of the table.
12
Then I stained the legs so they would be a darker color and contrast the top a little more.
13
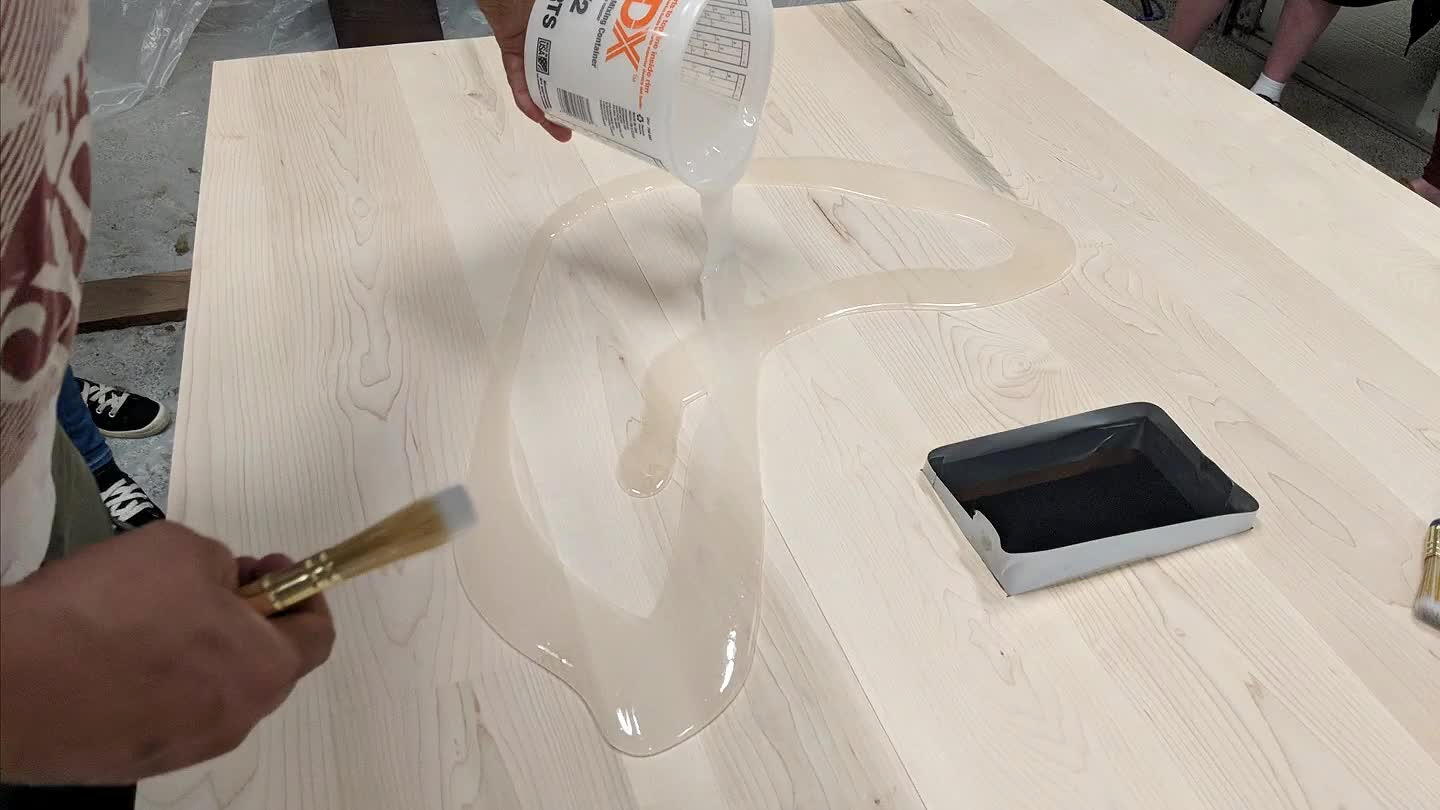
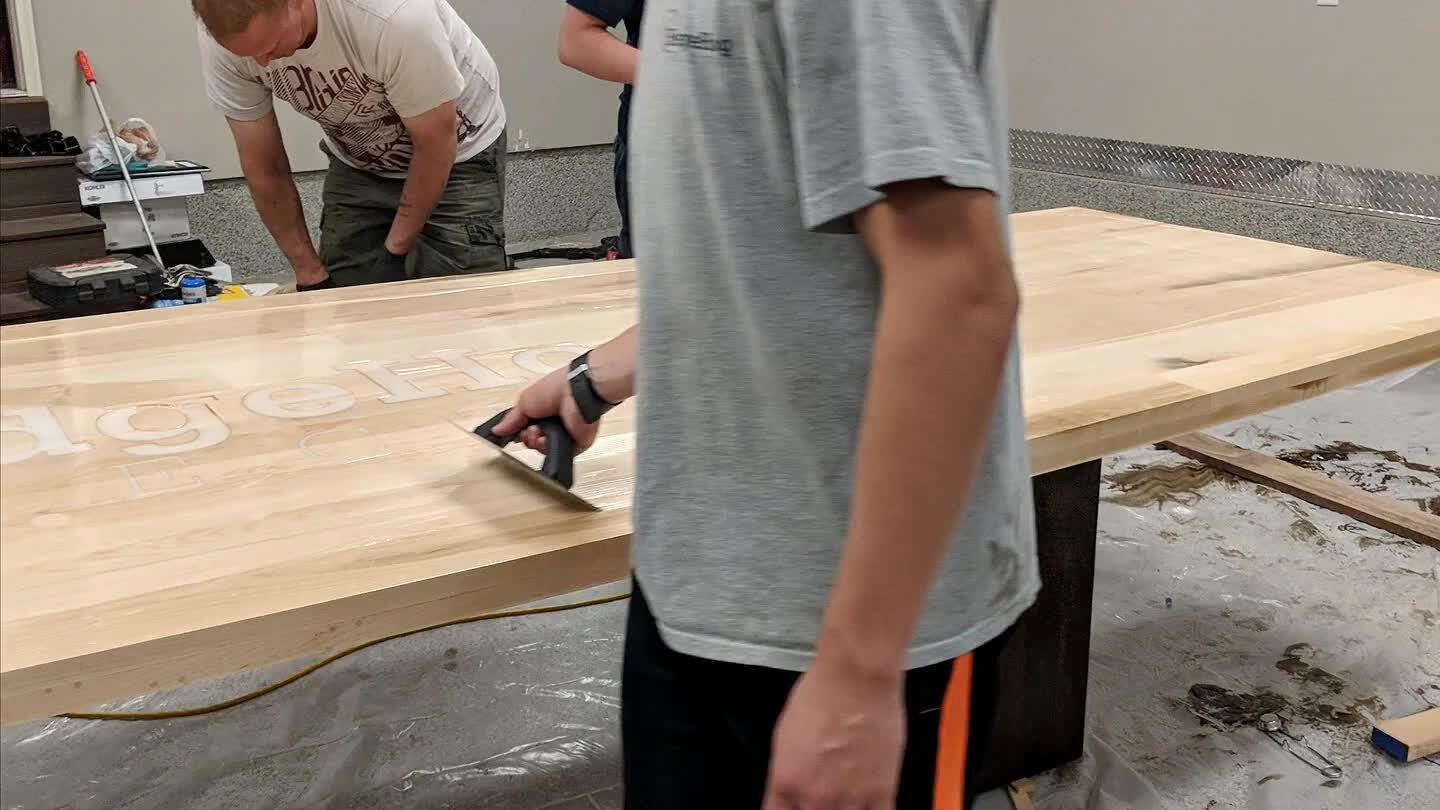
After that we spread Stone Coat epoxy over the top of it and created a seal between the wood and epoxy so we would get less air bubbles.
14
After the first coat you get less air bubbles so you can dump a lot more on and then just make sure it is all flat we used a couple 1/8 inch towels to help keep it flat and what is left self levels
15
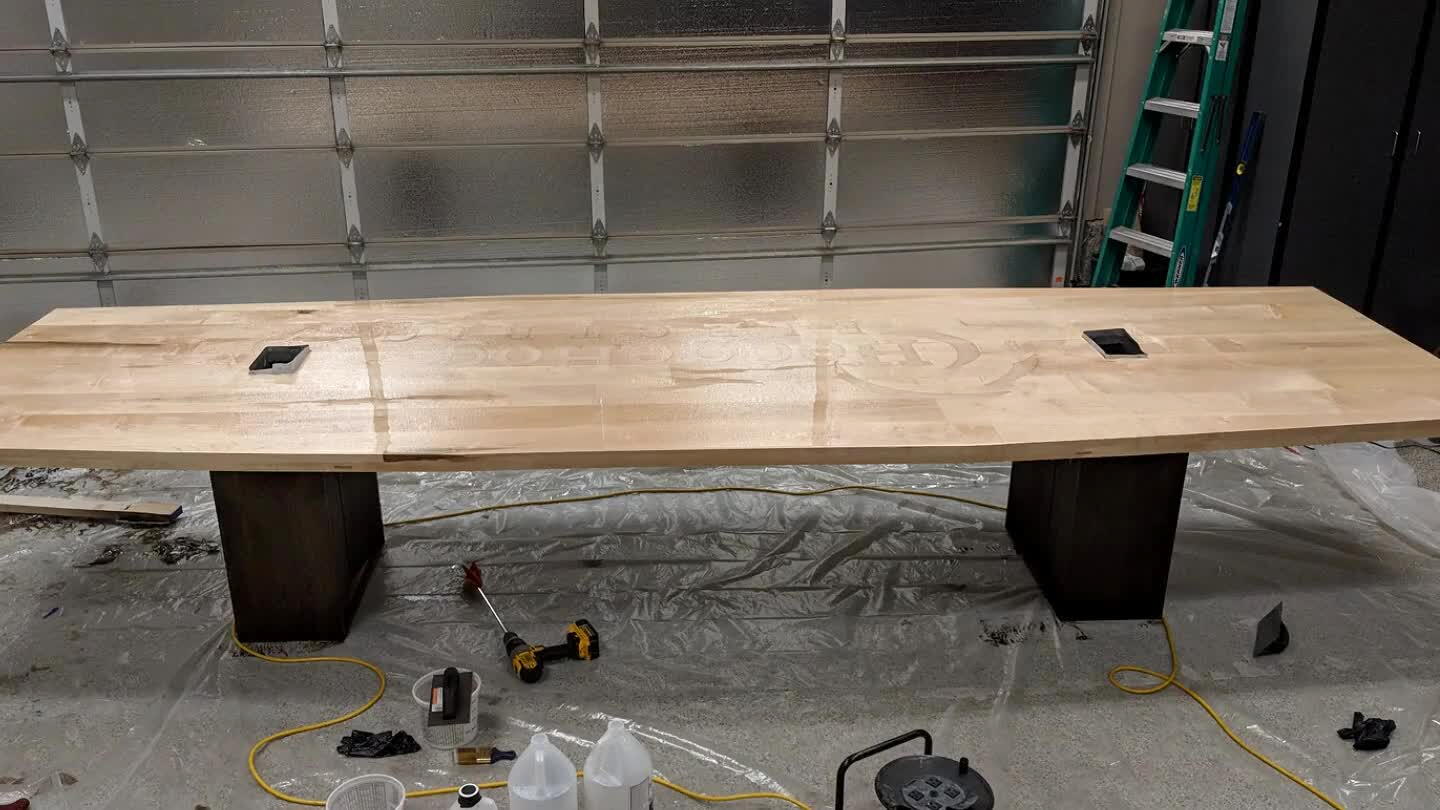
This is what the top looks like right now it still has to dry for 2 more days before it is at maximum cure.
Comments