
Sliding Walnut Barndoor
Sliding barn door for our master bathroom.


40" x 86" x 1" walnut door from 50yr walnut lumber stacked in local barn. To keep this old vintage look, I kept some of the circular saw marks and used square nails from Tremont.
What you will need
Walnut lumber
Woodworking tools: planar,Table saw, clamps, drill, chisel, tape measure, square
Square nails
Sliding door hardware - buy on-line
Sand paper
How to do this project
1
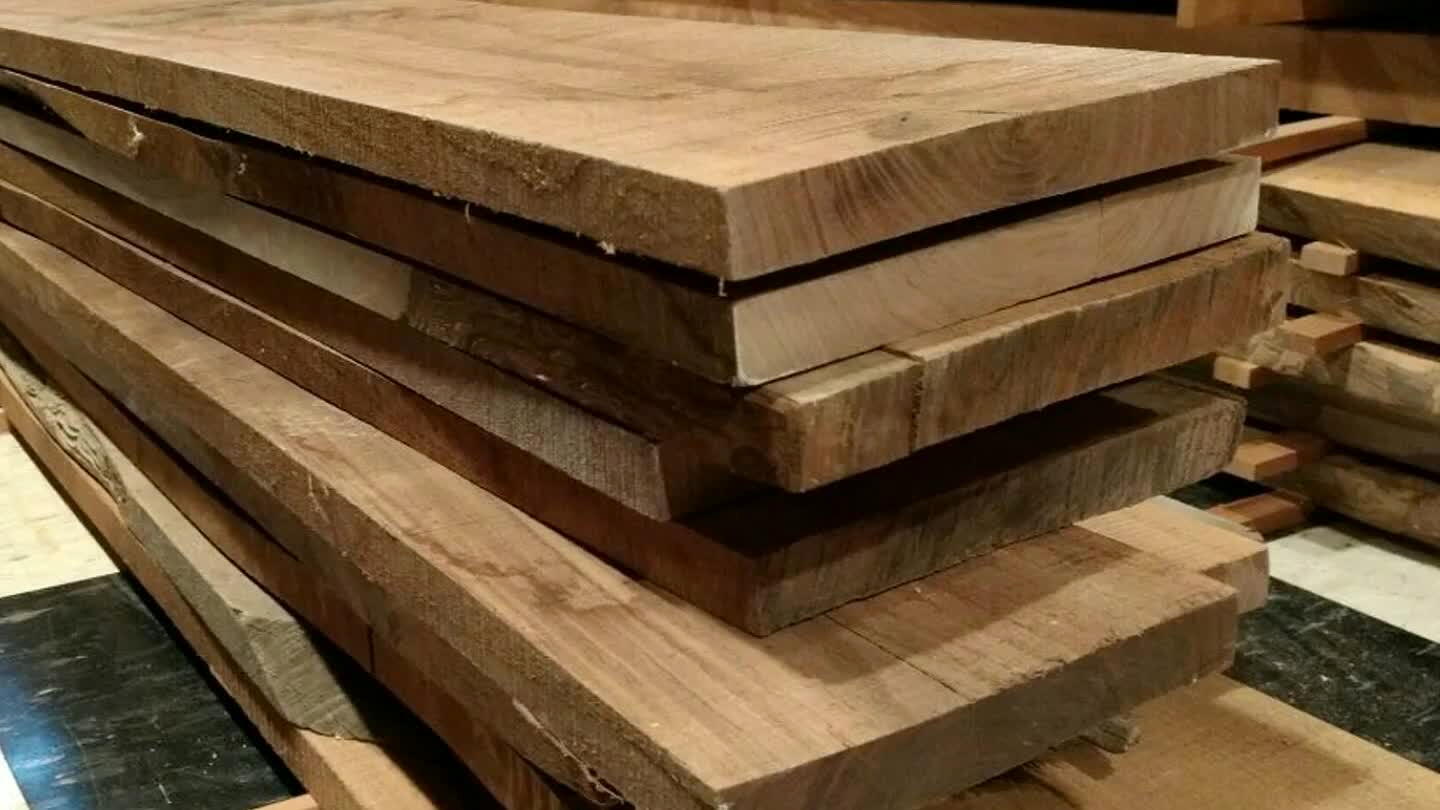
Buy enough wood. If you do not have wood working tools, buy it already prepped (planed, cut to size) at a local hardwood lumber store. Remember both sides of door will be visible.
2
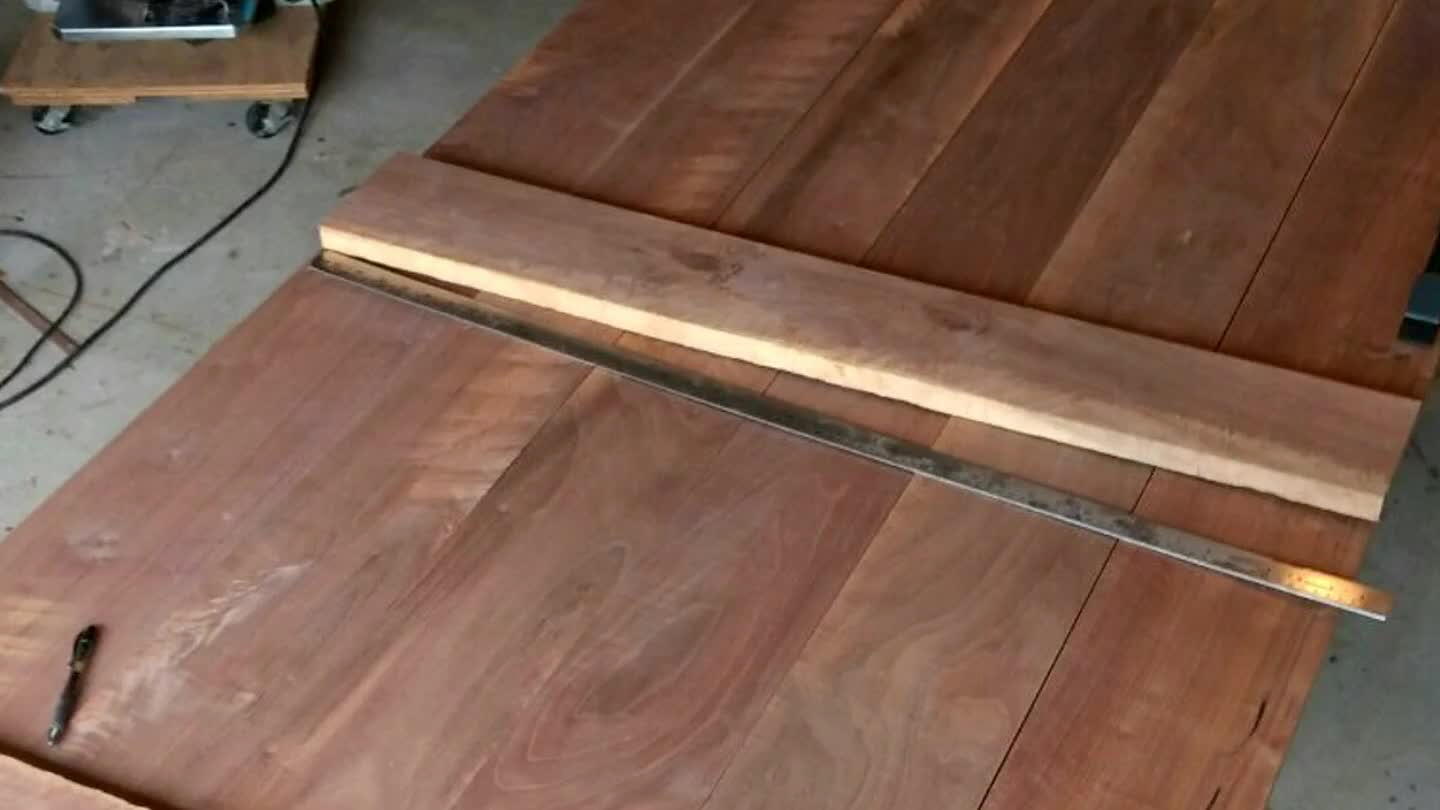
Plane, cut, and layout door prior to gluing.
3
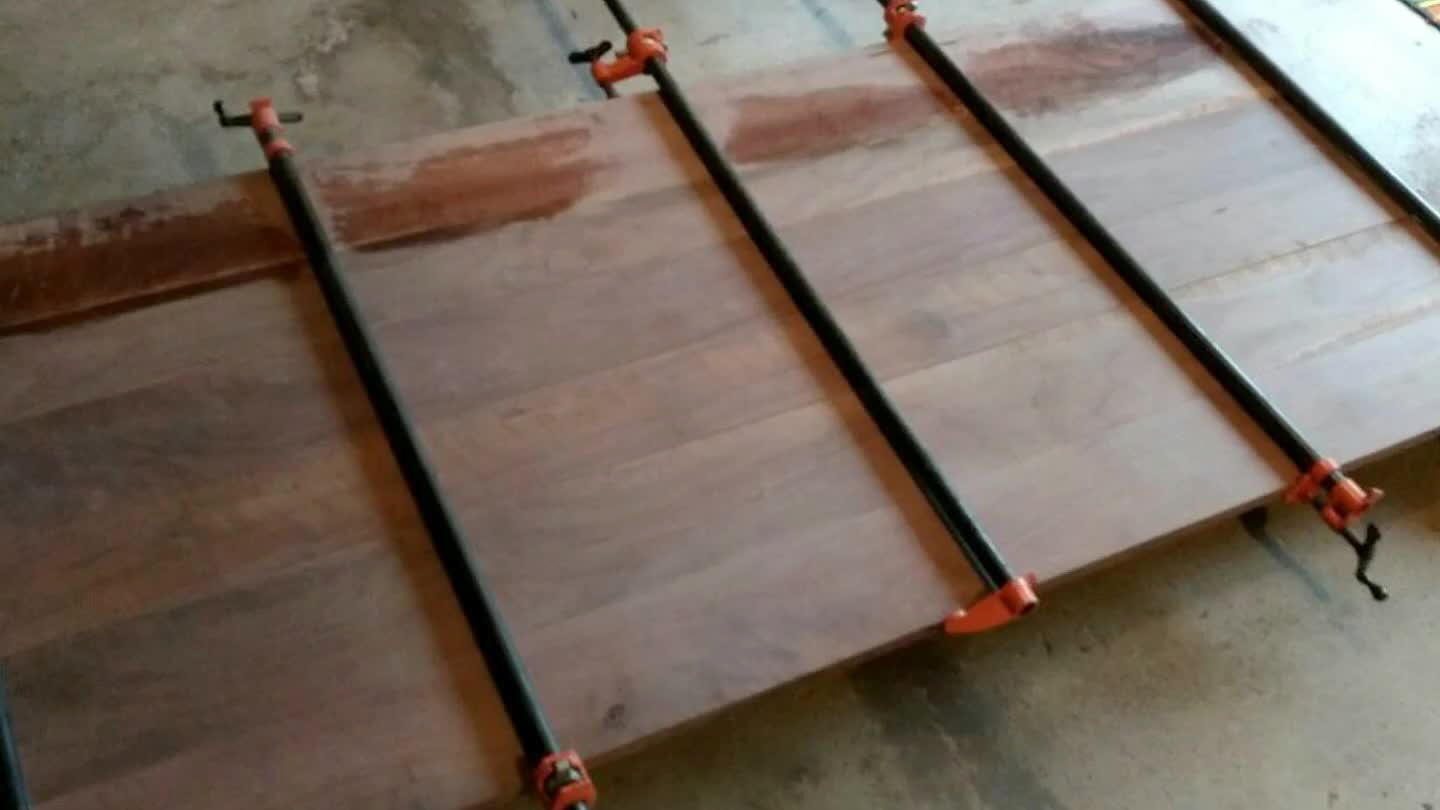
Glue up and clamp. Get ready to sand down to 180 grit.
4
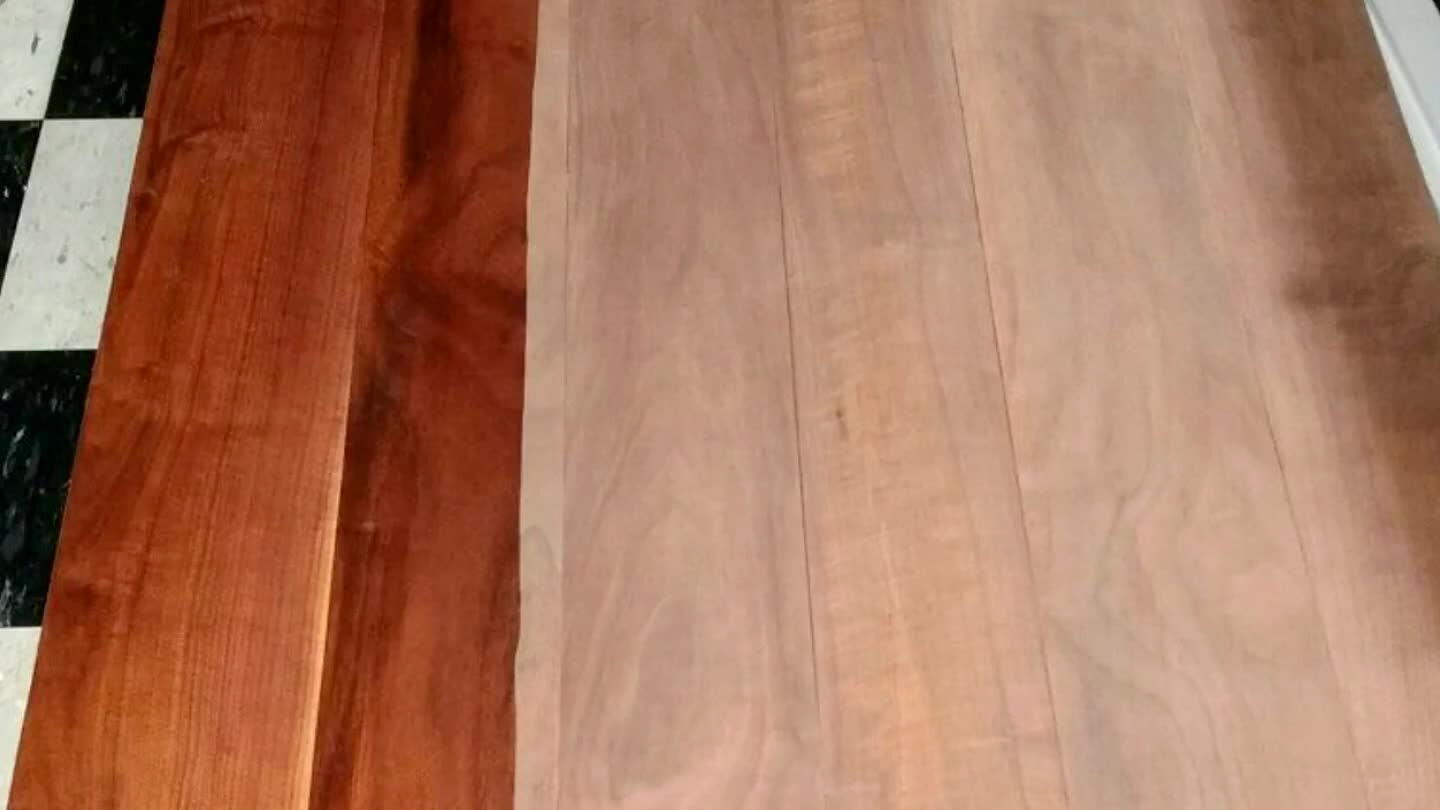
Apply three coats urethane. I prefer General Finishes satin.
5
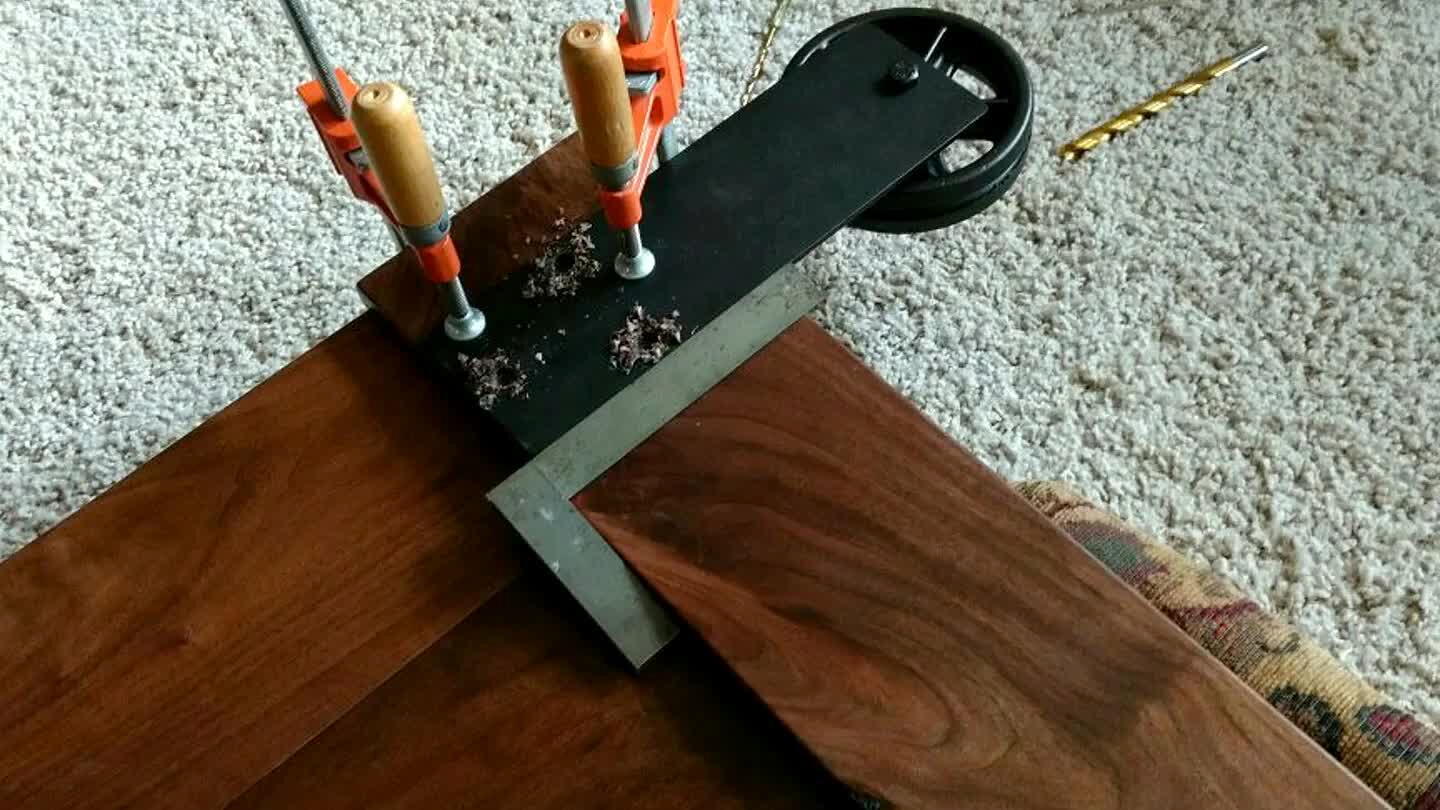
Attach roller hardware. Every kit is different, just need to follow their steps. I purchased this one from Artisan Hardware.
6
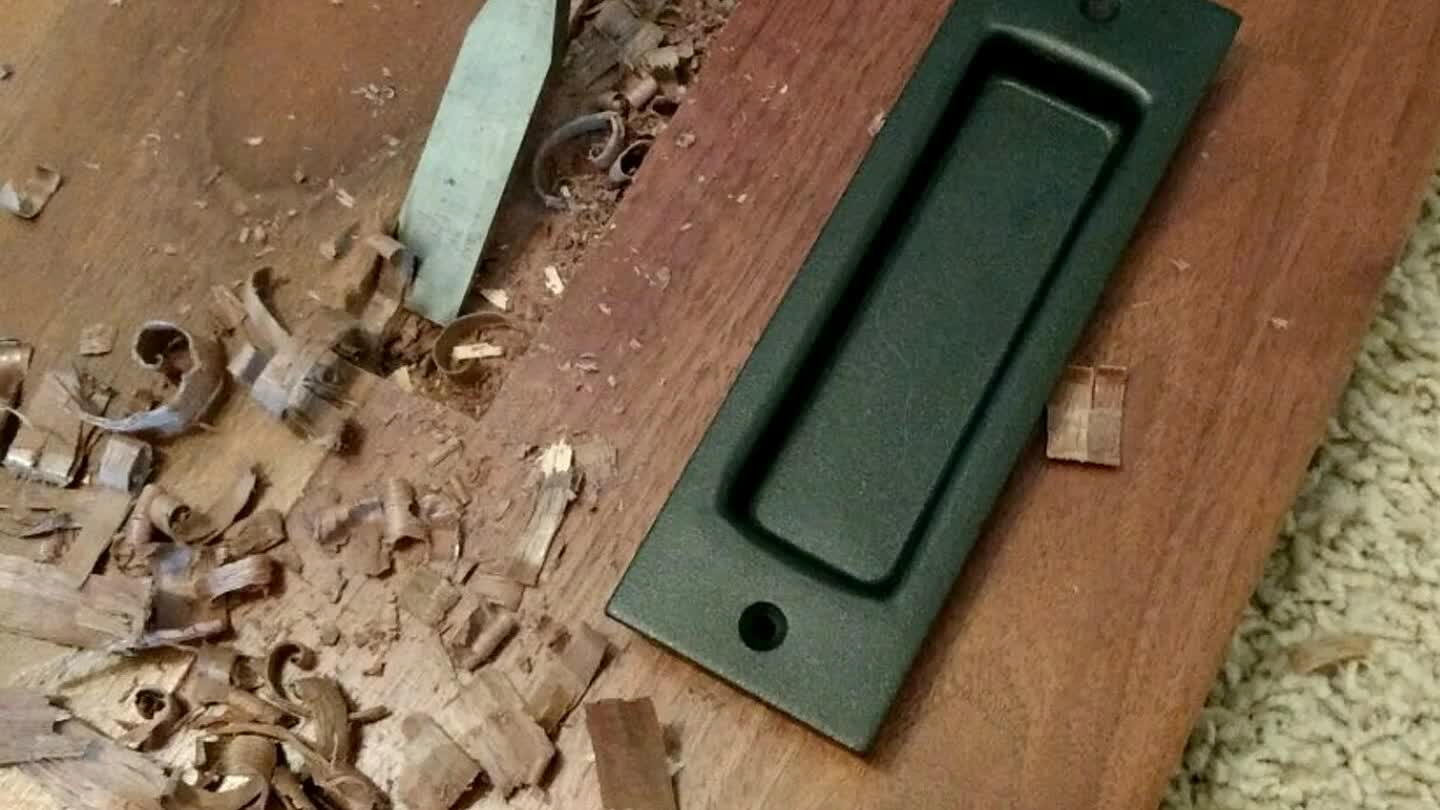
Chisel in a pocket for the drawer pull. This one measures 38" to bottom of floor.
7
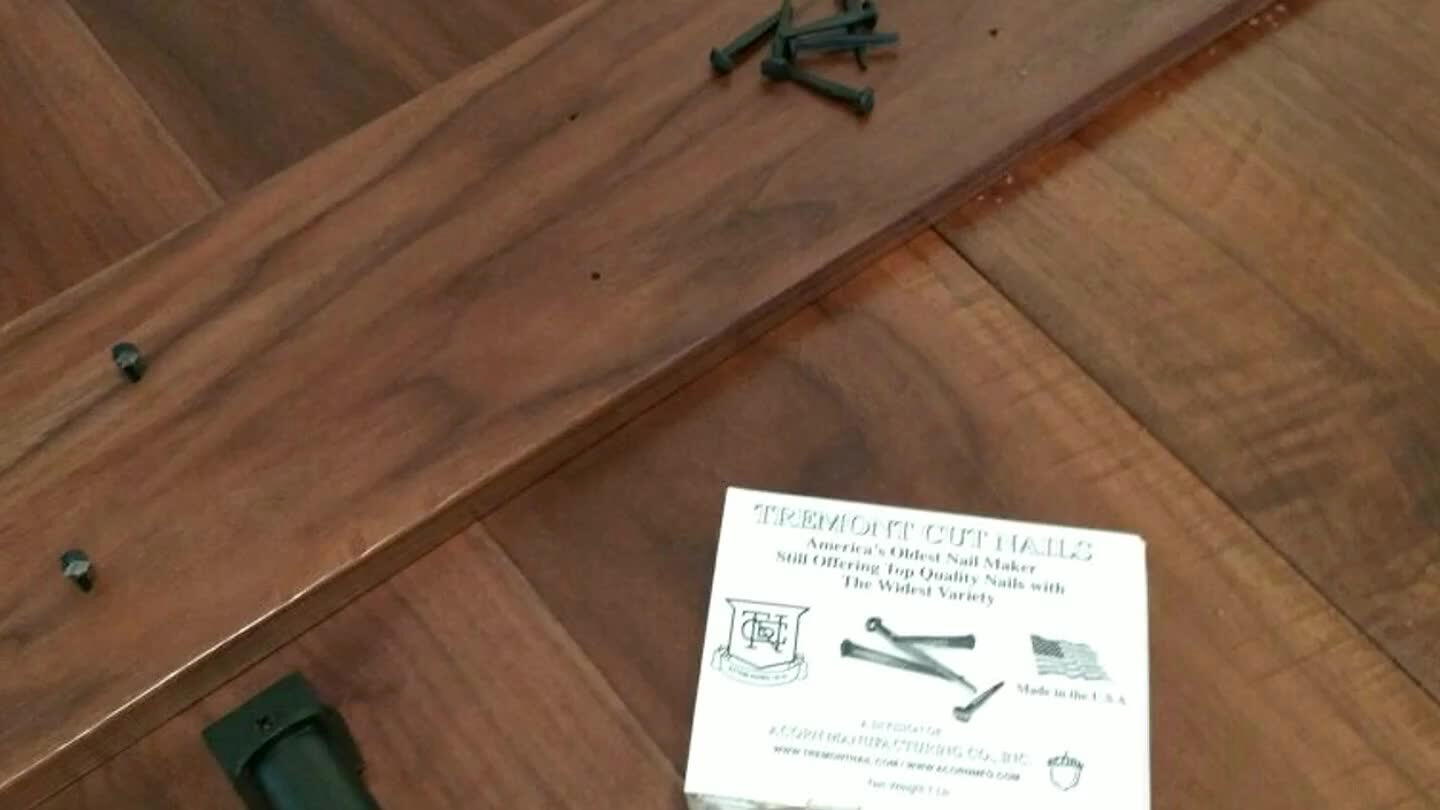
Add handle and cross pieces. I used square nails to attach the three cross pieces for decorative detail. The bottom cross piece has a notch cut into it for the guide rail to keep the door vertical when sliding open/close.
8
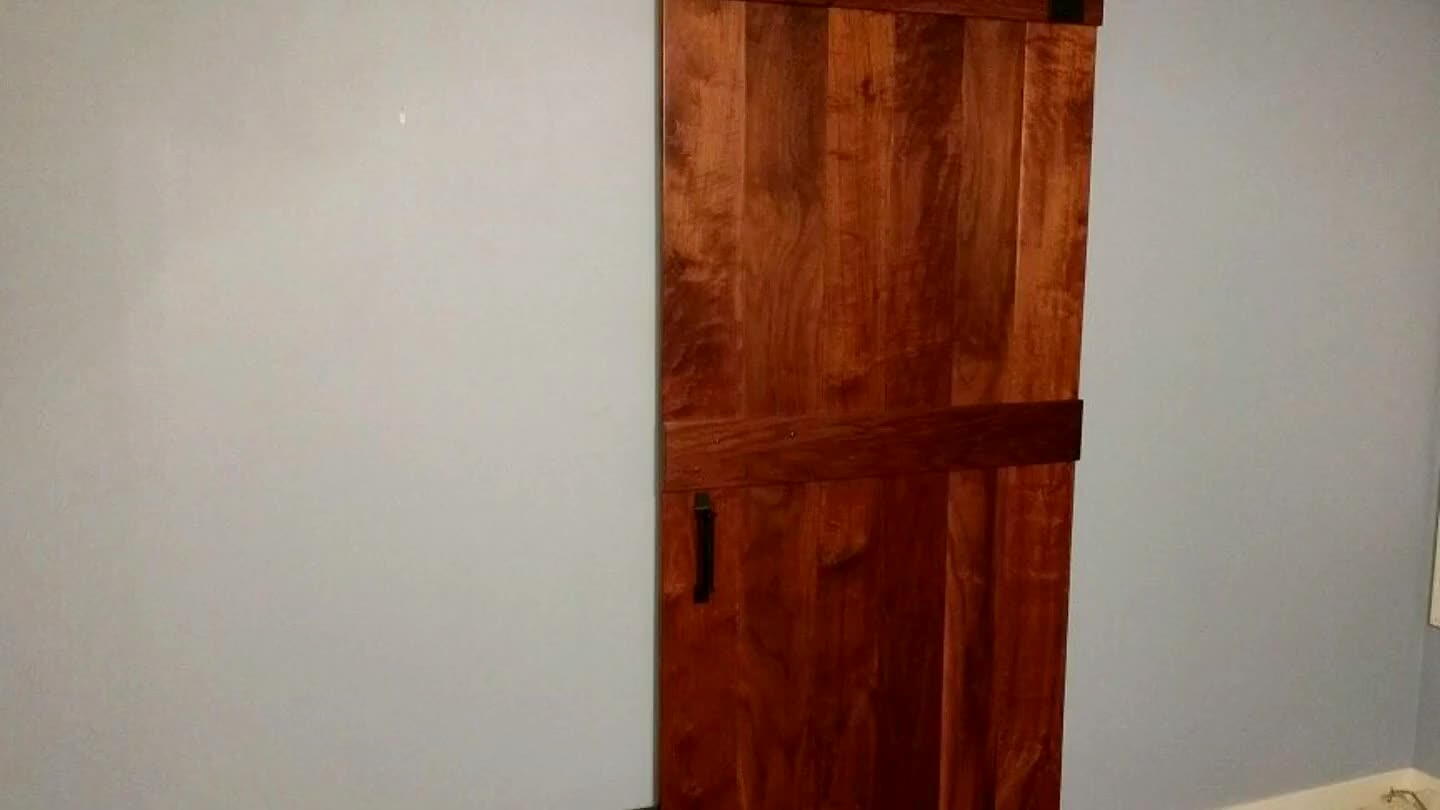
Hang door. Done.
Comments