
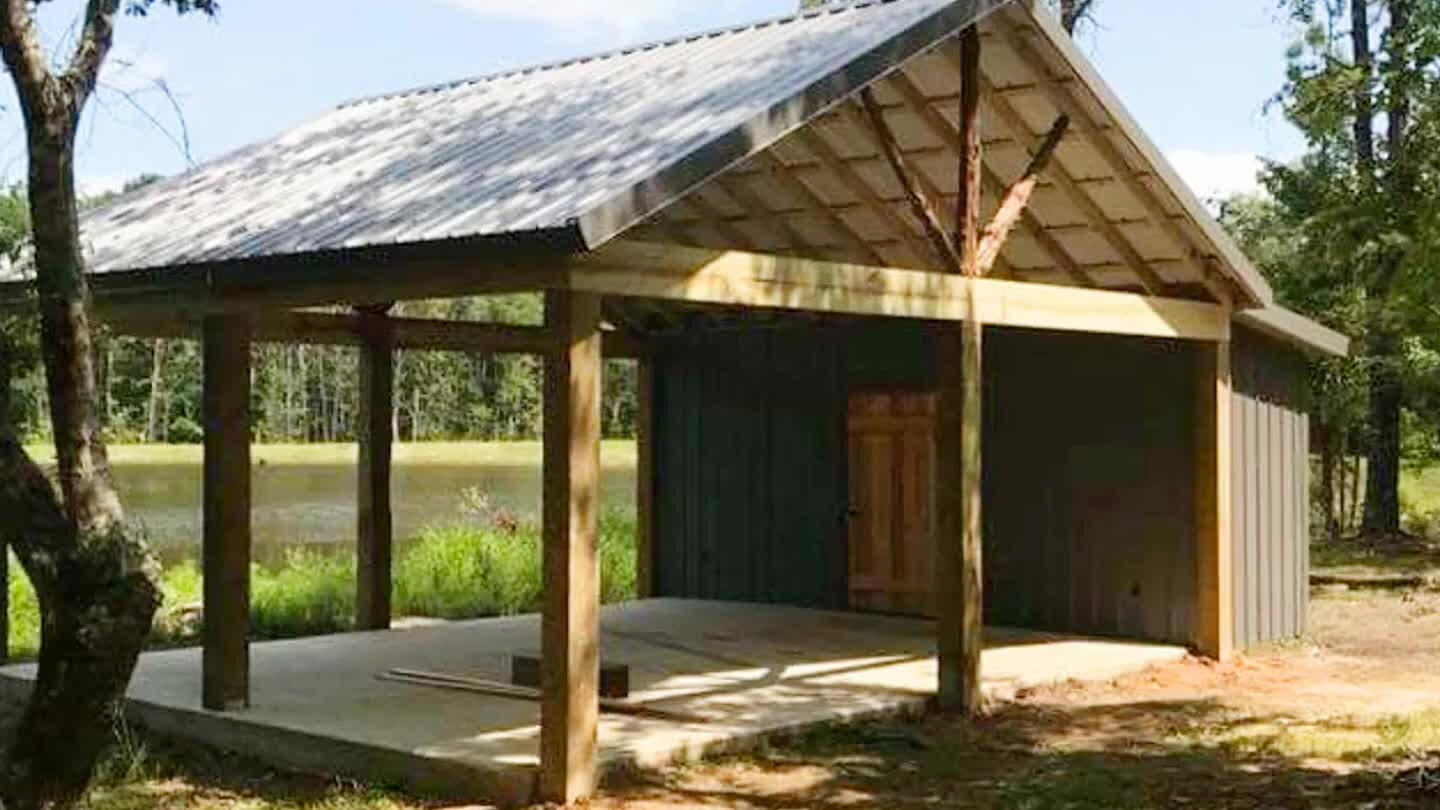
Stick Built Pole Barn


This is a prime example of why I enjoy building. The craftsmanship that went into this barn made the finished product an accomplishment.
What you will need
8x8 posts
2x6 rafters and fascia
2x6 "studs"
2x10 headers
1x4 purlins
1x6 cedar
rough cedar logs
roofing panels
concrete
How to do this project
1

The first thing that must happen when a pole barn is erected is layout. We drove stakes to hold our batt boards while we got our layout correct.
2
After the layout is complete, the digging starts. We were fortunate enough to have an auger. Anytime a powertool can be utilized, it should be utilized. Without the auger, we wouldn't have finished setting posts.
3

Once the concrete has cured, all posts get cut off at a uniform height. The posts are then notched to make room for the header. Once the headers are installed, it's on to the rafters and purlins.
4

Next comes drip edge, which keeps water from draining onto the fascia. The roofing panels go on to almost finish the canopy. We then move to the enclosed storage space. We frame an opening for the handmade door, and we frame bands horizontally at a 2' layout. This is what the siding panels are going to screw to. Before we can install panels, there is a piece of trim called a "rat gaurd" that installs at the bottom of the wall. The siding panels can go up at this point.
5
After the siding panels have been installed, we turn our focus to the trim. There are three cedar logs sweeping up to the peak, rake trim dressing the fascia, and ridge metal capping the barn.
Comments