
Walnut & Aluminum Clock
Large Center Piece Wall Clock 37"×47"


What you will need
Safety Gear
Eye Protection
Hearing Protection
Materials
1" thick Walnut wood slab
7' of Aluminum round rod 1/2" diameter
Polishing compounds for aluminum
17.5" Clock hands
High torque clock motor
Aluminum spray paint
Aluminum flat bar 3/4" x 1/8"
Tools
Table saw
Miter saw
Planner
Jointer
Drill press or drill guide
Angle grinder w/ cutoff, grind, & buffing disks
Router w/ chamfer bit
Tape measure, combo square
Disk sander
Orbital sander
Wood glue
Various size clamps
Finish
How to do this project
1
Cut walnut down on table saw into 2.25" wide slats. On the miter saw cut slats down to size. (3) 37", (4) 31", (2) 25", (2) 19", (2) 13".
2
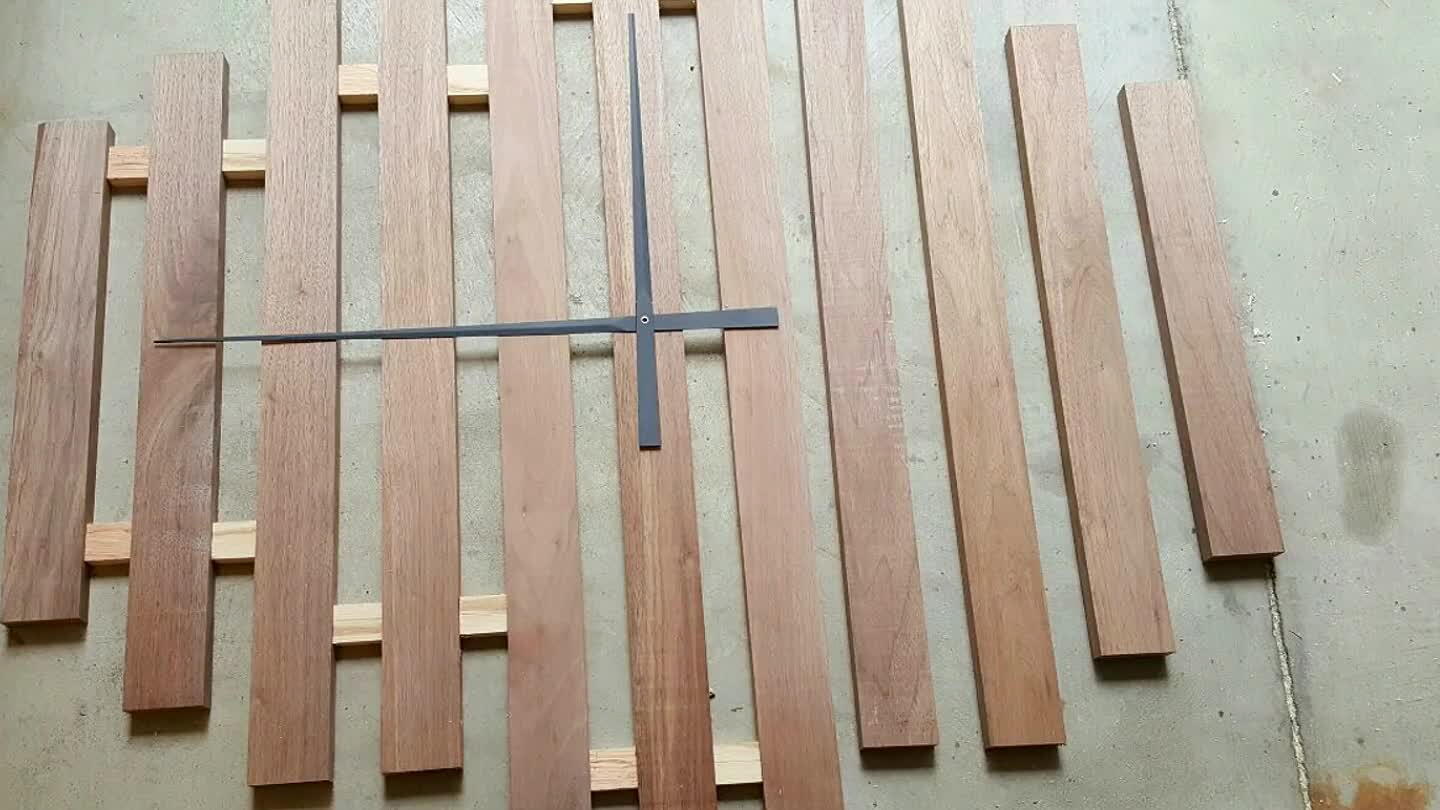
Lay out pieces to select the spacing you like. I spaced my pieces 1.5" apart. Nothing scientific. Its just looked right to me. You can see i made plywood spacers to help me with spacing.
3
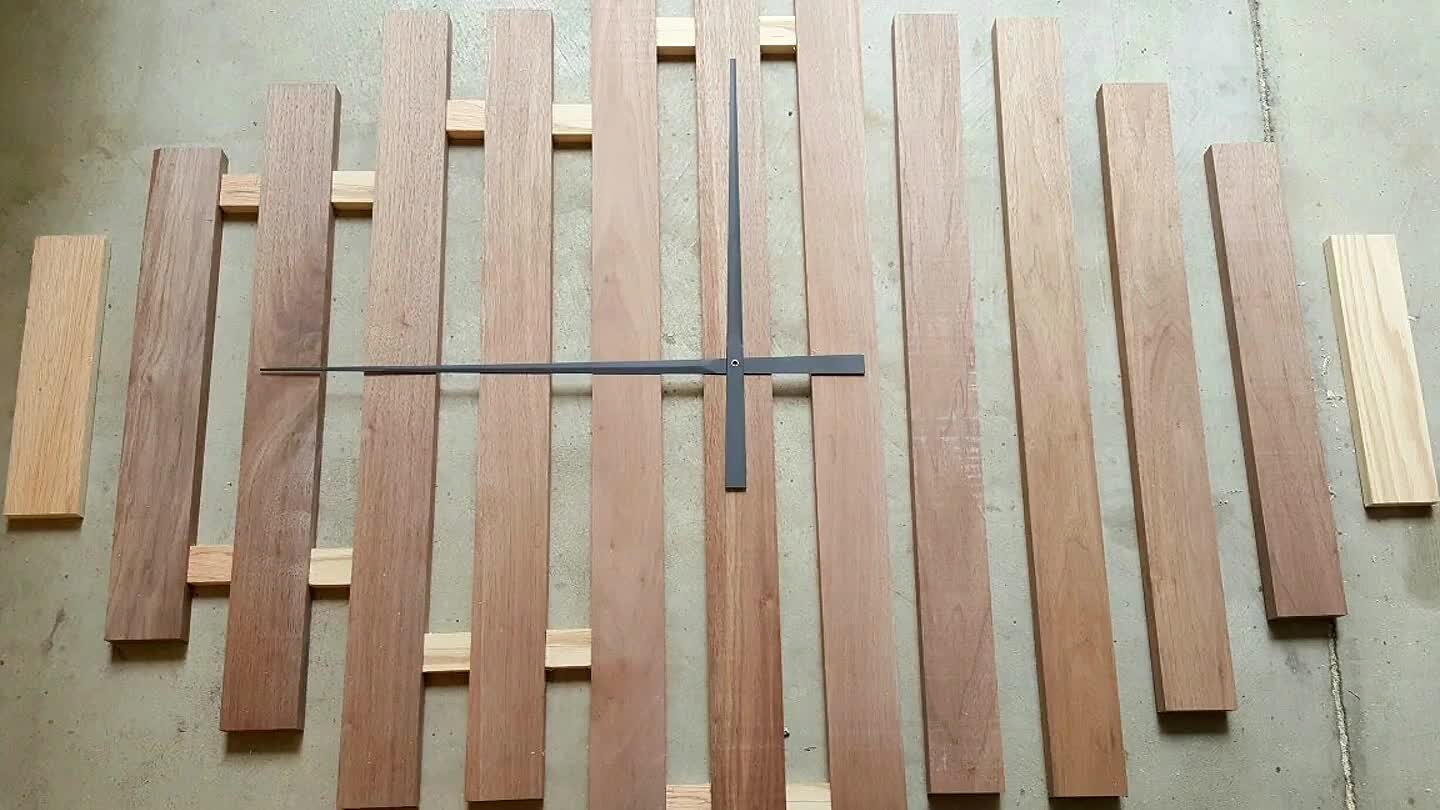
I didn't like the way it looked so I wanted to see what one more piece at the end would look like. I did this with scrap wood rather than cut more of the walnut. I already had another project planned for my walnut scraps. I liked the look of the clock being wider than taller.
4
Run all the cuts of walnut through the jointer and planner.
5

Cut 2 more walnut slates 9" long by 1.5" wide. Take to the disk sander and round the ends of each. You can see the two smaller pieces in the picture and how i shaped them.
6
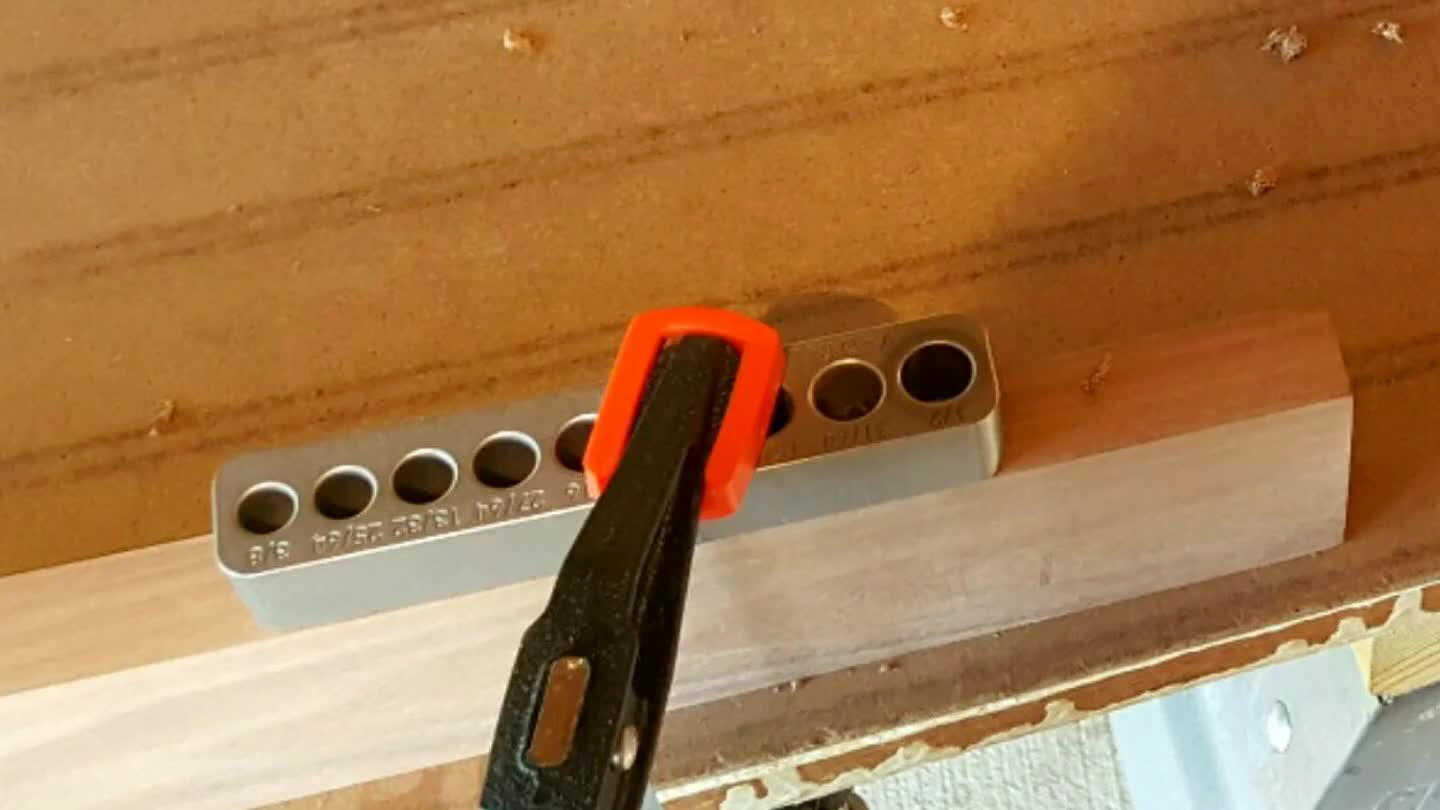
Drill 1/2" hole with drill press or drill guide to connect slats. See the pictures for location. Just make sure the hole is centered on the width. My drill press died the day i started this so i bought a drill guide and it worked extremely well.
7
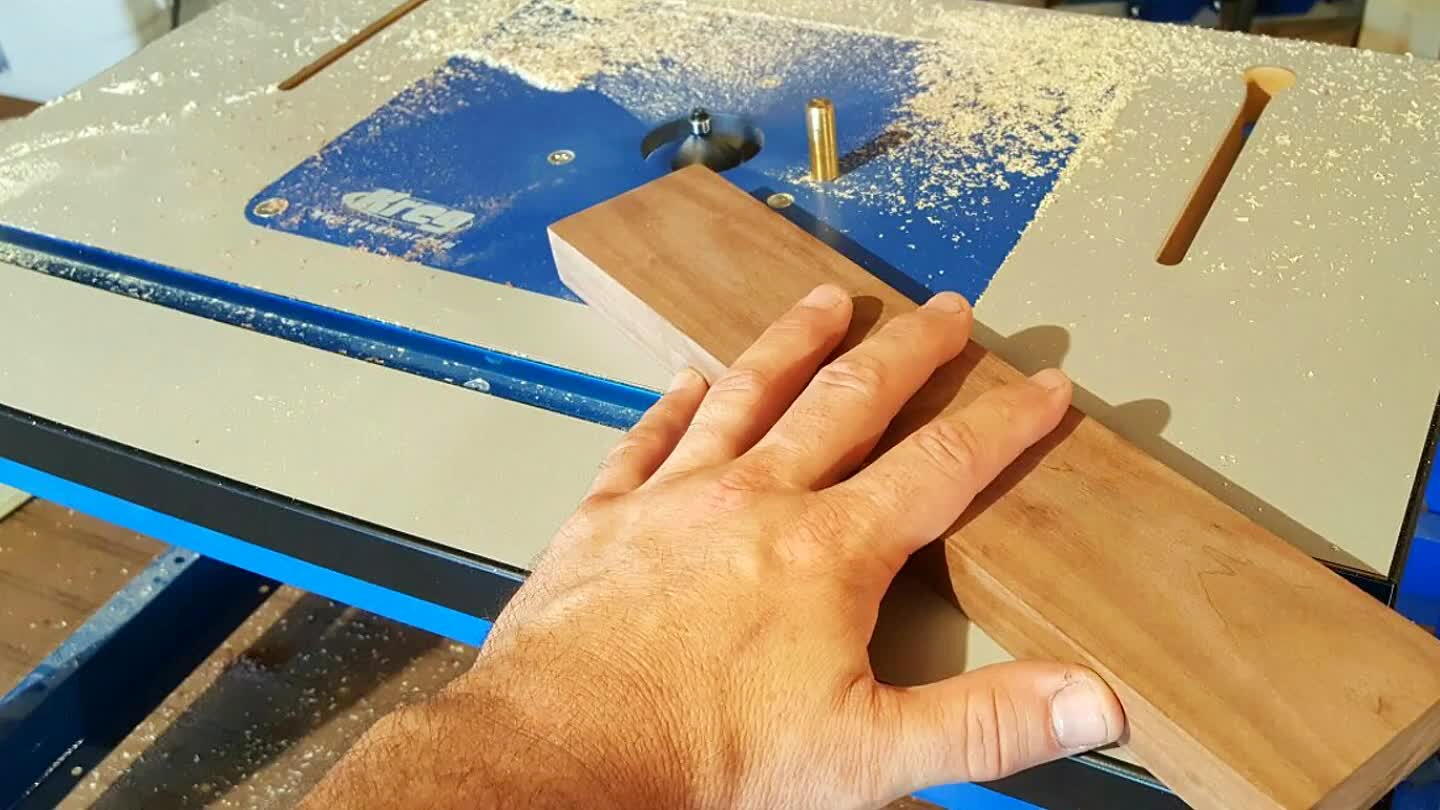
Take walnut slates to the router table and chamfer the edges.
8
Buff the entire aluminum 1/2" rod with compounds either with angle grinder or by hand. Much easier to do one big piece than a bunch of small pieces.
9
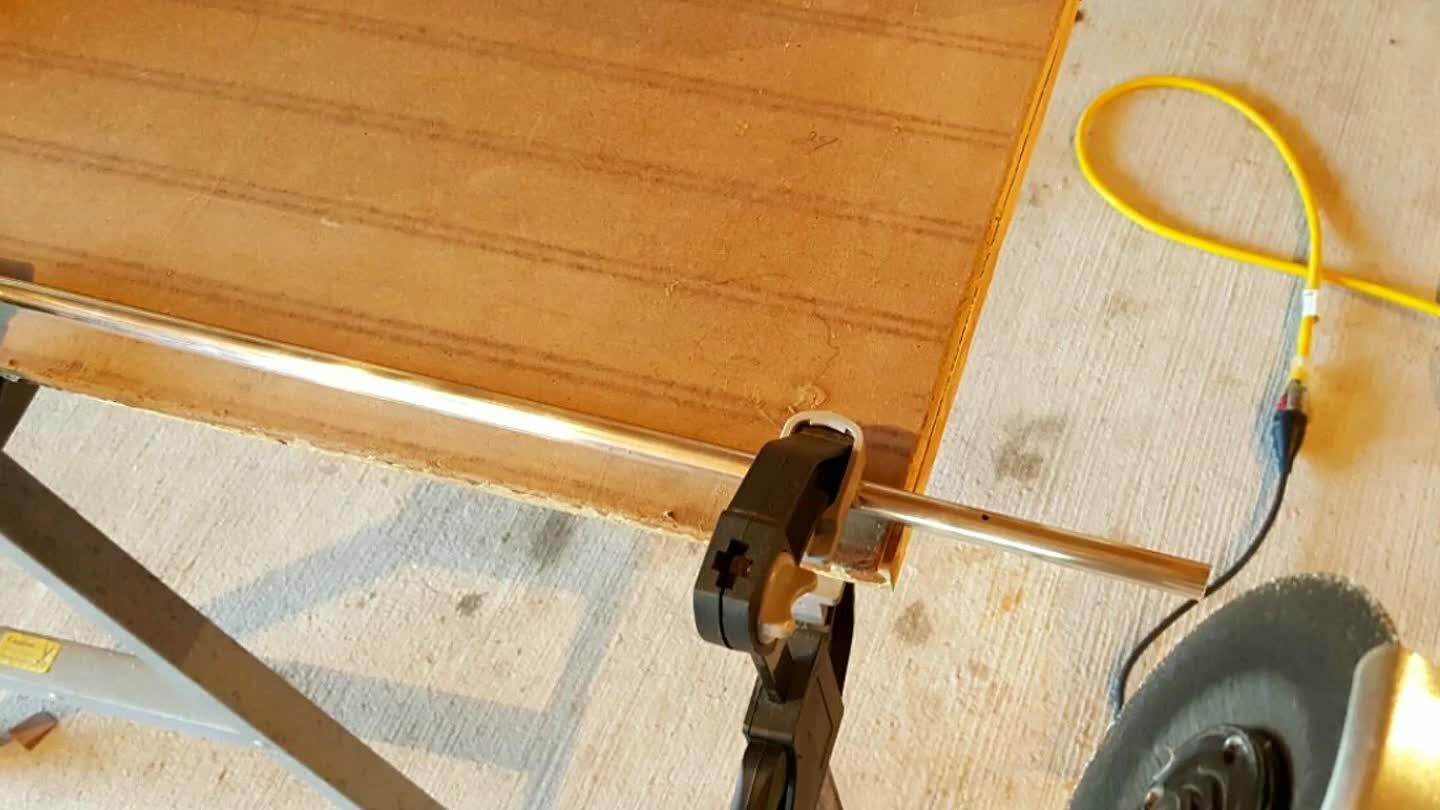
Cut aluminum rod into 3" pieces. I used my angle grinder with a cut off wheel.
10
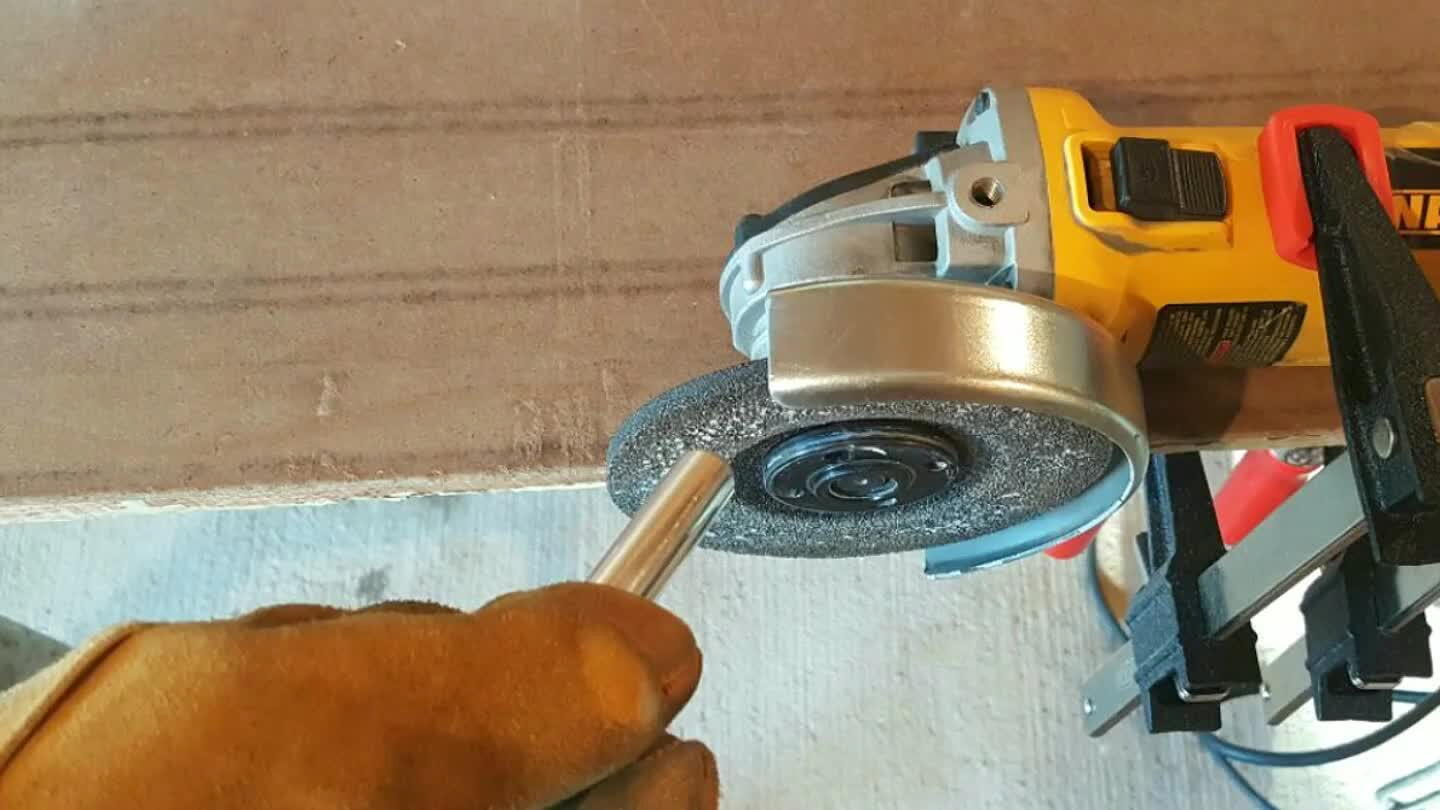
Switch wheels to a grinding wheel to clean up the rough cut edges on the aluminum rod.
11
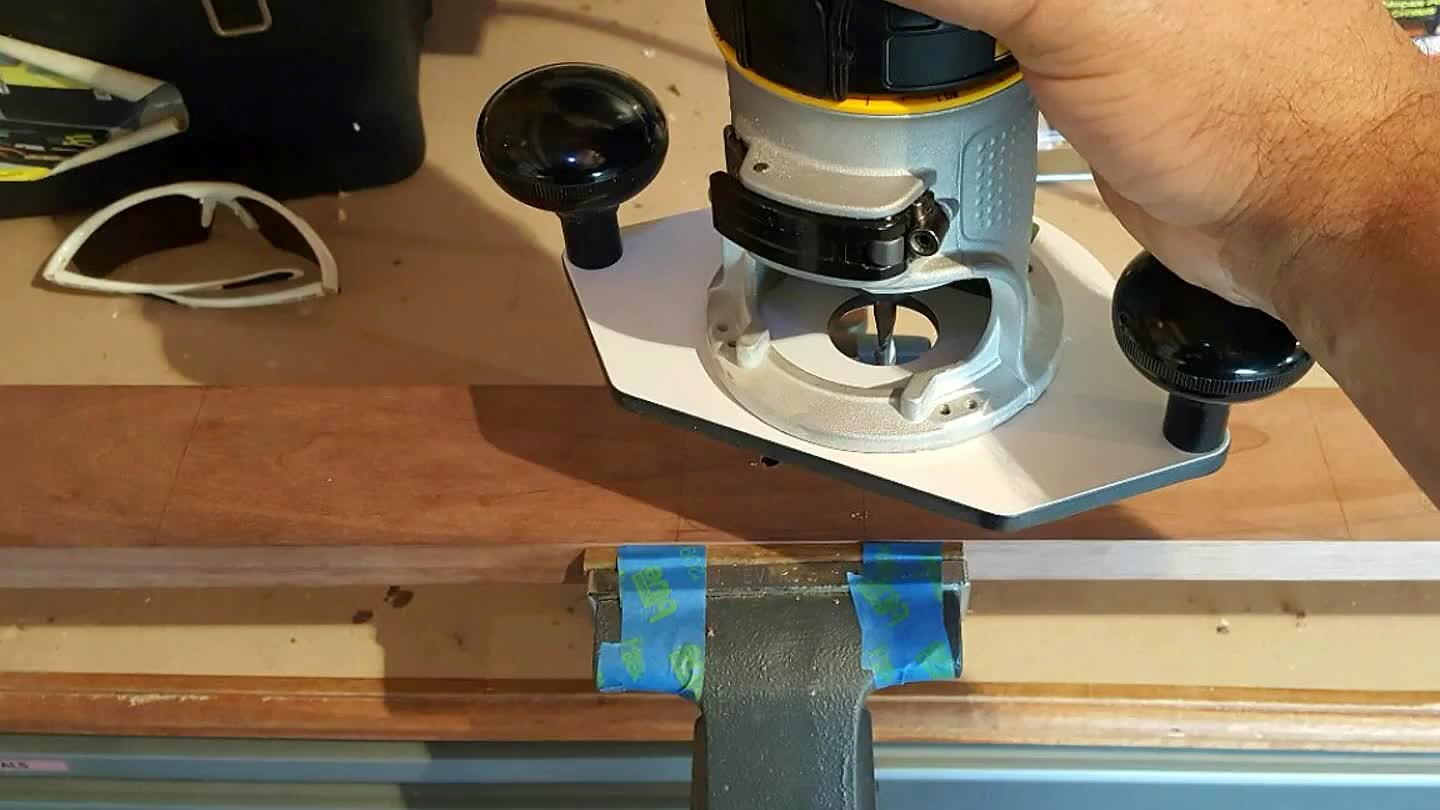
Take one of the 37" pieces of walnut, find center and drill center hole for clock motor stem. Place clock motor on the wood with stem in hole and trace around the motor with pencil. With straight bit in hand router remove wood for motor placement.
12
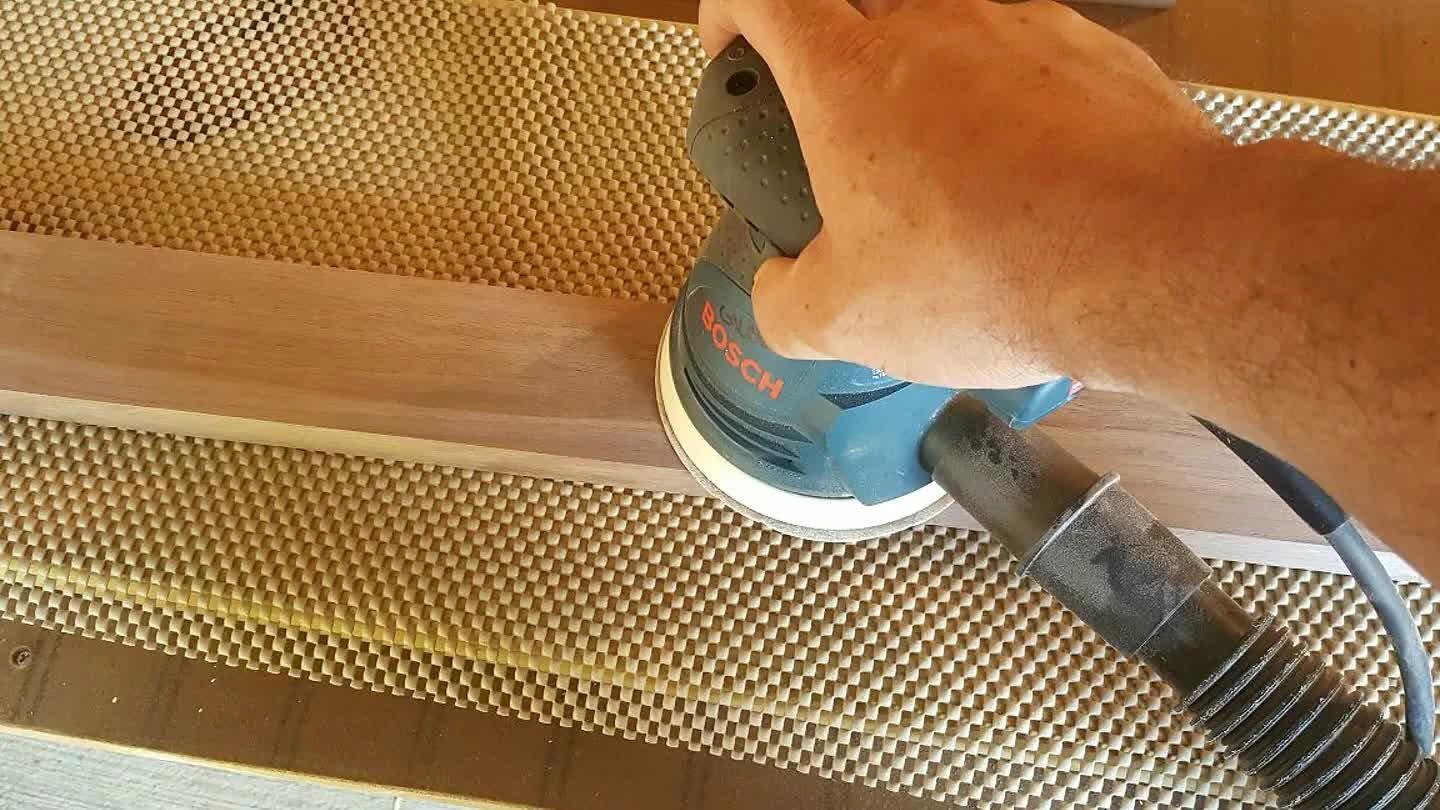
Sand all pieces down to 220 grit with orbital sander. Take middle three 37" slats and tap in the aluminum pieces but only partially. Place in the middle the two 9" pieces of walnut with glue. Tap it together fully and clamp.
13
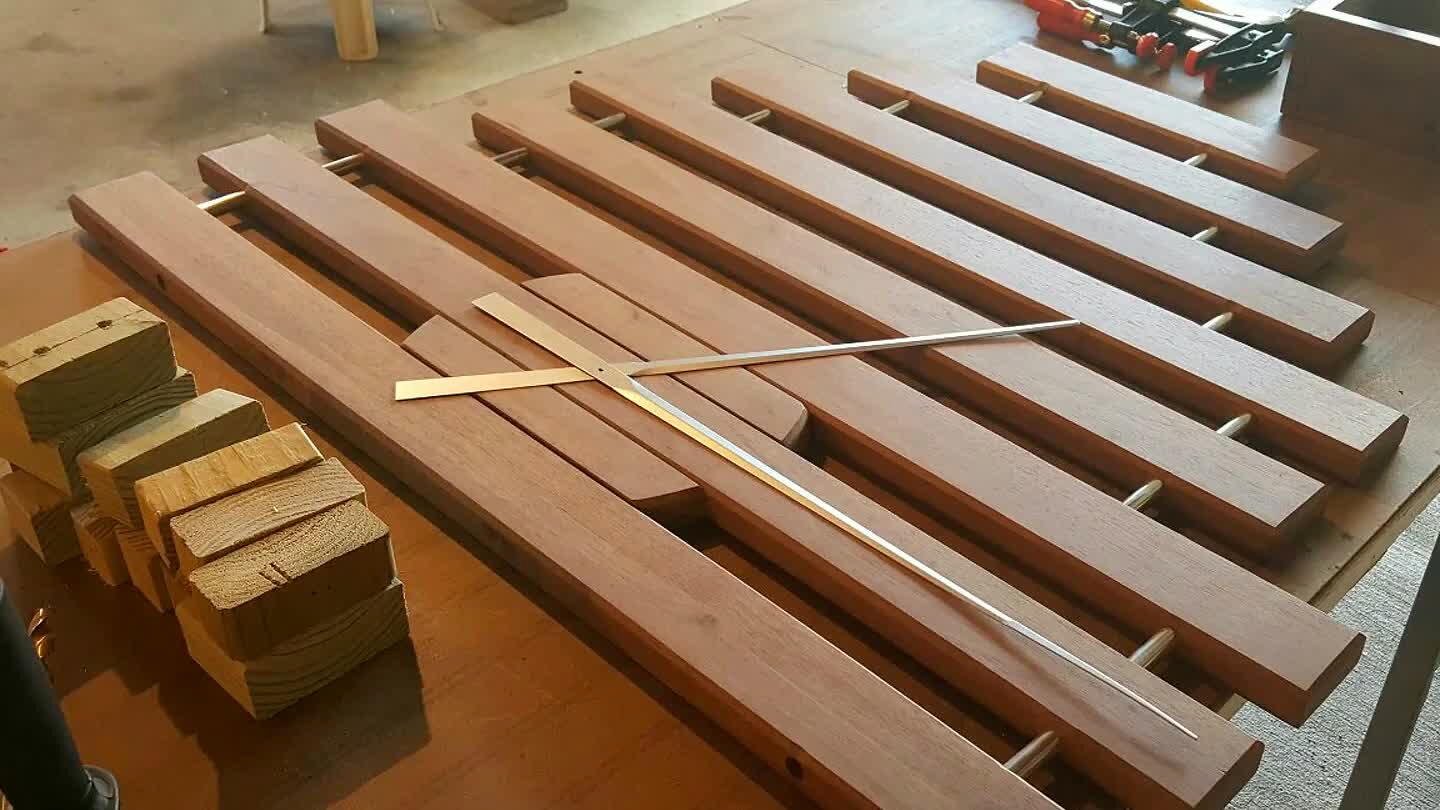
Assemble one half of the clock by inserting the aluminum dowels. I place a little glue in each hole first. Tap together with a mallet if its tight. The clock hands are only laying on there for a visual reference.
14
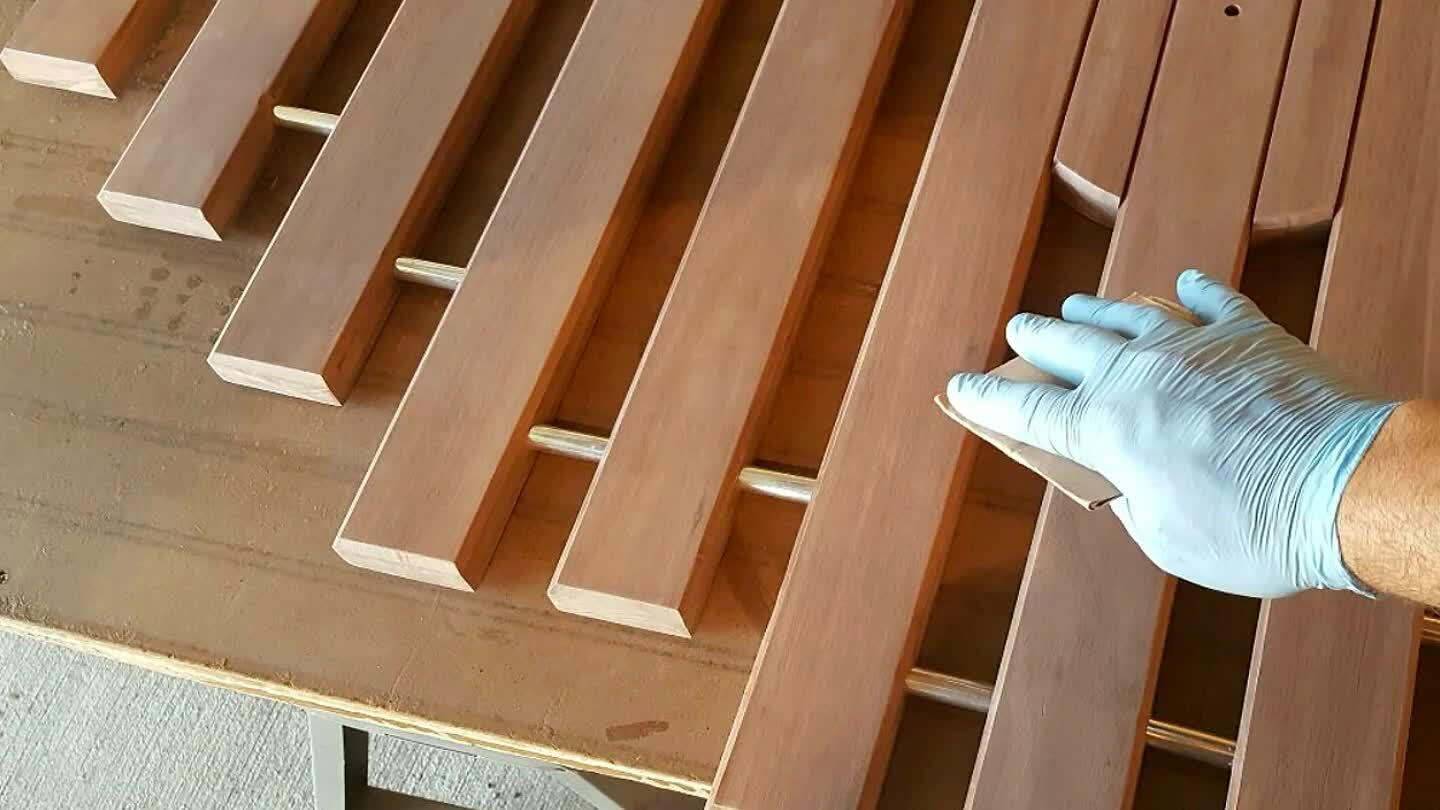
Once all the pieces are put together clean the surface with tack cloth and air.
15
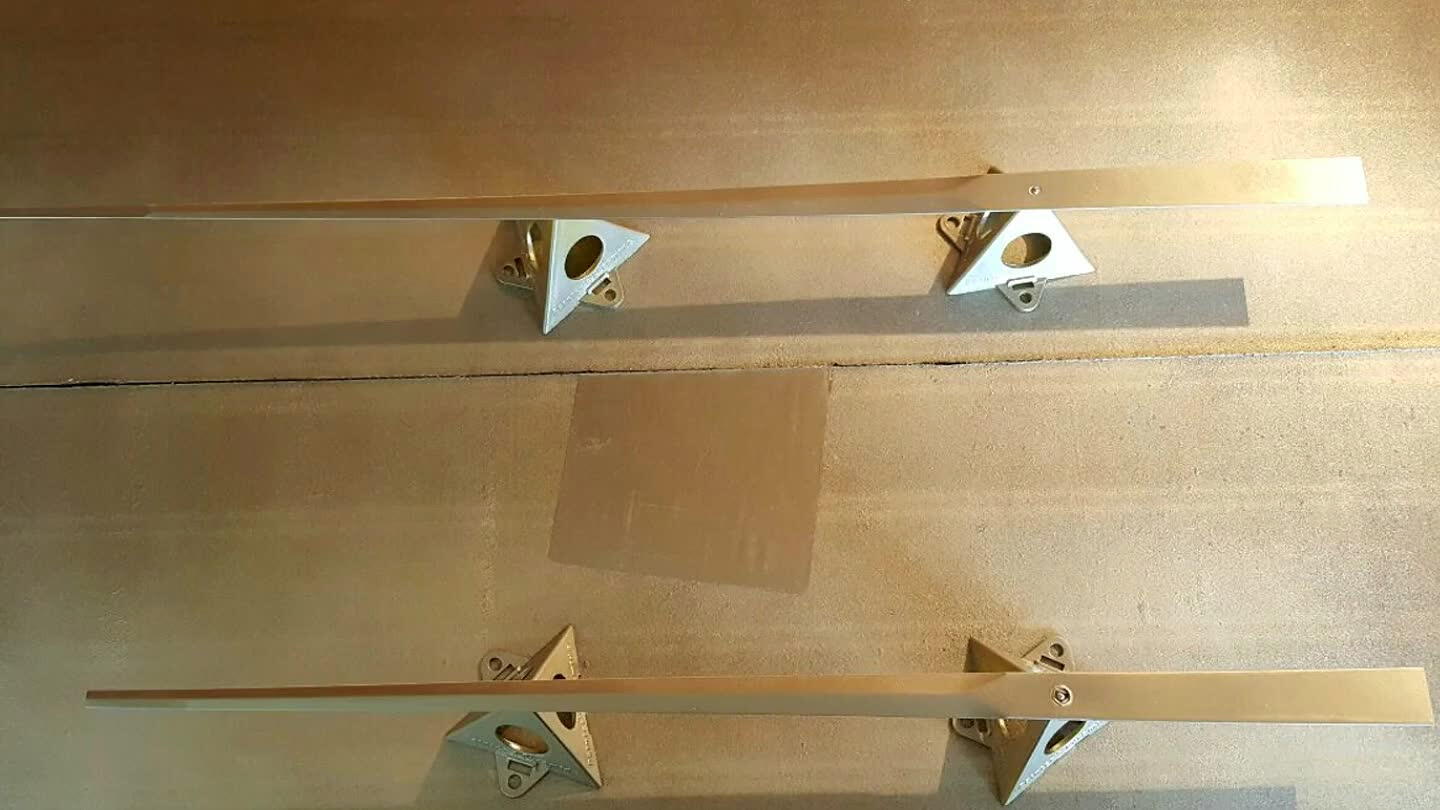
Paint the clock hands
16

Wipe on the finish coat. I used General Finishes oil and urethane topcoat satin. This is incredibly easy to work with and looks amazing. A tad bit pricey but worth it to me. I did three coats with no sanding between coats.
17

Place clock motor in cutout, attach hands, insert 1 AA battery, attach hanging hardware on back. I also cut some aluminum to represent 12, 3, 6, 9 on the clock face and glued them on.
18
Comments